
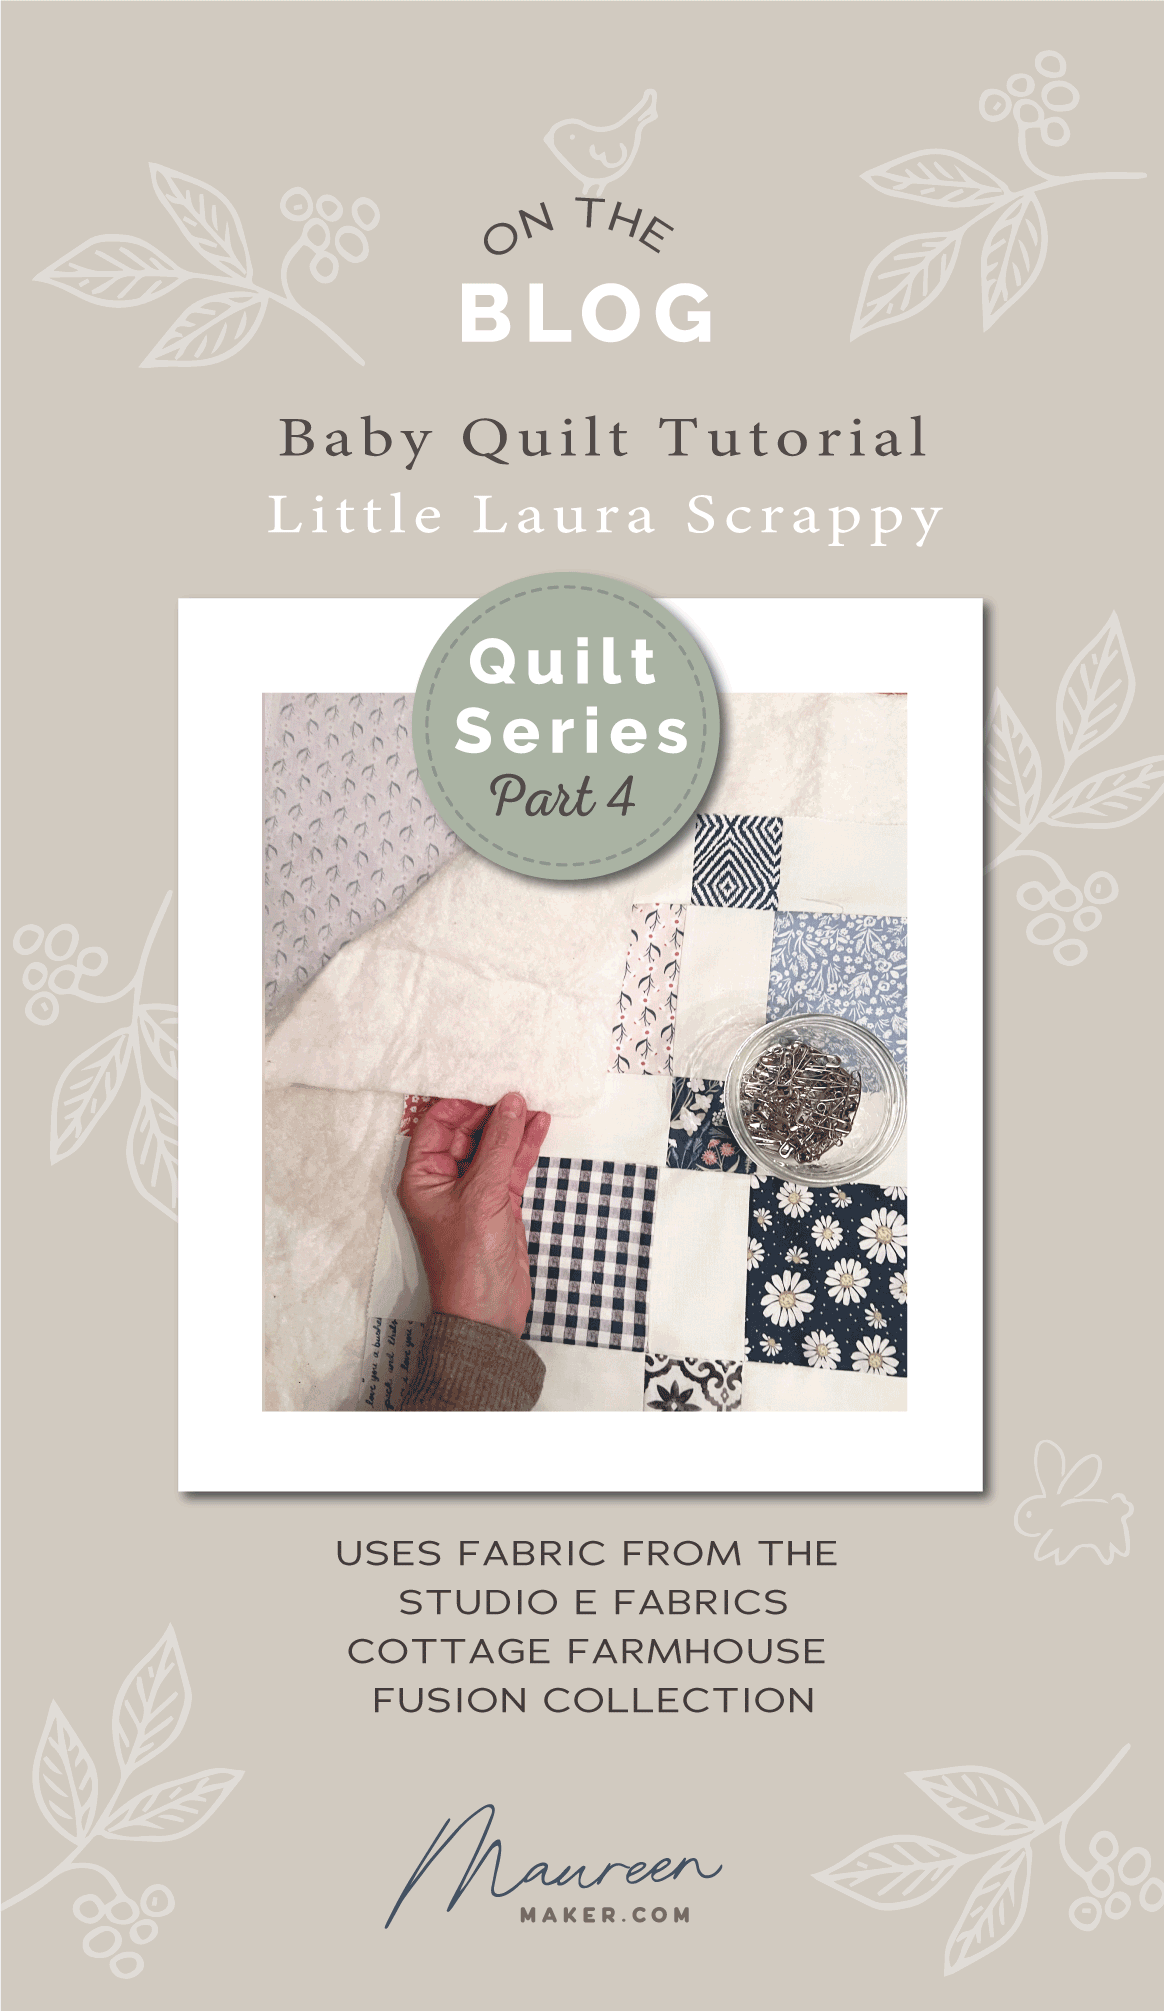
How to craft a modern vintage baby quilt part 4
EASY DIY BABY QUILT SERIES
Free Beginner Sewing Patchwork Pattern With Easy to Follow Tutorials
Perfect for new quilters and a quick make for the more experienced.
ASSEMBLING THE QUILT SANDWICH FOR YOUR BABY QUILT
Part #4 in the series
(This post contains some Amazon affiliate links, I will earn a small commission if you purchase at no extra cost to you)
Welcome back to our baby quilt-making journey! If you missed the previous posts, no worries, they are all waiting for you when you are ready.
In Part 1, we explored the exciting world of selecting fabrics for your baby quilt.
In Part 2, we cut up our beautiful fabric in preparation for today’s step, sewing them together, or piecing in quilting terms, to make the patchwork quilt top.
In Part 3, we dove into the heart of quilt-making: Sewing the fabric squares into units, then rows, and joining those rows to form the quilt top.
In Part 4 we will layer your quilt top with backing fabric of choice and batting, aka quilt sandwich. We will pin or spray baste the layers together. Then make quilting guide lines using a hera marker and acrylic ruler to prepare the quilt for either hand or machine quilting.
Grab your favorite beverage, put on some soothing music or favorite podcast and let's make some sandwiches!

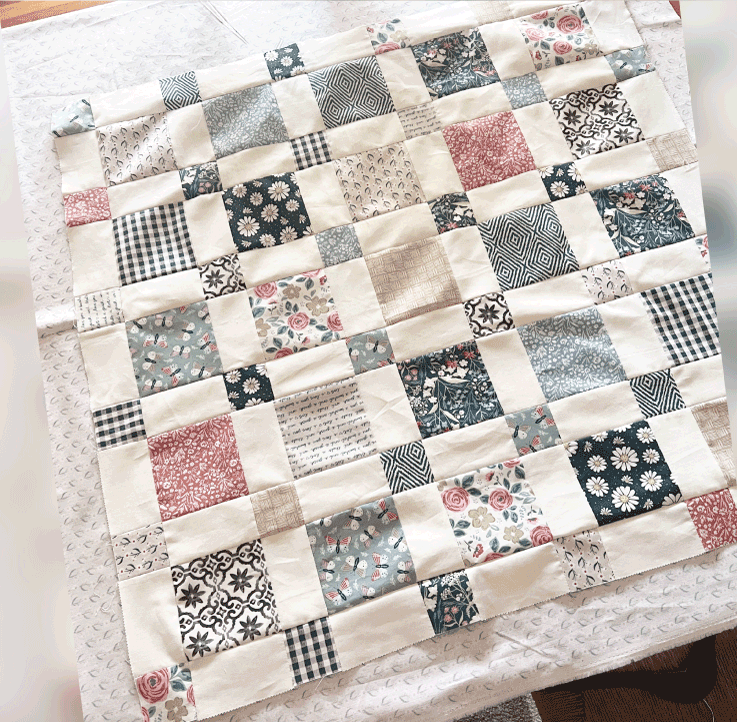
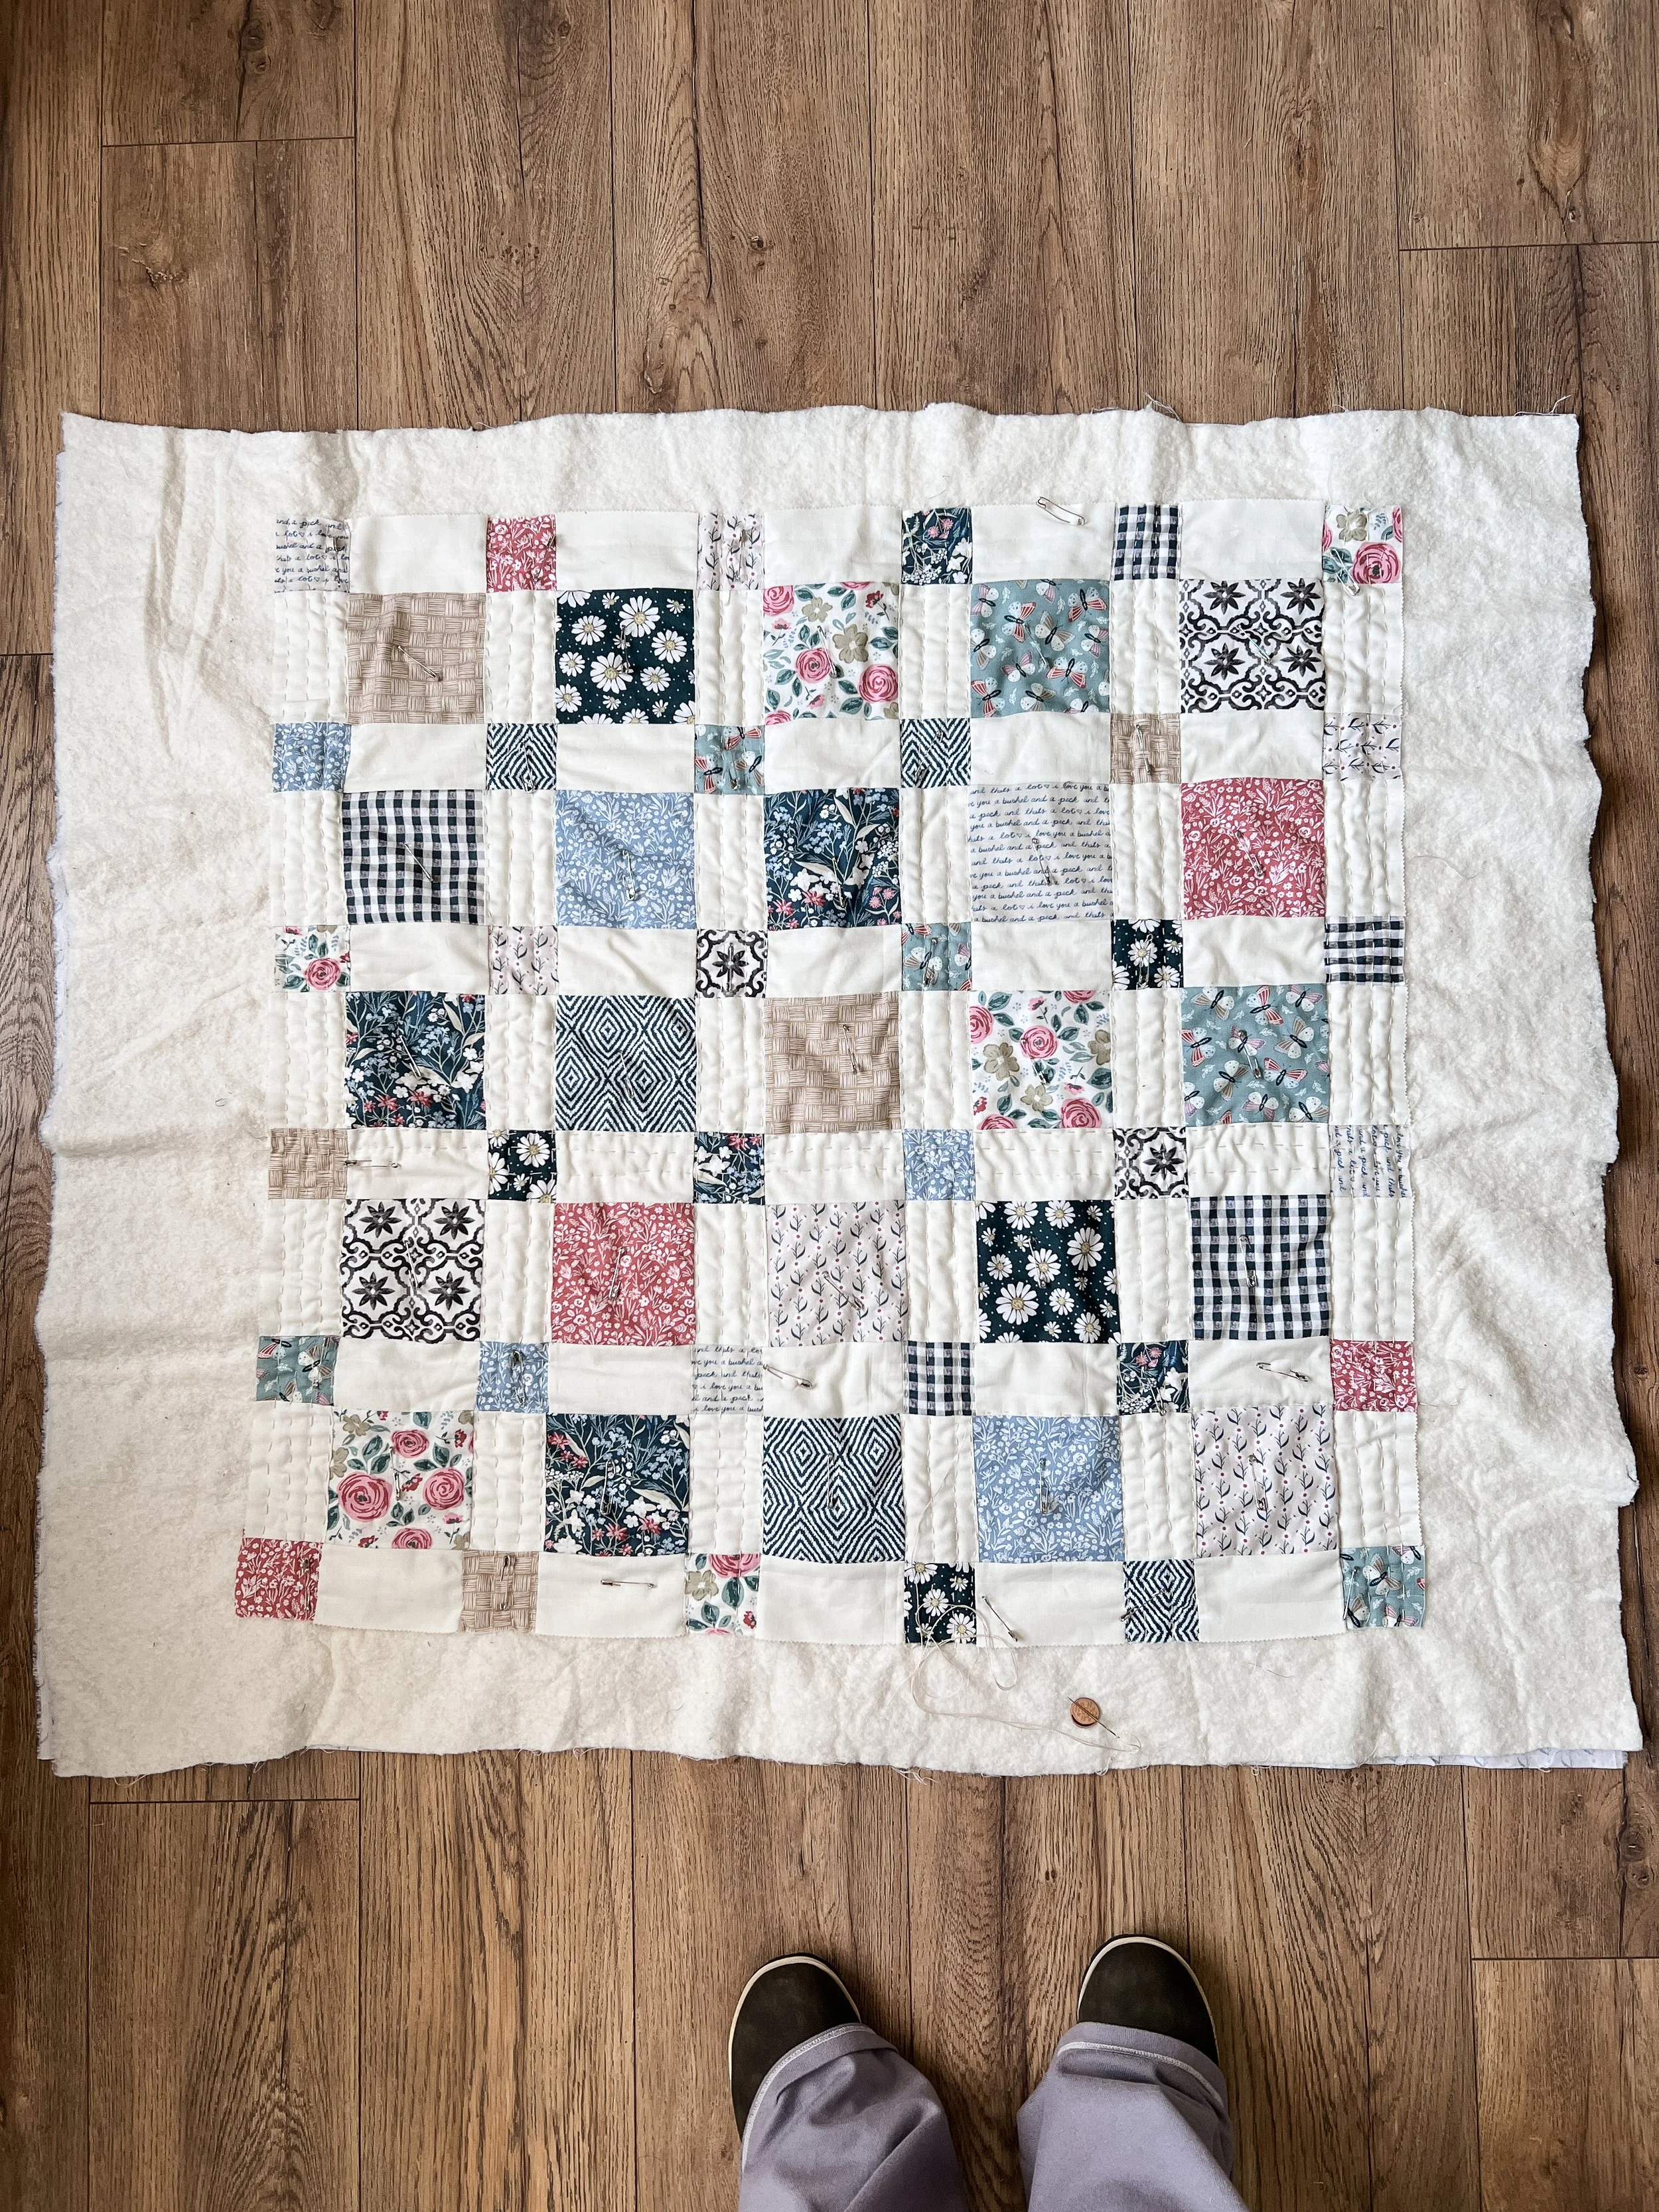
Your quilt top should look something like this👆🏻
Give it a good press so all the seams lay flat. Remember to “press” not iron. You lift your iron when you press, don’t drag it over the quilt top as if you were ironing clothing, or you may distort your quilt. Quilting is all about accuracy, so we do whatever we can to get the best results.
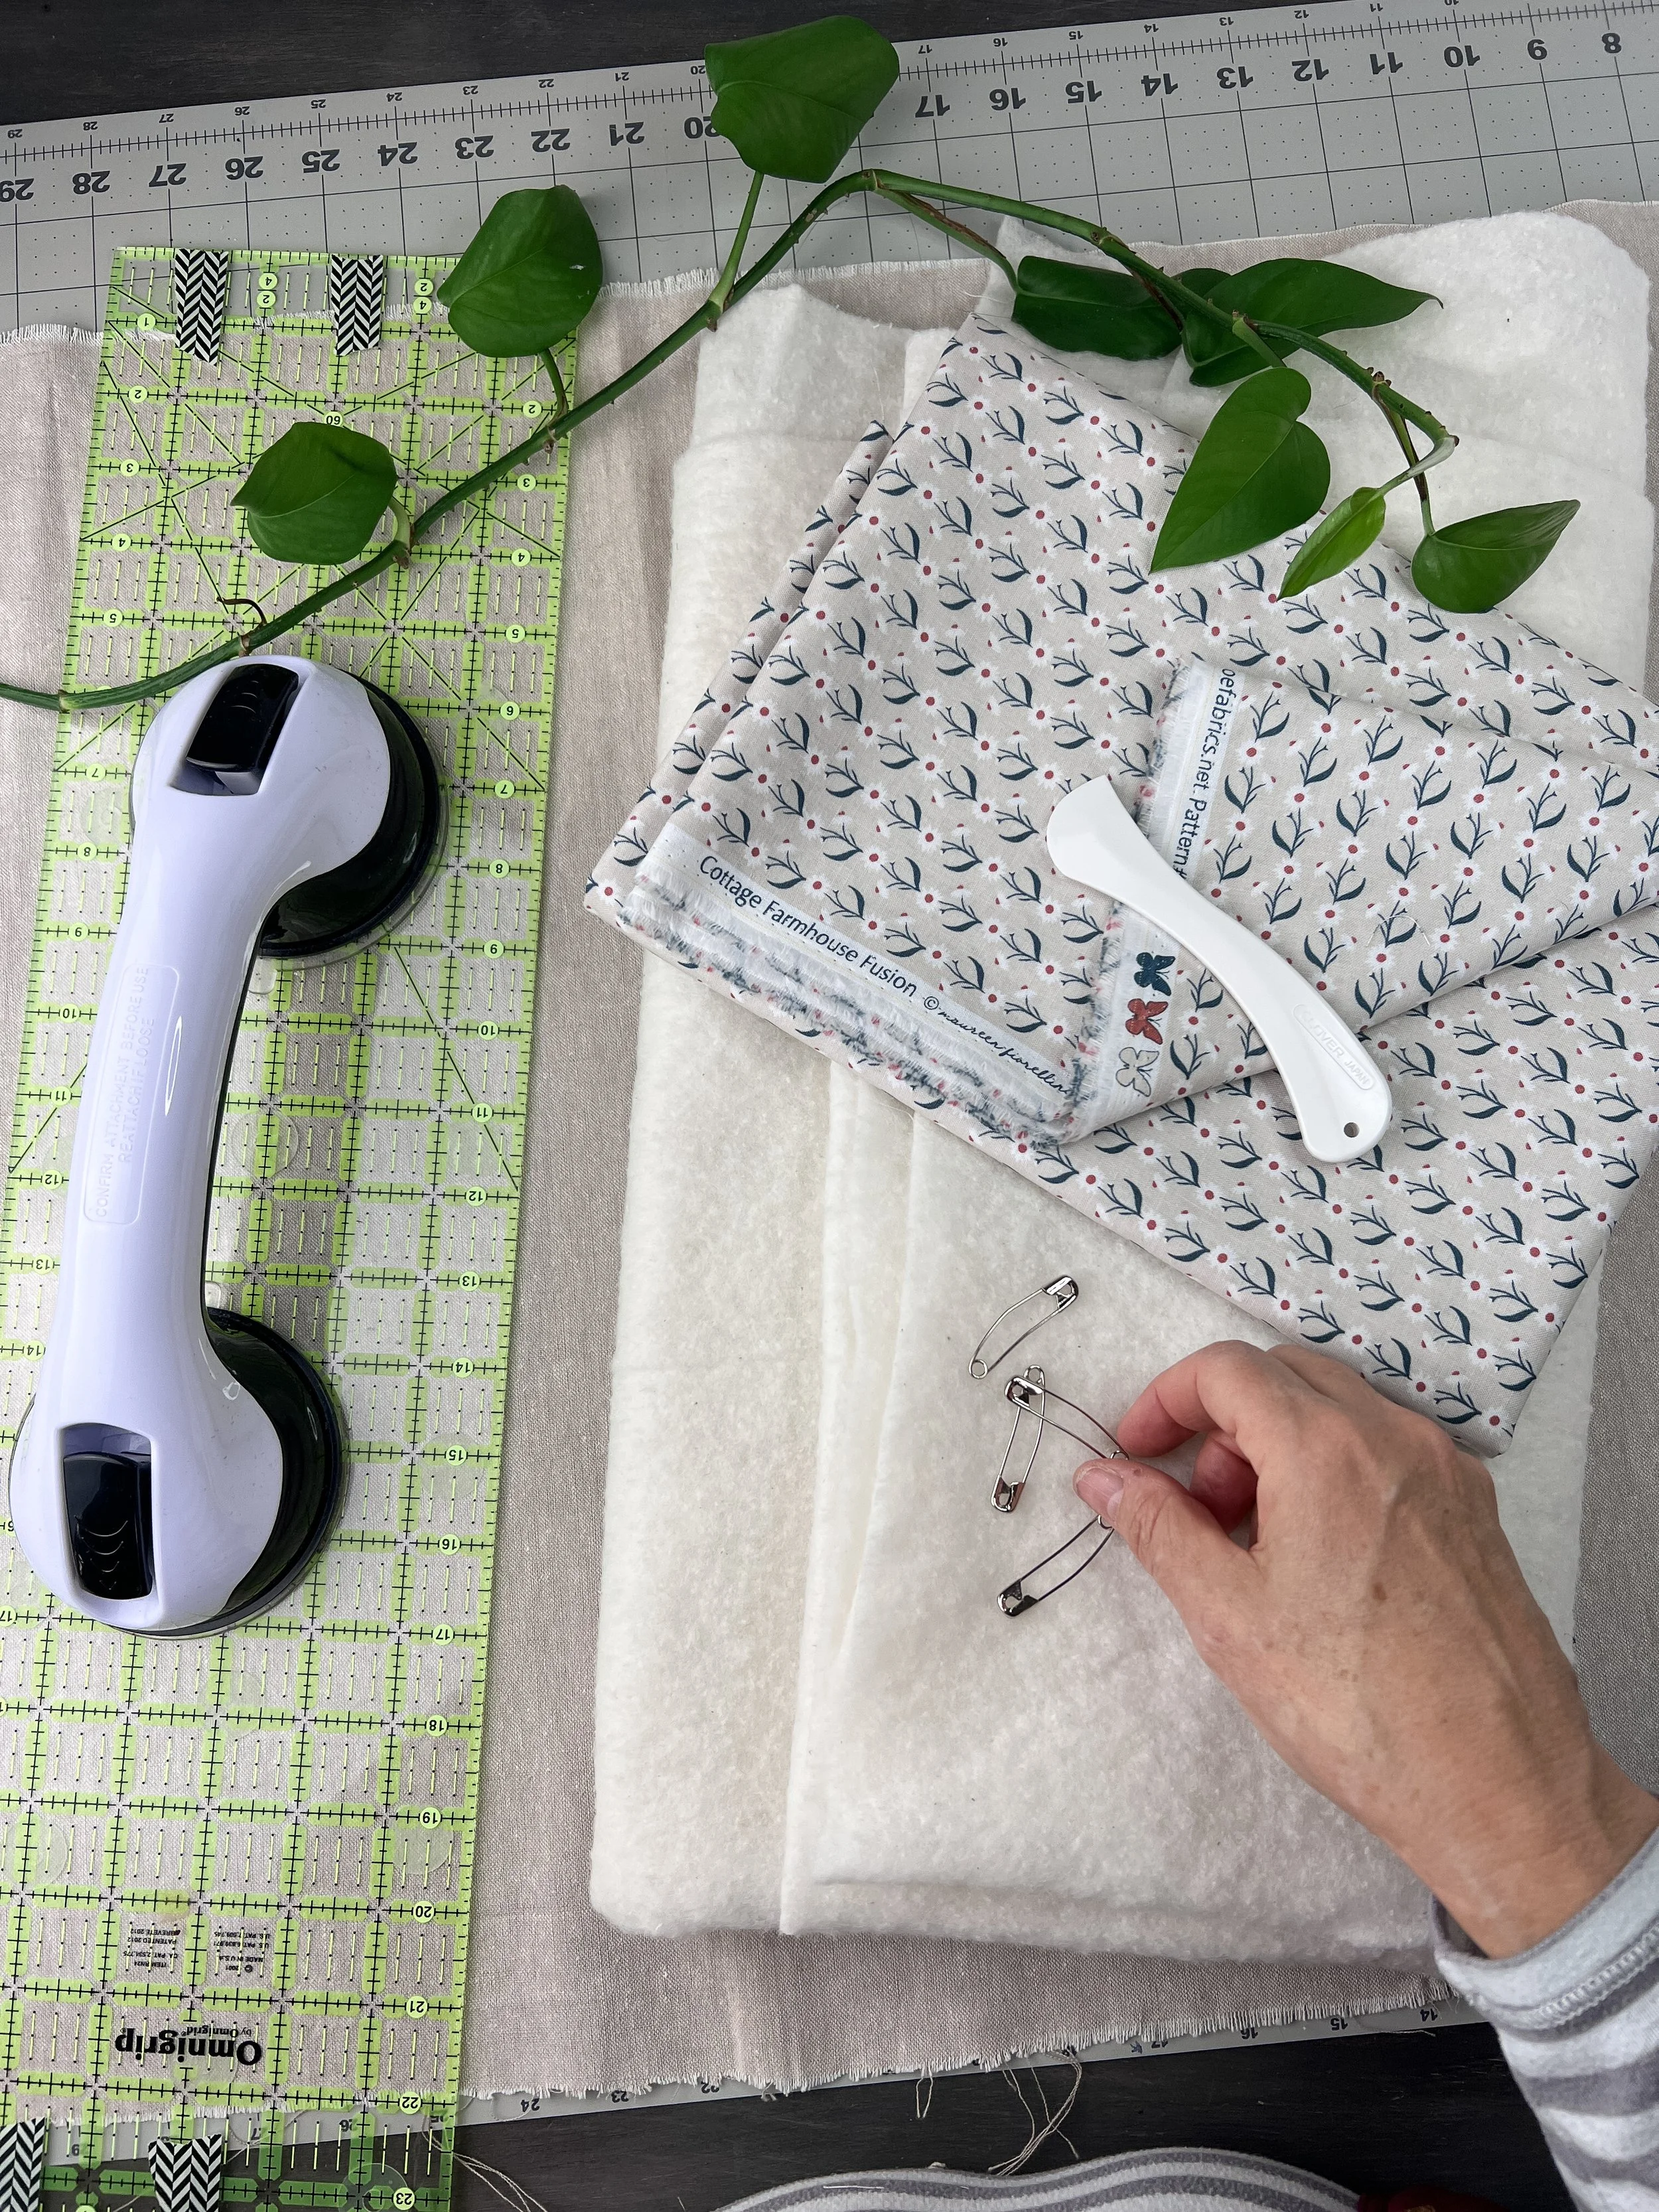
Gather Your Supplies
You gotta have to right supplies to get the best results. Don’t get me wrong, I’m pretty frugal and try to make do with what I have on hand. But I have learned, when I have the right tools, my results are more professional.
YOU WILL NEED:
Backing Fabric: Choose one yard of fabric for the back of your quilt that complements the front. Ensure it's a few inches larger on all sides than your quilt top.
Batting: Select a batting that suits your desired level of warmth and loft, sized at least 36” x 36”. This soft layer will provide the cozy thickness to your quilt.
Quilt Top: Your beautifully sewn quilt top, ready to take its place as the star of the show.
Safety Pins* or Spray Baste: Decide whether you prefer the classic method of pin-basting or the modern convenience of spray basting to secure your layers (I have tried both and I prefer to pin baste. I feel it’s more sustainable, buy the pins once and reuse over and over again).
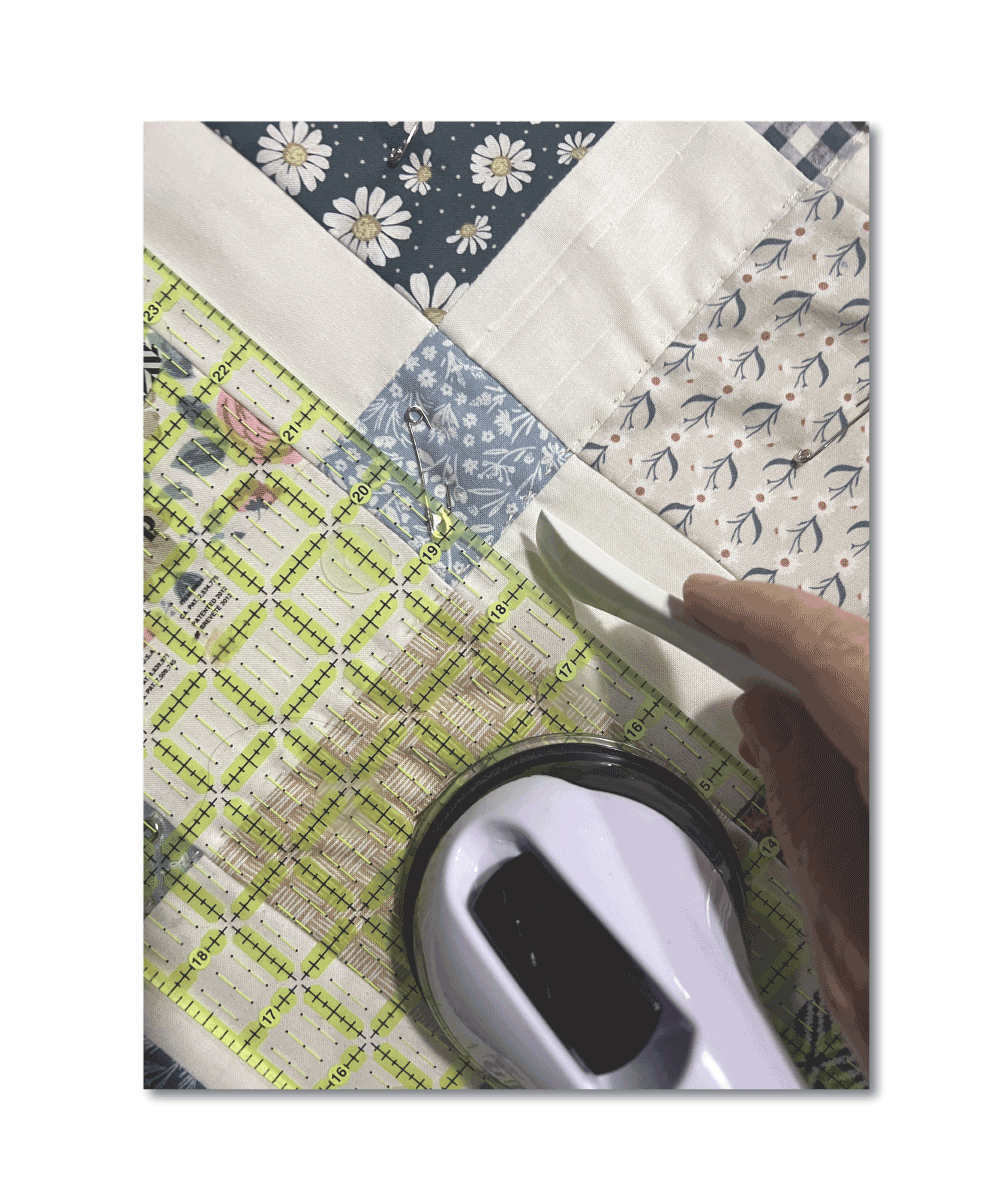
Clover 490/NV Hera Marker: This little device leaves a nice crease/line that really helps to sew in straight lines. Perfect invisible temporary mark that lasts long enough and irons away. No need for markers or pencils that may or may not wash out.
Long Acrylic Ruler: This is my favorite ruler, the Omnigrid Non-Slip quilter's Ruler, 6" x 24", Neon Green. I use it to mark the quilting lines with my Hera Marker.
Suction Cup Ruler Handle: Makes moving the large ruler around much easier (It also may save your fingertips one day, fingers are out of the way while using the rotary cutter).
*WARNING: For my first quilt, I purchased an off brand of safety pins. Big mistake, HUGE! The pins left rust marks on my quilt😫. Live and learn. Safety pins are not expensive, please splurge on a well known brand . I now use Dritz 3031 Curved Basting Safety Pins, Size 2, Nickel-Plated Brass.
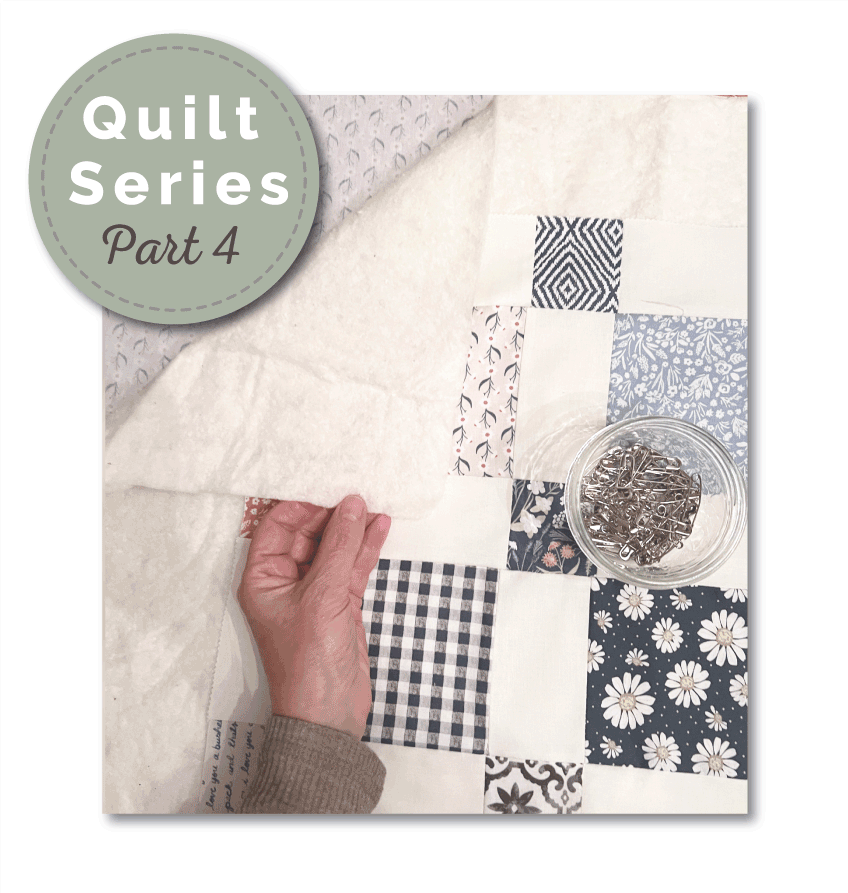
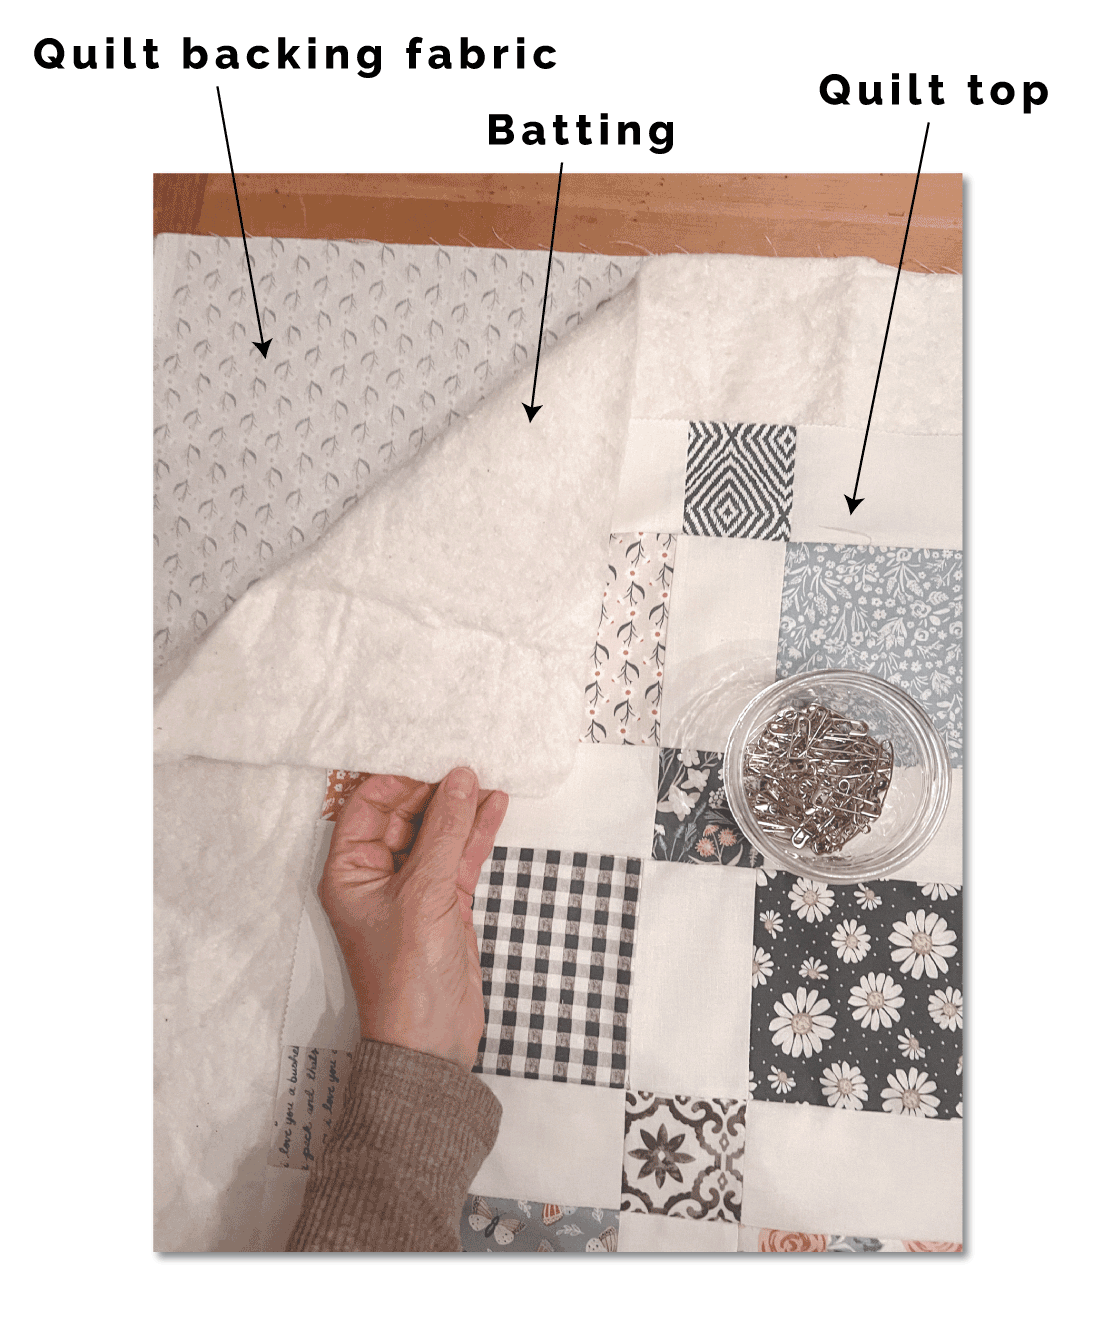
Creating the Quilt Sandwich:
Prepare the Backing: Lay your freshly pressed backing fabric on a flat surface, wrong side up. Smooth out any wrinkles, ensuring a clean and even surface for your quilt.
Layer the Batting: Place the batting on top of the backing fabric, smoothing it out to the edges. The batting should be centered on the backing.
Add the Quilt Top: Gently place your quilt top right side up on the batting. Take a moment to ensure everything is aligned and centered.
Pin or Spray Baste: If you're using safety pins, start in the center and work your way out, spacing the pins about 4-6 inches apart. If spray basting, follow the product instructions for an even application.
Smooth and Adjust: Smooth out any wrinkles or bubbles as you go. This step is crucial for a professional-looking finish to avoid excess puckering.
PRO TIP:
When pin basting on a table, I found it easier to place my large cutting mat under my quilt. This avoids making marks on your table, which I may or may not have learned the hard way🤪 Good thing I love rustic distressed furniture🤣
Marking Quilting Guide Lines:
Ensure that your quilt sandwich is free of any wrinkles or lumps, to achieve accurate markings.
The hera marker is a tool designed for marking quilting lines without the need for ink or chalk. It typically has a flat, curved edge that will leave a visible crease on the fabric when pressure is applied.
Establish Reference Points: Identify the key points on your quilt where you want the guidelines to appear. These points can be intersections of blocks, borders, or any specific design elements you wish to highlight.
Apply Even Pressure: Hold the hera marker like a pen and firmly press the curved edge onto the fabric along the desired line. Apply even pressure, making sure to maintain a steady hand for consistent results.
Create Straight Lines: For straight lines, use a ruler or quilting guide as a straight edge to guide the hera marker. This will help you achieve precise, straight lines across the quilt top. (I made straight lines in my quilt).
Experiment on Scrap Fabric: Before marking the actual guide lines, practice on a scrap piece of fabric to get a feel for the hera marker and to adjust the pressure to achieve the desired visibility of the crease.
Work in Sections: If your quilt is large, work on marking it in manageable sections. This ensures that you maintain control over the markings and can easily reference the reference points. Don’t worry if safety pins are in the way, it’s just a guide, lift hera and continue.
Double-Check Alignment: Periodically step back and double-check the alignment of your marked lines. This helps catch any deviations early on and ensures a more cohesive and visually appealing final result.
Enjoy Quilting: Once your guidelines are marked, you're ready to start quilting along those lines (I will show you this step in Part 5)
The hera marker's creases serve as a temporary guide that will disappear with time, leaving behind a beautifully quilted piece.
By following these steps, you'll be able to use a hera marker effectively to mark your quilt with precise guidelines, facilitating a smoother quilting process.
Ready for the Final Stitch:
Congratulations! You've successfully assembled your quilt sandwich—a crucial step on our creative quilting journey. As you look at your layered creation, take a moment to appreciate the progress you've made. The quilt sandwich is like a canvas awaiting the final strokes of your quilting masterpiece.
Share Your Progress:
We're all eager to see your quilt sandwiches taking shape! Share your photos, thoughts, or any tips you have for this stage in the process in the comments below. Your experience might just be the inspiration someone else needs.
You can also tag me on Instagram or Facebook @maureenmaker so I see your progress. Use the #maureensmakers so we can find it easily👍🏻
Thank you for being a part of this wonderful quilting community. Stay tuned for the next installment, where we'll explore the art of quilting and adding those finishing touches that make a quilt uniquely yours.
Happy quilting!
( Sneak Peek👇🏻, some hand stitching in progress, more in Part 5)
CAN YOU DO ME A SOLID?
Please pin any of these images to Pinterest so other makers can find it and be inspired.
(If you hover over any of the images you will see the Pinterest red logo in the top left corner, just click on it to pin to Pinterest) Thanks so much👍🏻
Incase you made all the way down here, thanks! You are awesome🤗
And if you missed any of the other posts in this series, here they are again.
Quick links to all of the blog posts in the series:
In Part 1, we explored the exciting world of selecting fabrics for your baby quilt.
Part 2: We'll dive into the essential steps of cutting fabric to bring your cozy creation to life.
Part 4: We’ll assemble the quilt sandwich and get ready to hand stitch the layers together.
Part 5: We will hand quilt the layers together, then add make and add the binding.
Part 6: We added optiopnal lace to the binding.
Part 7: Bonus queen size fabric requirements for the more adventurous.
Happy Making,
XO Maureen