
How to Craft a Modern Vintage Baby Quilt Part 1
EASY DIY BABY QUILT SERIES
Free Beginner Sewing Patchwork Pattern With Easy to Follow Tutorials
Perfect for beginner quilters and a quick make for the more experienced.
Part #1 in the series
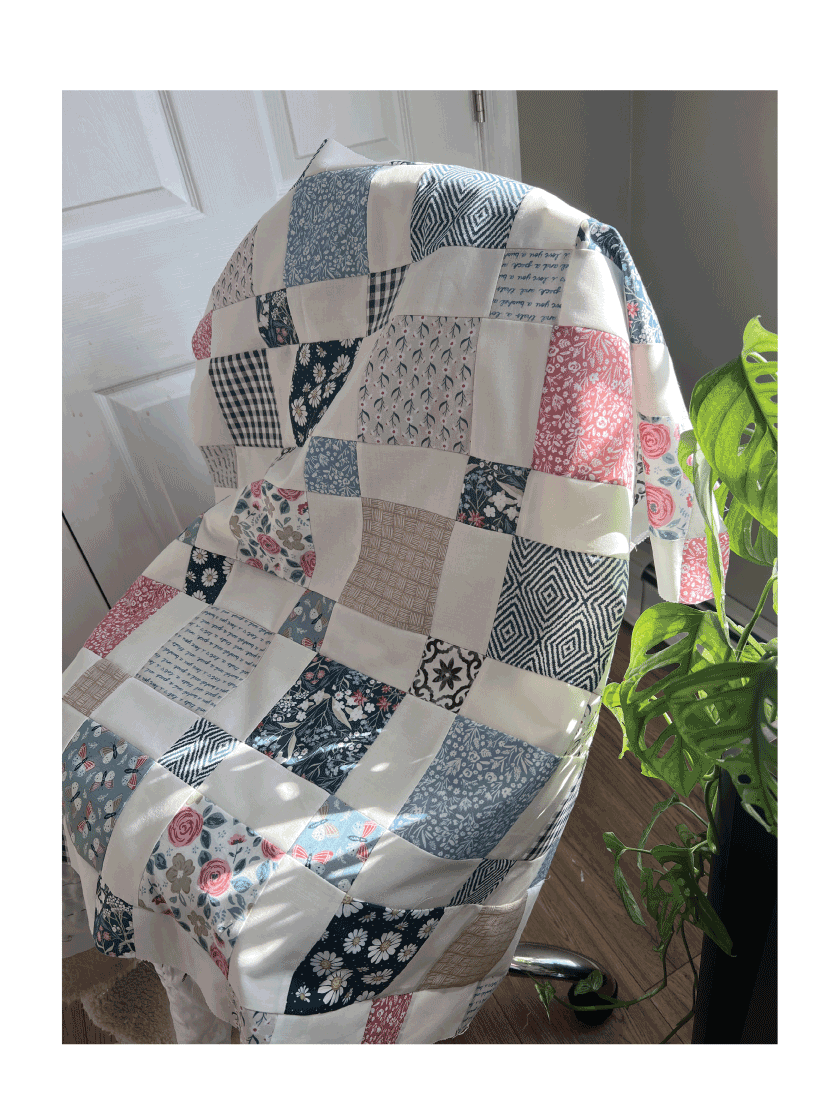
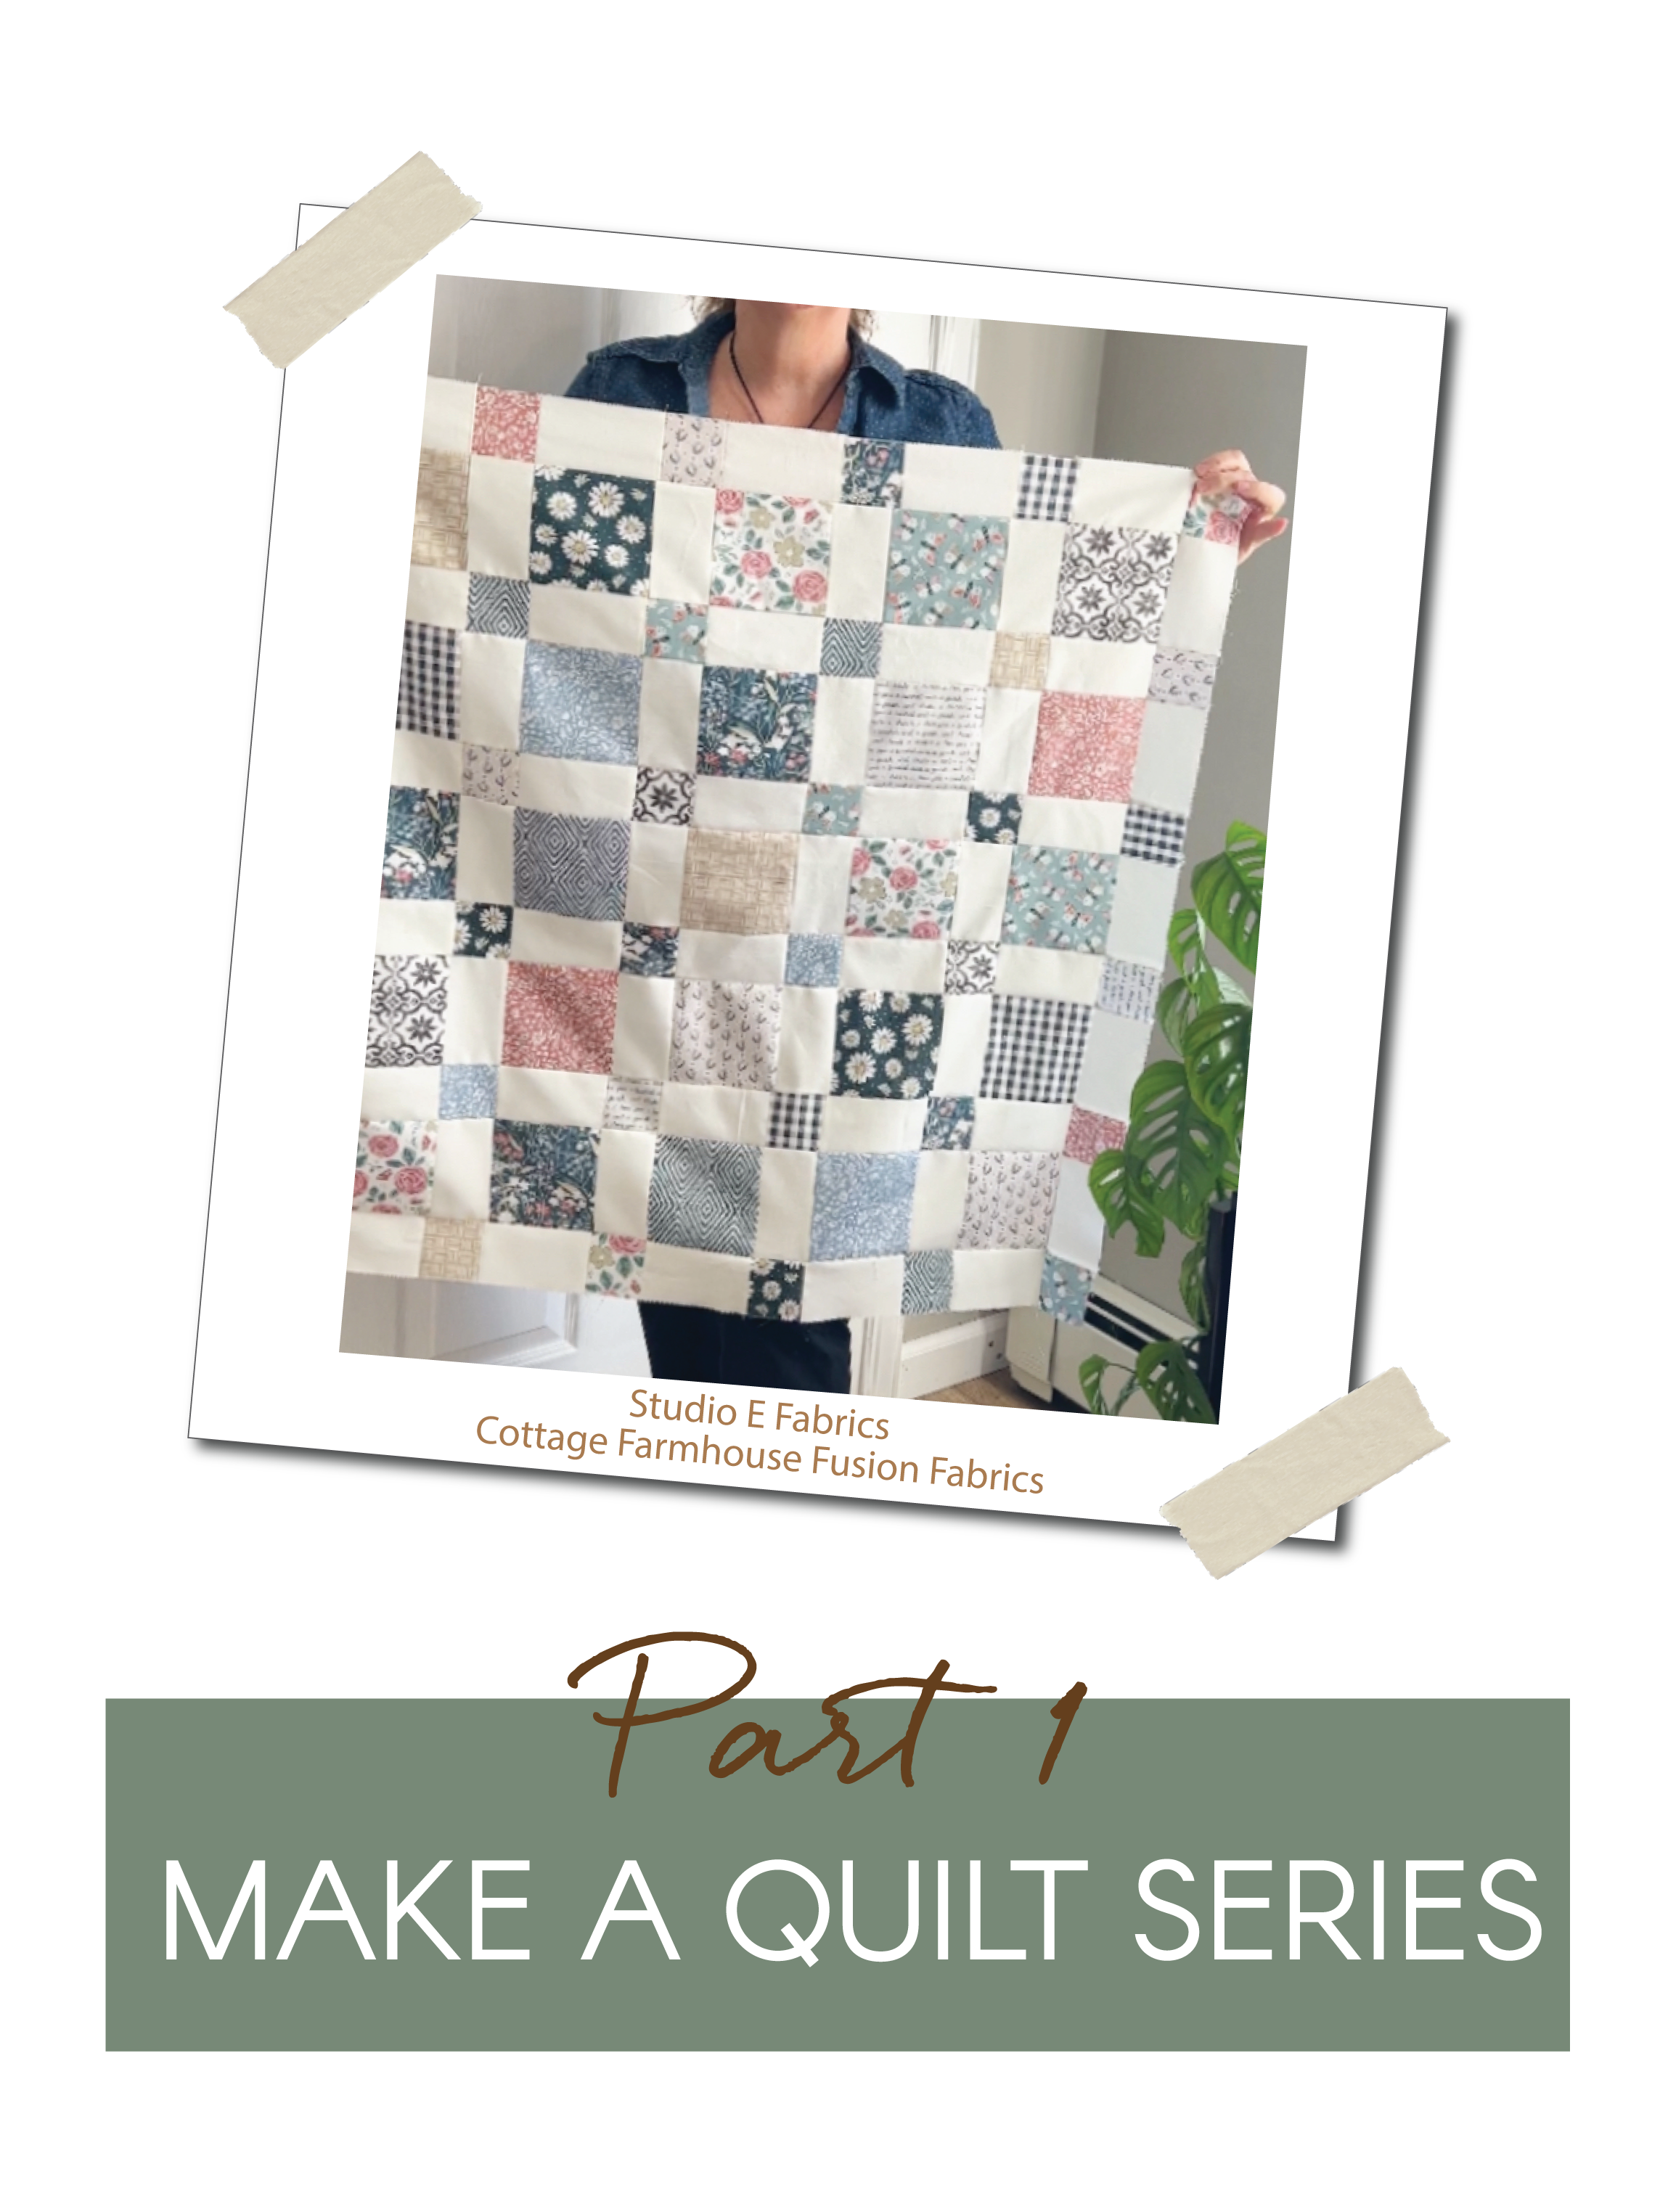
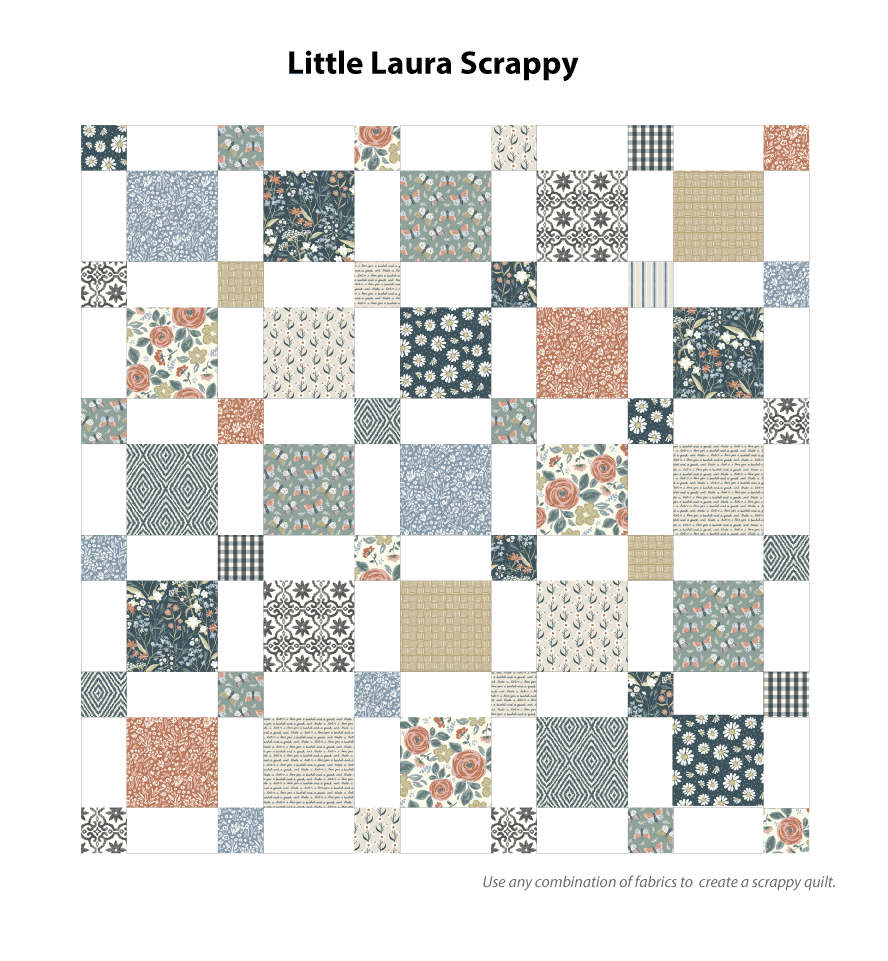
This is part 1 of a 5 part series on making the 32” x 32” baby quilt you see below I named “ Little Laura”.
For quick links to skip ahead to the other posts in this series, click below:
Links to all of the blog posts in the series:
In Part 1, we explored the exciting world of selecting fabrics for your baby quilt.
Part 2: We'll dive into the essential steps of cutting fabric to bring your cozy creation to life.
Part 4: We’ll assemble the quilt sandwich and get ready to hand stitch the layers together.
Part 5: We will hand quilt the layers together, then add make and add the binding.
Part 6: We added optiopnal lace to the binding.
Part 7: Bonus queen size fabric requirements for the more adventurous.
Hey there, friend!
Have you ever stumbled upon a vintage quilt and felt that spark of inspiration?
Or maybe you never thought you could make one that matches the vintage charm of yesteryear.
Let's dive into this exciting journey together so you can learn how to recreate this modern vintage quilt.
Follow along I will share my pattern and all the steps and resources to get you making this quilt with confidence.
The Inspiration
Scrolling through Pinterest, I stumbled upon a vintage quilt that instantly sparked my creativity. You can see it here.
Isn’t it sweet?
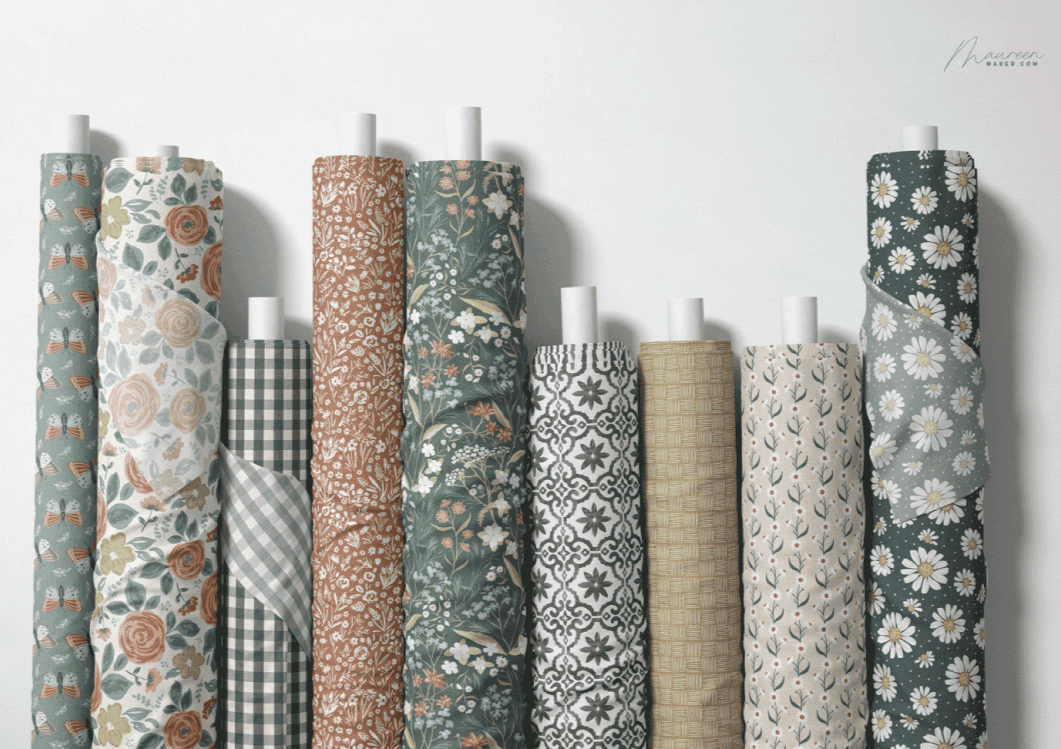
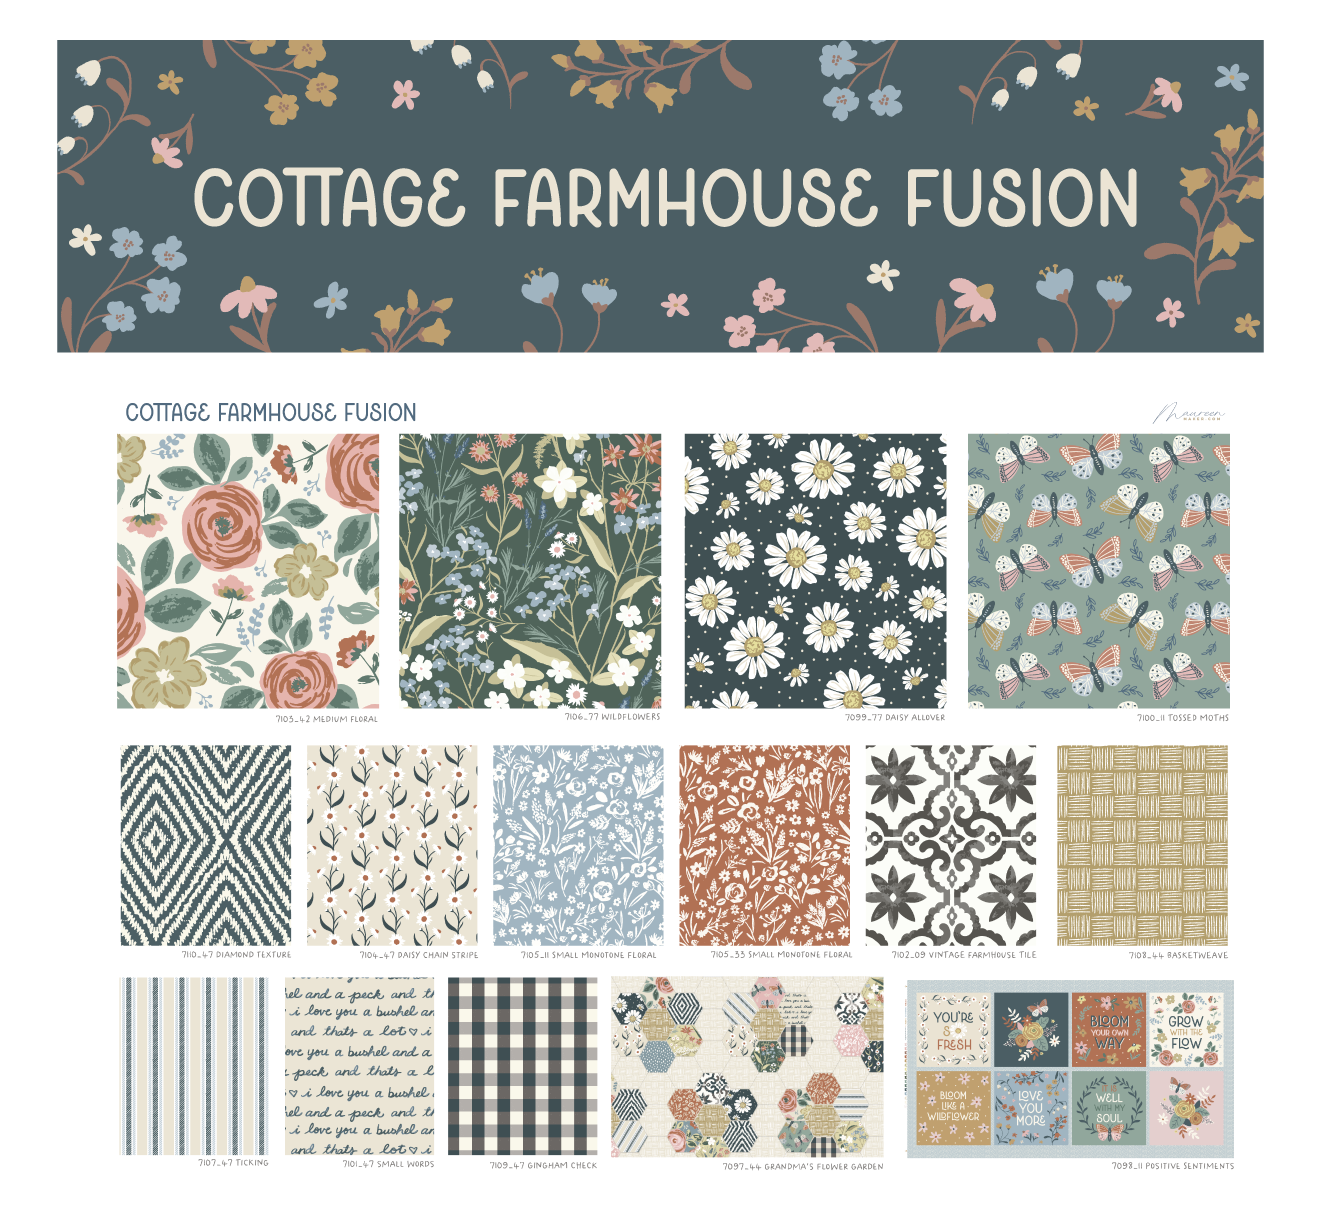
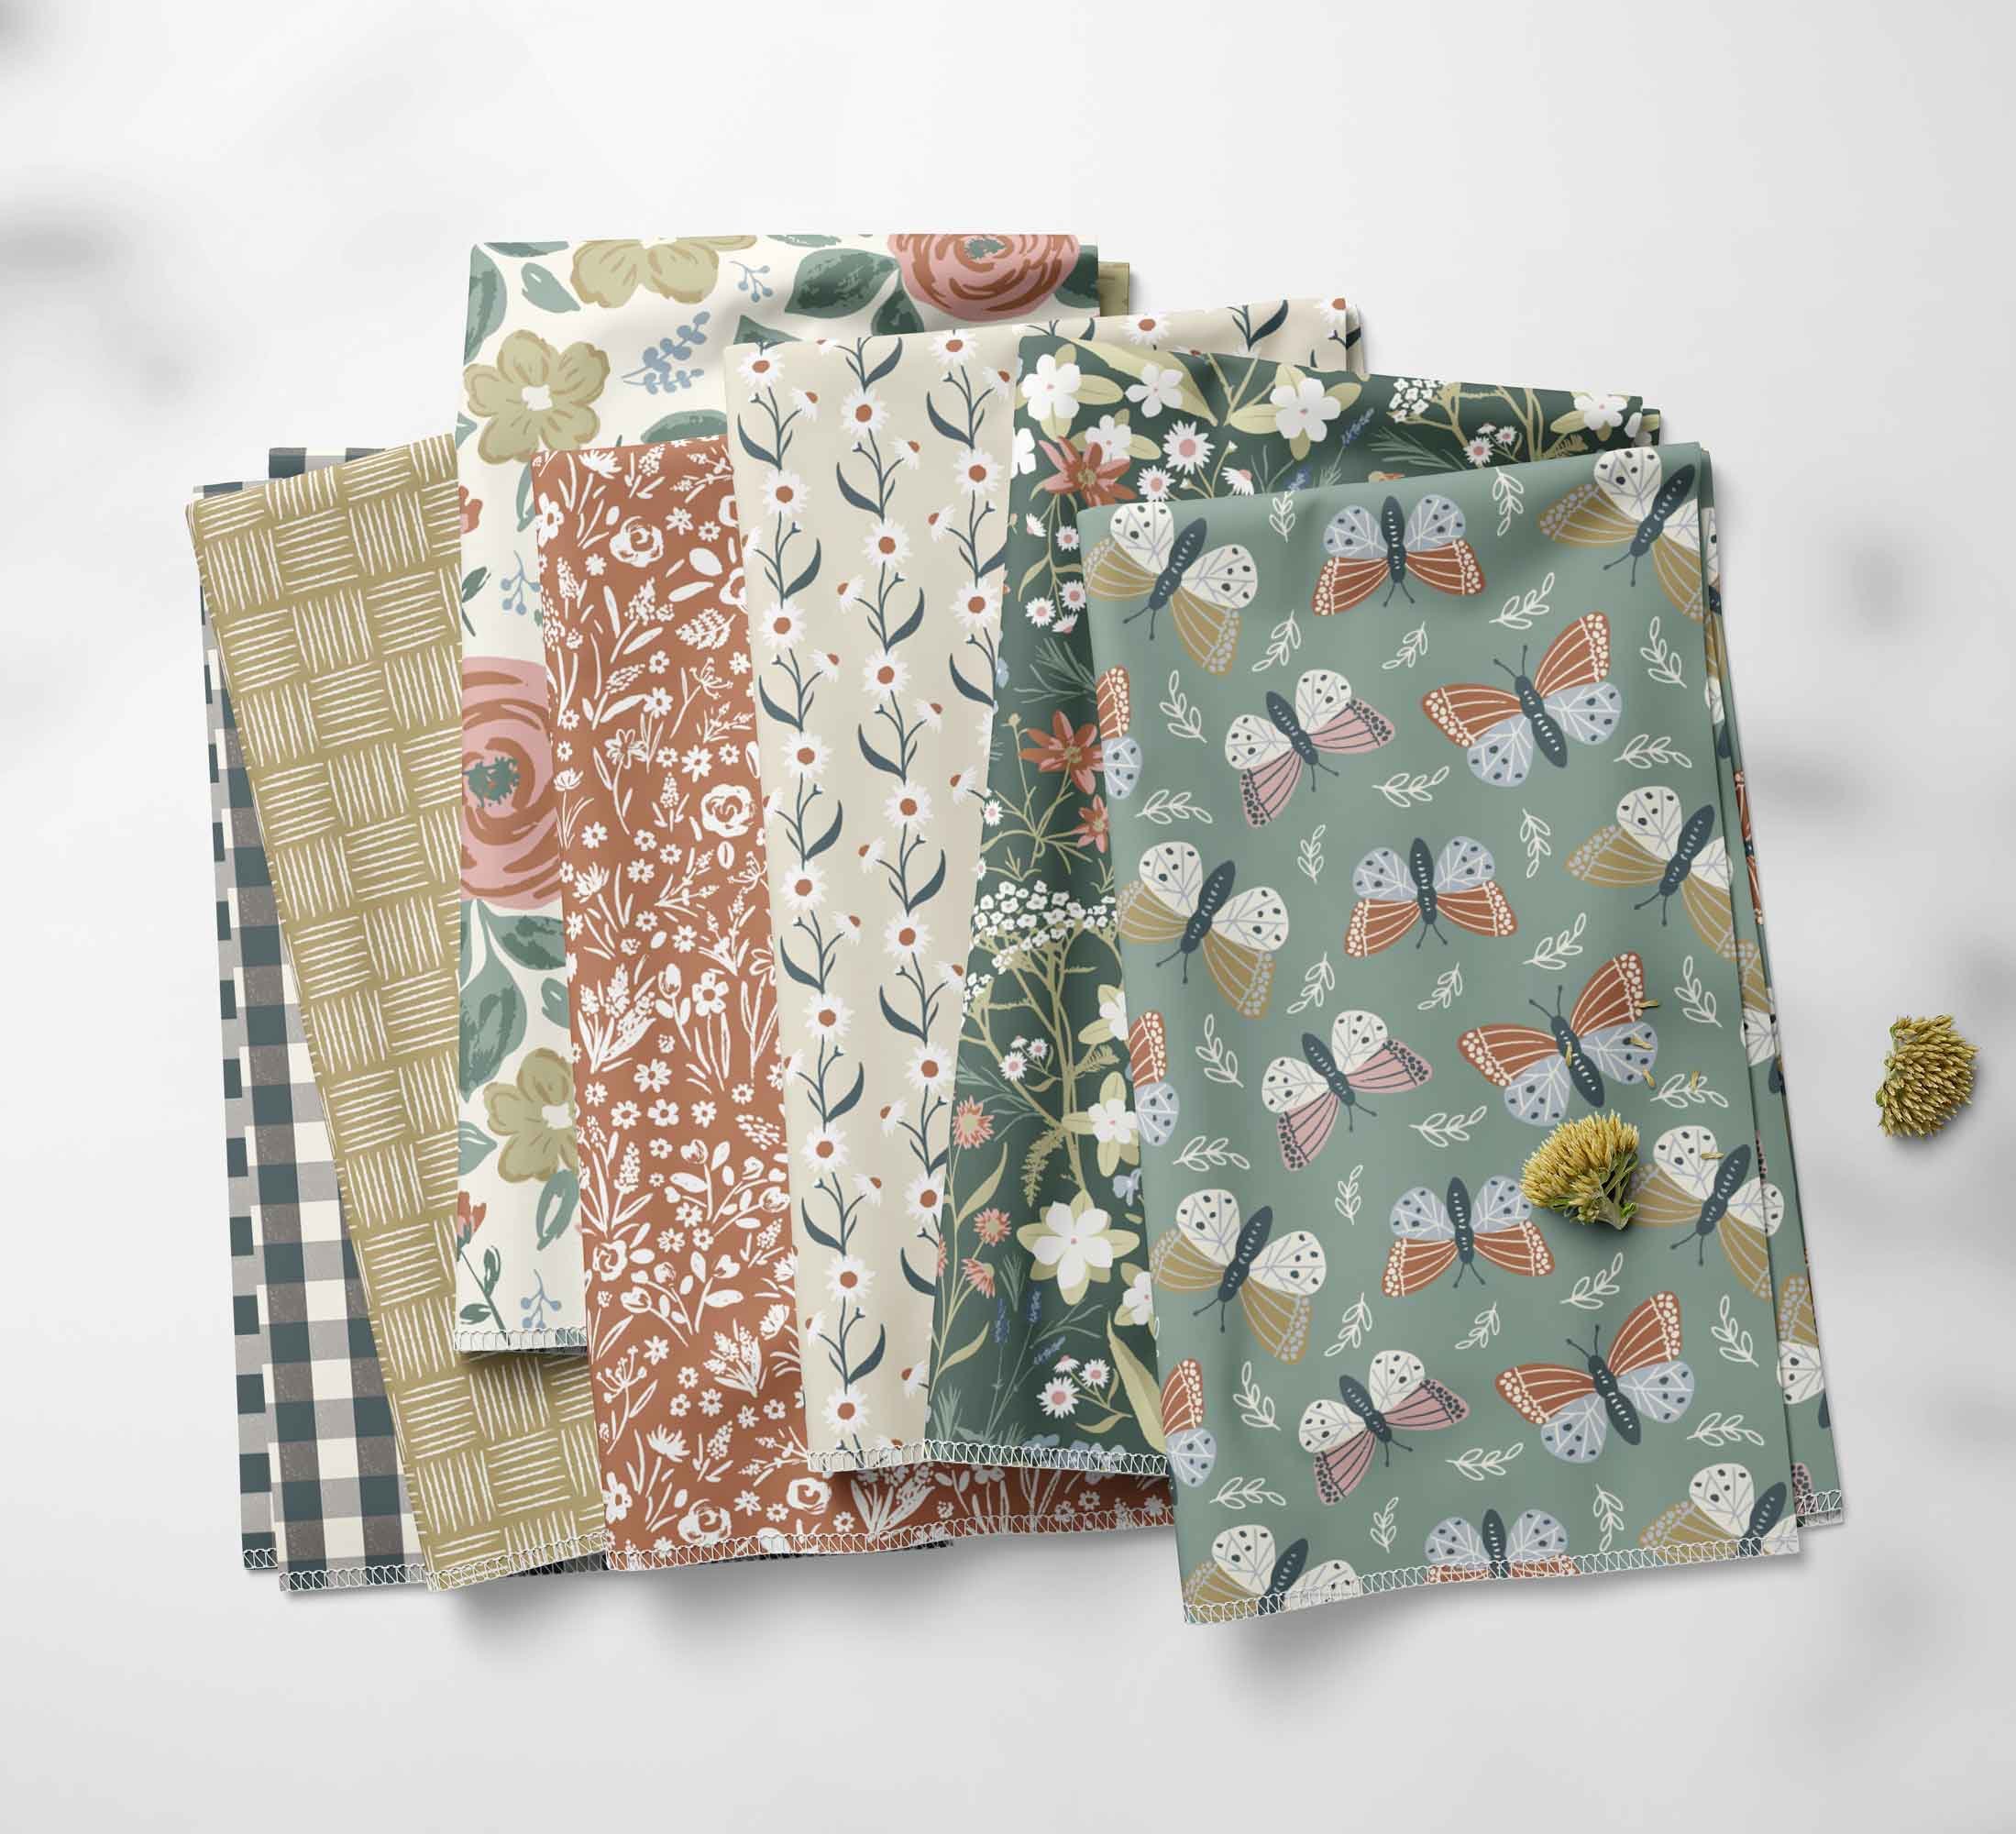
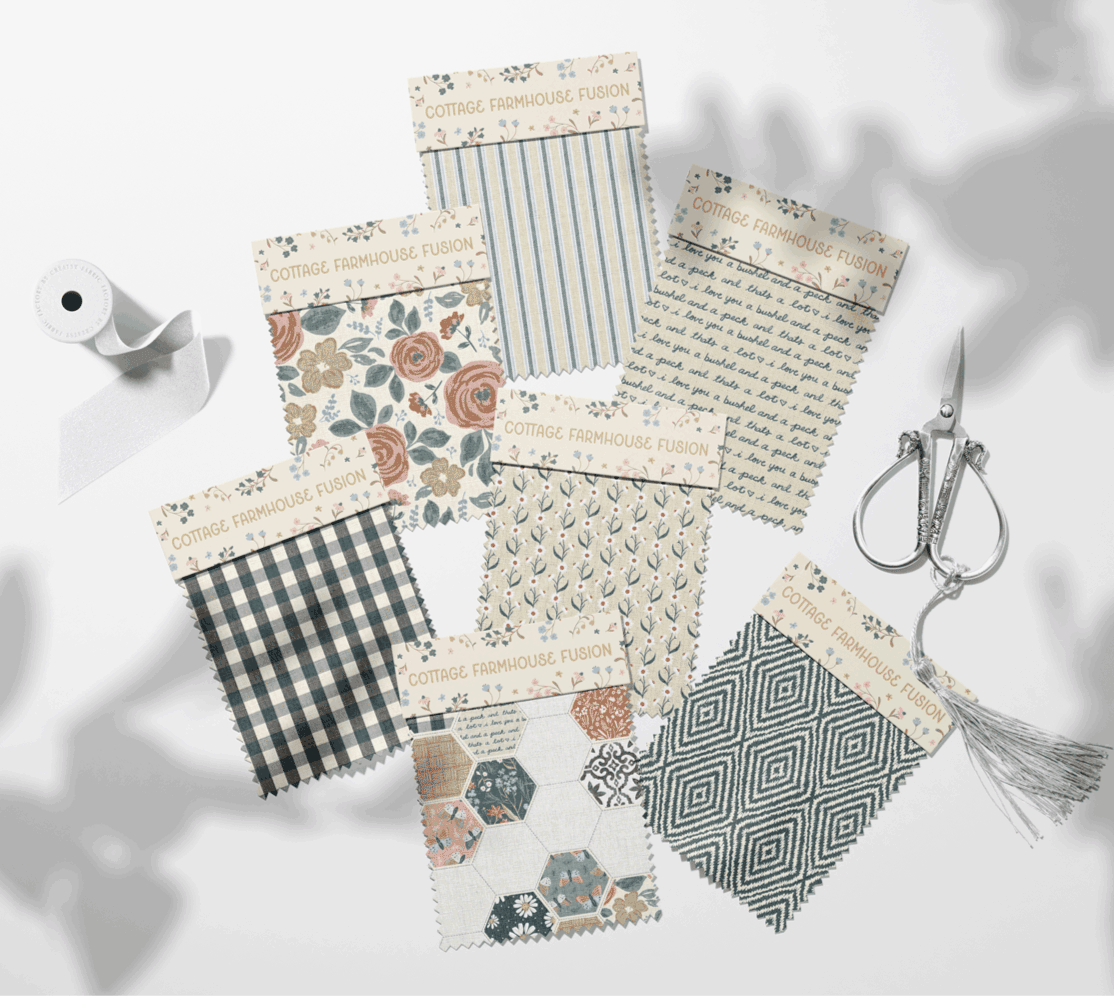
StudioE Fabrics Cottage Farmhouse Fusion Fabric Collection by Maureen Fiorellini
I immediately knew I wanted to use this fabric for this quilt. It’s called Cottage Farmhouse Fusion, my third collaboration with Studio E Fabrics, and available at select quilt shops. If you do a quick Google search you should be able to find some.
I often run fabric giveaways, if you follow me on Instagram, and join my email list, you will be notified when I host one.
(Or just click the image below to sign up)👇🏻
Self Drafting a Pattern
The hand-stitched details and the charming scalloped lace binding resonated with me, and I couldn’t resist the urge to recreate it. Adding a touch of modernity using my Studio E Fabrics Cottage Farmhouse Fusion fabric.
Although I spent some time trying to find the owner of this post, I could not find the pattern, or the original post.
My family was missing dinner that night as I feverishly sat at my computer figuring out how to recreate this beauty.
(I’m calling her Little Laura Scrappy👇🏻)
New to Quilting?
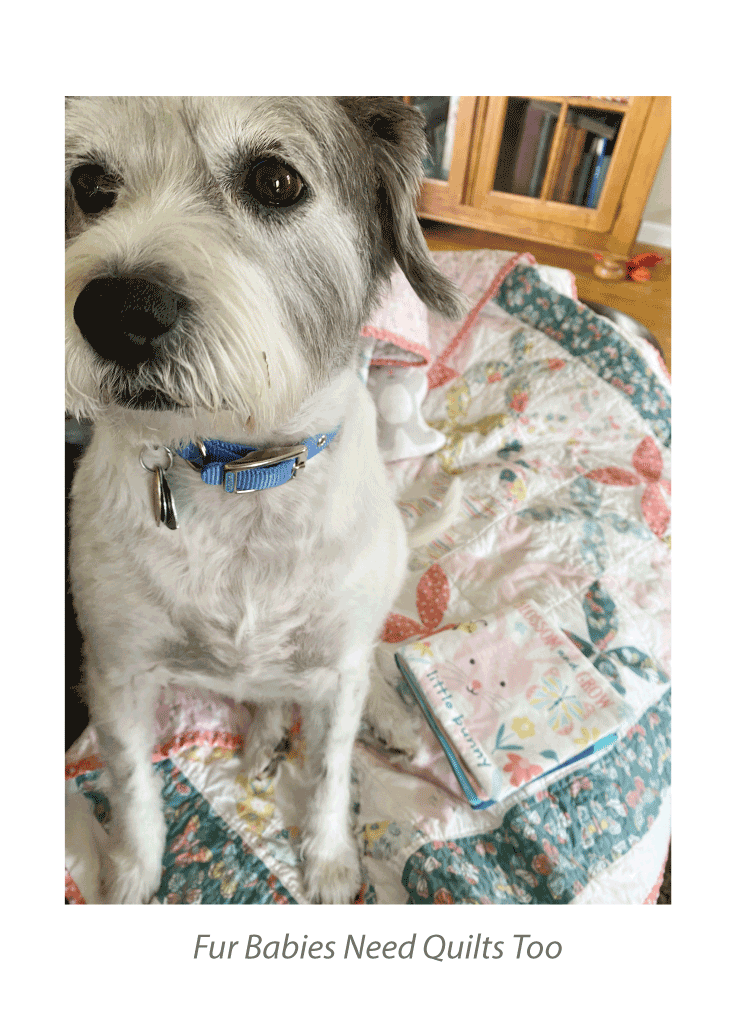
Making an entire quilt can be overwhelming and time consuming, I get it. That’s why I opted to make this one small, baby size 32” x 32”, which is a perfect size for a baby or a fur baby.
You could easily adapt this to a larger size just by adding blocks and rows.
Beginner Resources
Before I start, I want to share some quilting resources with you. I am fairly new to quilting, and if you are too, you might like to check out these classes to learn the basics before you start.
Melanie Ham’s “ Your First Quilt Series” is a great place to start and it is free.
I also took Brittany’s Beginner’s Quilt Academy and I highly recommend it. It only opens once a year, so put it on your calendar so you don’t miss out.
I also turn to Suzy Quilts often when I need to learn a quilty technique.
Check out your local quilt shop, most of them offer beginner quilting classes with a bonus of making new like minded friends.

Why Baby Size Quilt?
Baby-Sized Quilt Benefits:
Ensures a manageable and enjoyable project, particularly for new quilters.
Requires a smaller amount of fabric due to its size.
Making a baby size quilt is a great first quilt to make see if you enjoy the craft.
You will have a gift ready to give. Fact, people keep having babies.
Encourages using fabric from your stash or that special fat quarter bundle for a personal touch.
Baby size quilts can also be perfect for beloved pets. (Mine steals every one I make as his own.)
Many churches and shelters need baby blankets, check locally and see where you can donate one.
Choosing Fabric For Your Quilt:
Let’s just focus on choosing your fabrics today. We’ll worry about the quilt pattern and making the quilt later.
Use any fabric you like, or that special fat quarter bundle you've been saving for the right project to give it an extra special touch.
Quilting Fabric Choices
Now, when it comes to choosing the fabric for your heirloom quilts, the choice between designer quilting cotton and big box store cotton carries its own set of considerations.
Designer Quilting Cotton:
Boasts finer thread counts and superior printing techniques.
Offers an extensive array of unique, high-quality designs.
Ensures a luxurious feel and long-lasting colors.
Benefits:
Enhances the overall look and feel of your quilt.
Provides a broader range of high-quality, unique designs.
You are supporting an artist and a small local shop.
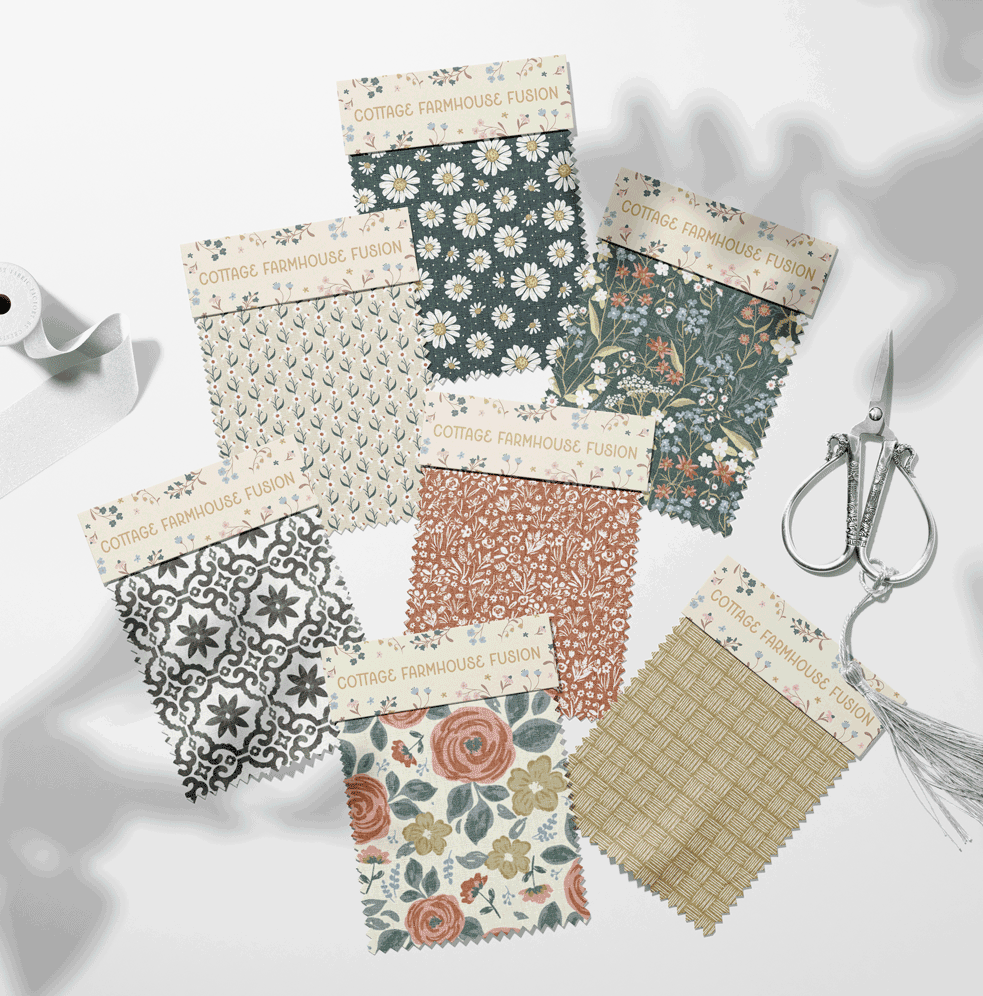
Cottage Farmhouse Fusion by Maureen Fiorellini for StudioE Fabrics
Big Box Store Cotton Considerations:
Budget-Friendly Options:
Might offer lower-priced selections.
Could have a reduced thread count.
May present limited design choices.
Considerations:
Affordability might be a primary advantage.
Durability and long-term vibrancy might not match that of designer quilting cotton.
Thread count and design variety might be limited in comparison.
My Honest Opinion
When crafting an heirloom quilt, investing in designer fabric can be seen as an investment in the quilt's longevity and the beauty it will hold for years to come.
I may be slightly biased, as I chose to use my Studio E Fabrics Cottage Farmhouse Fusion collection. I felt it embodies a rustic yet modern aesthetic, perfect for this cozy creation.
How Much Fabric ?
When looking for fabric, note that you don’t need a lot of fabric for this project.
For anyone who wants to skip ahead and start pulling fabric for this project, this is what you will need:
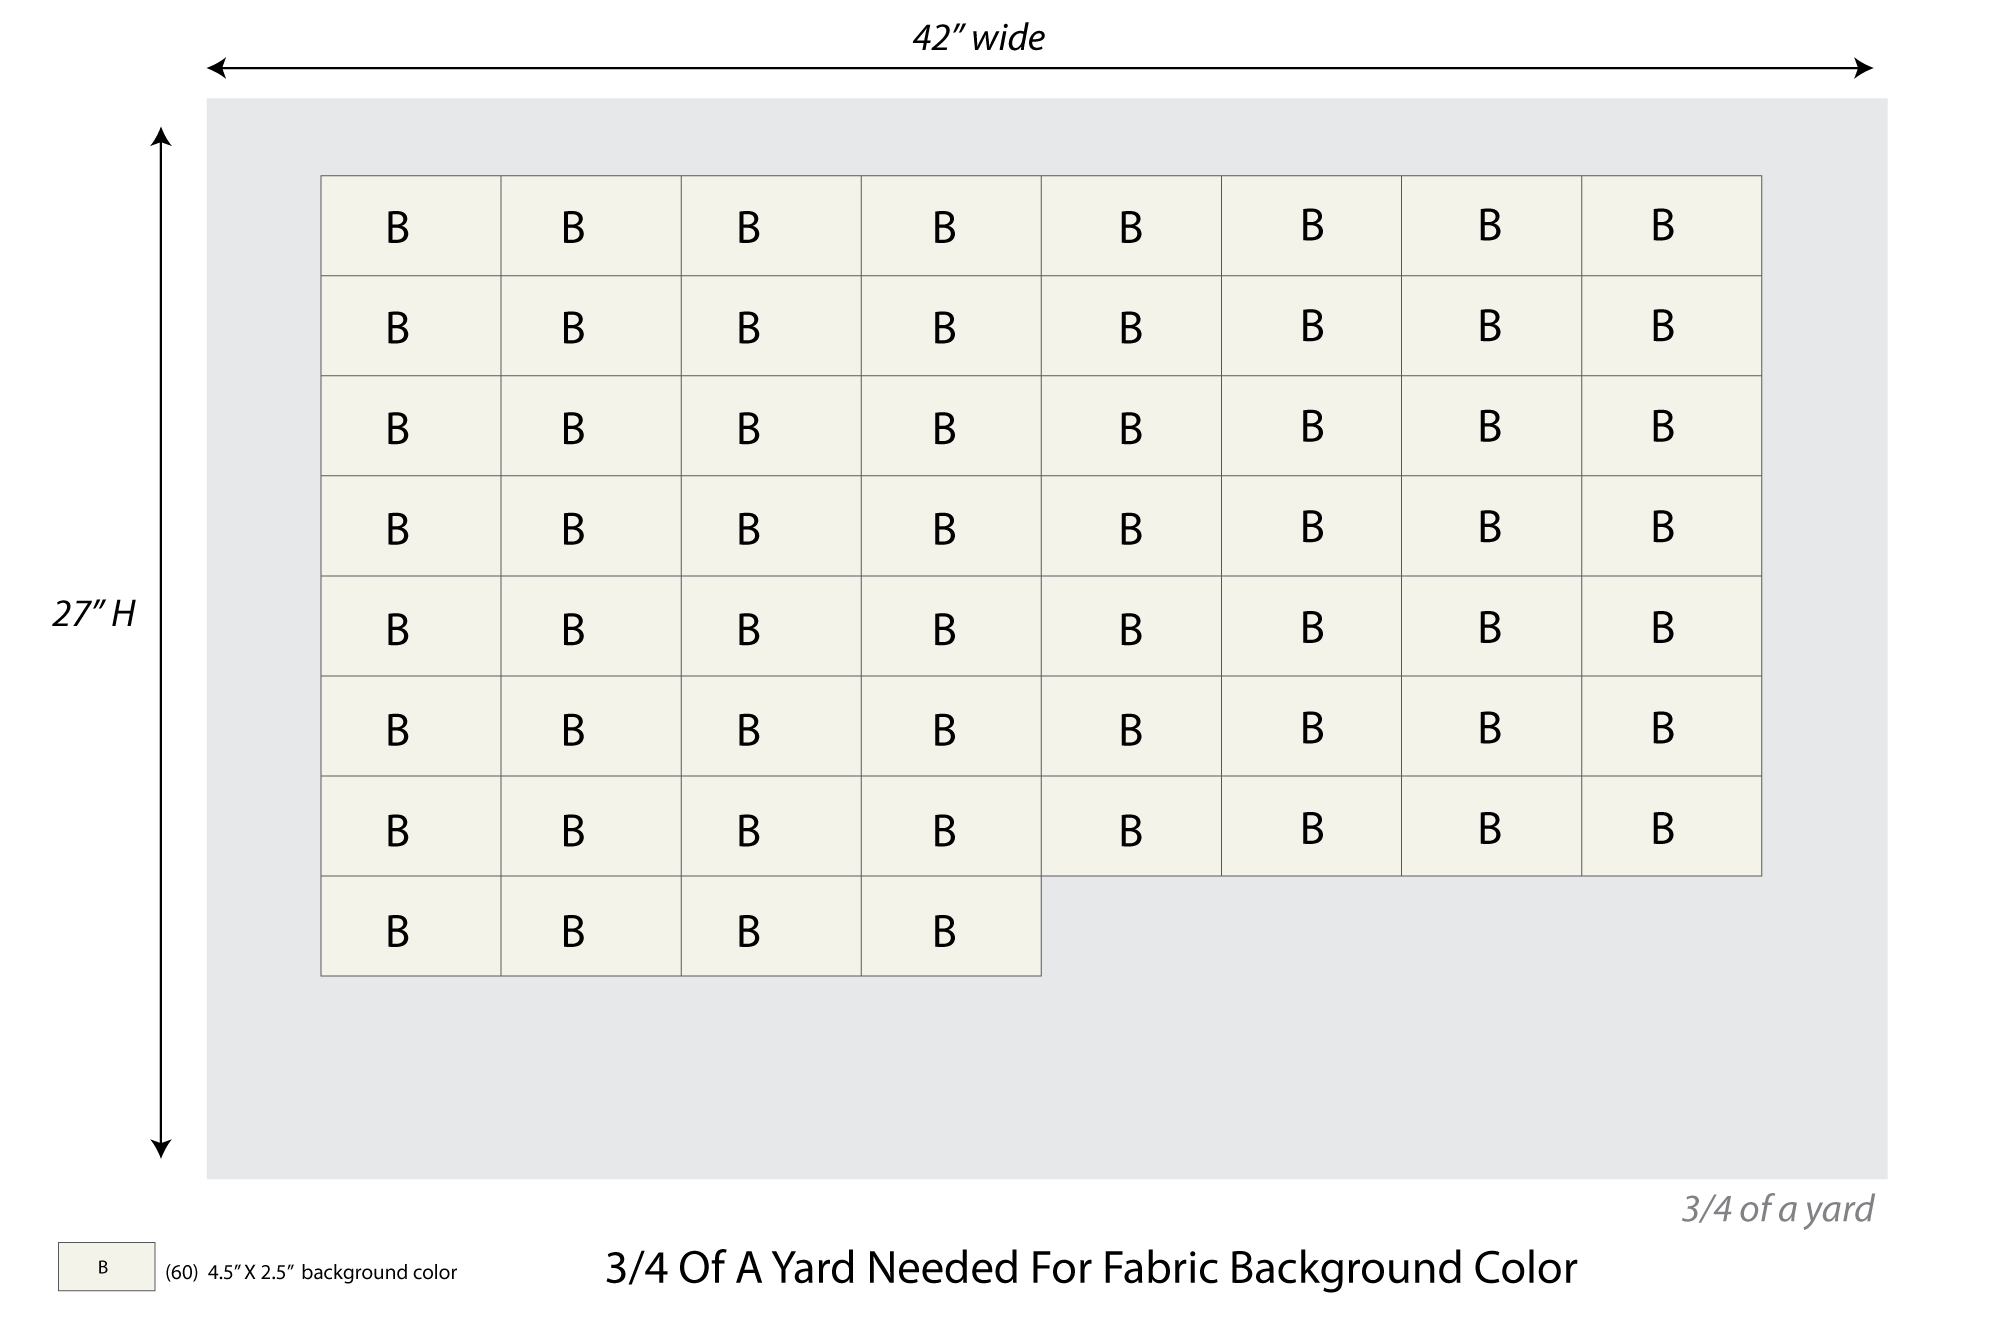
¾ yard for quilt top background solid color
1 yd of backing fabric
3-4 fat quarters in total yardage for all squares, mix and match for scrappy effect, or all one fabric for a modern effect.
⅓ yard for 2.5” binding strips.
Optional lace border.
Quilt batting 36” x 36”
Precuts for Timesaving
Precuts are quilting cotton fabrics already cut for you in the most useful sizes.
Very useful if you don’t like the cutting part of quilting, or, if you just want to save some time.
They come in the following sizes but not available in every designer fabric collection:
Fat Quarter: 18” x 22”
Fat Eighth: 9” x 22:
1.5” Strips: 1.5” x 44” (sold as a roll of 40 strips)
2.5” strips (sold as a roll of either 20 or 40 strips)
10” Squares
5” Squares
6” Hexagon: Usually 40 per pack
2.5” squares: (Usually sold in sets of 42 squares)
6” Triangles: (Usually sold in sets of 60)
7” squares: Sometimes sold in a gift box with other sewing notions.
Background Fabric:
In addition to your patterned fabric, you will need some solid fabric, this is called background fabric.
I used part of a bundle of 2.5” precut strips I had in my stash. It was Moda brand Bella Solids Jr. Jellyroll in off white. It included (20) 2.5” strips. I have a lot of it left over for another project. Such a great timesaver.
To be totally honest, I don’t love the cutting part of quiltmaking. The rotary cutter scares me a little. So when I find a precut, I’m all in. You won’t find them in every fabric collection, but you can always find the basics, like the off white I am using.

Quilt Squares
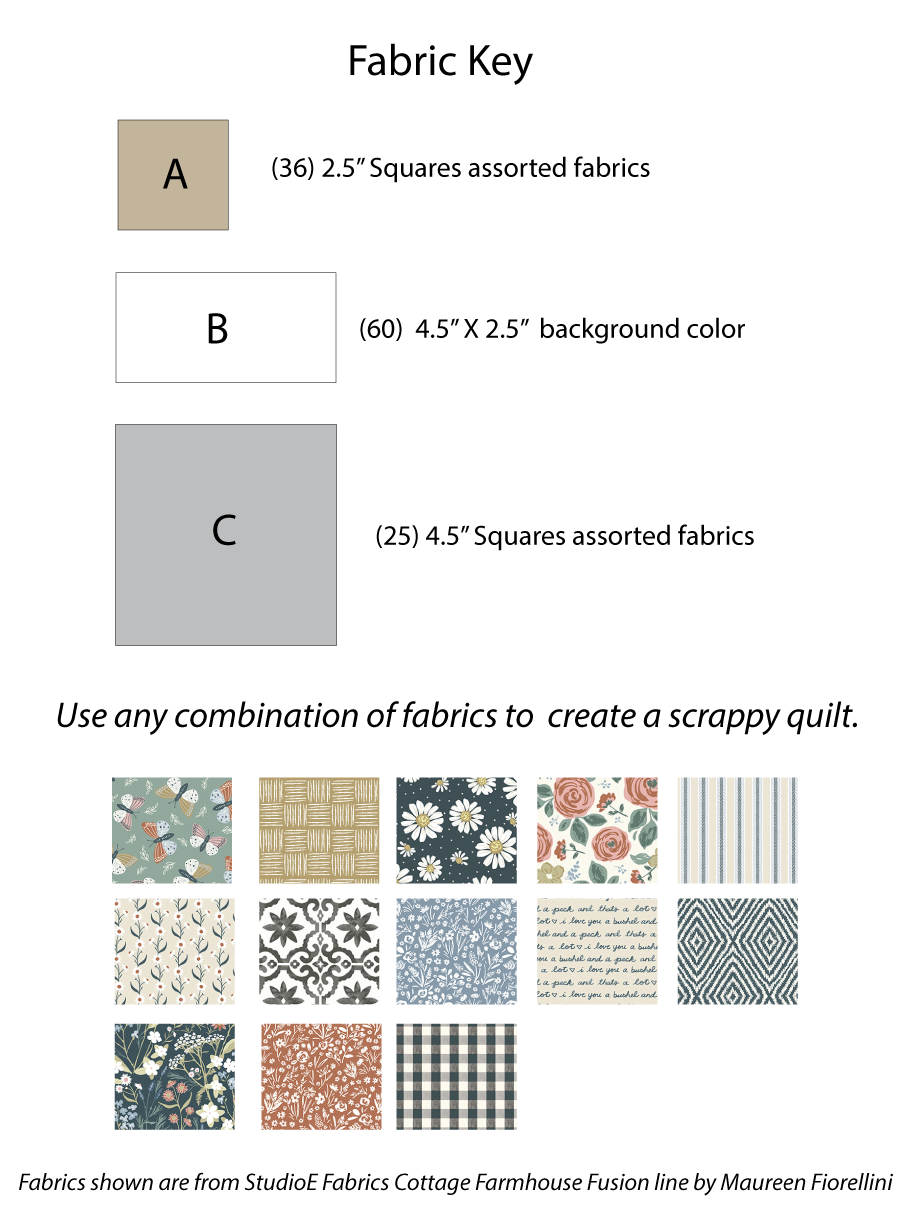
Scrappy Version:
If you choose to make the scrappy version of the quilt, you only need a small bit of each fabric. I call this version “Little Laura Scrappy”. (See diagram above)
I used 12 different fabrics from one collection to make my 4.5” and 2.5” squares, to get the “scrappy” effect I was after.
I cut my squares from fat quarters which are 18” x 22”. I only used about a quarter of each fat quarter. Plenty left over for other projects or more versions of this quilt.
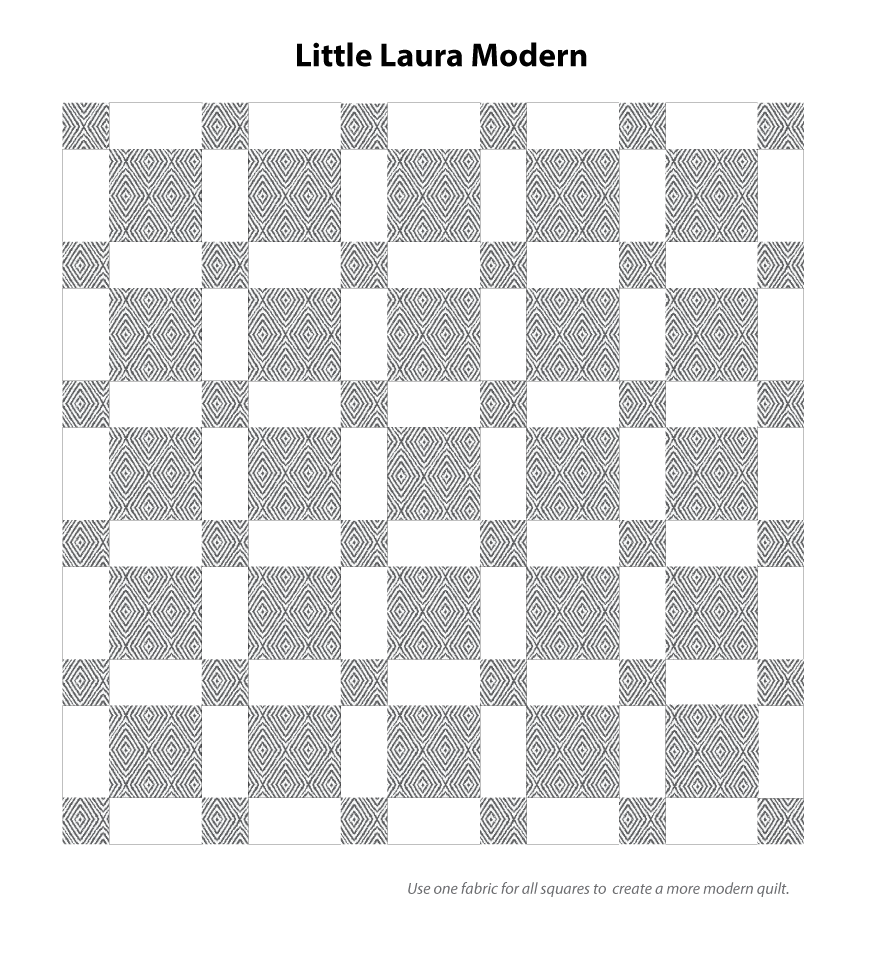
Modern Version:
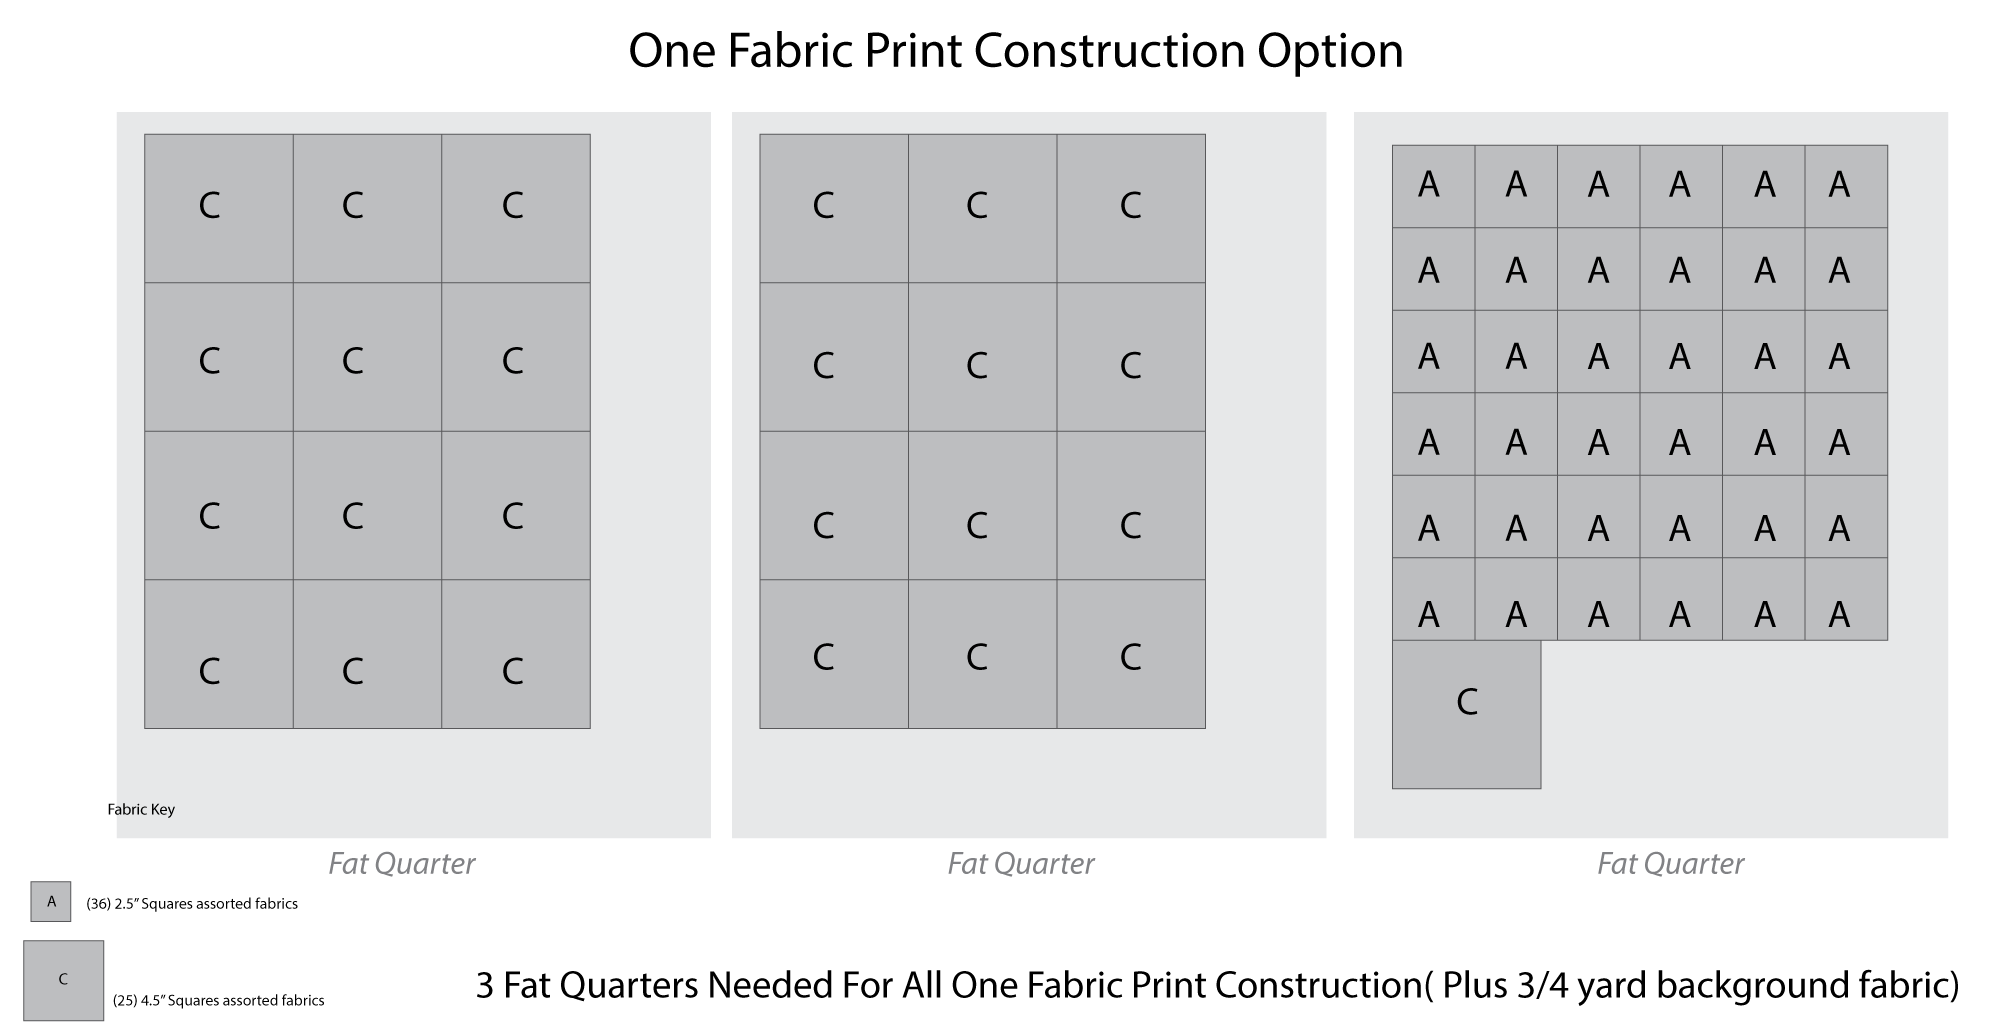
If you choose all one fabric for the squares and choose the “Little Laura Modern” version of this quilt, you will only need 3 fat quarters total for all of the squares. But get an extra one incase of a cutting mistake, it happens.
(This is a much easier project for beginners, if the scrappy aspect overwhelms you, I suggest just make version “ Little Laura Modern” and work your way towards the scrappy version for your next quilt.)
5” precuts would work well for this quilt, although you will have to trim them down to 4.5” and 2.5”, but sometimes that is easier than working with large pieces of fabric, especially for beginners.
For experienced quilters who are anxious to get started, I will include my cutting diagram here so you can see how many total squares you need and get started cutting.
I am not showing a fabric cutting guide for the scrappy version, because you will be using scraps, or parts of precuts.
Fabric Cutting Guide
Little Laura Modern:
Fabric cutting Guide
Background fabric both quilt versions:
Quilt Backing
You will also need one large piece of fabric for the back of the quilt.
Since this quilt is 32” x 32” , one yard of fabric will be enough for the backing.
No piecing required.
Feel free to get creative, experiment. Use flannel or quilting cotton, or even an old sheet will work.
I recently made a quilt using sherpa for the backing, it was a little messy to work with but oh so soft.
Quilt Batting
You will also need a piece of batting which will be the middle of the “Quilt Sandwich”.
One piece of batting 36” x 36”.
Batting is a personal preference and there are many choices.
Since this quilt is small, it may be more economical to buy batting off a roll in a store.
I haven’t made enough quilts to recommend one brand over the other, but I did some research and I chose Hobbs 80% Cotton/20% Polyester
And I have also used: Warm and Natural
(These are Amazon affiliate links, I may receive a small commission at no extra cost to you)
Here are 2 great articles that explains all of your choices so you can decide for yourself:
Where to Buy Your Fabric?
Now, when it comes to sourcing fabric for your heirloom quilts, I would encourage you to seek out your local quilt shop because:
Local Quilt Shop
Goldmine of Creativity and Expertise
Offers a unique selection of top-quality fabrics.
Provides personalized advice and fosters a sense of community.
Crucial for keeping the quilting community vibrant and thriving.
These small businesses work tirelessly to curate a unique selection of top-quality fabrics, offering personalized advice and a sense of community that's truly irreplaceable. Supporting them is crucial to keeping the quilting community vibrant and thriving.
However, if you can't find the specific fabric you're hunting for, online shopping can be a fantastic alternative.
Online Shopping as an Alternative:
Can be a fantastic option if specific fabrics are unavailable locally.
Provides access to a broader range of fabric choices.
Here are some online shops I have used:
Hangin by a thread (my local NJ shop)
And if you have a favorite quilt shop, do let us know in the comments.
Sewing Notions and Other Supplies
If you are in need of sewing notions for your project,
I have another blog post where I list all my favorite supplies for quilting and sewing.
You can check it out here.
There You Have It
Ultimately, your quilt supplies should balance quality, design, durability, personal preference and budget, setting the stage for a beautifully crafted quilt.
I hope you feel confident to pick your fabrics and start on this journey with me.
Have fun choosing your fabrics.
Crafting a quilt can be an incredibly rewarding experience. Whether you're a beginner or an experienced quilter, this baby-sized quilt offers a quick, delightful project to fit between larger endeavors. The joy of creation, the pleasure of giving, and the comfort it brings to little ones, or even pets, is immeasurable.
How many quilts have you made in your lifetime?
Let me know in the comments.
I am working on number 4.

Don’t hesitate to reach out if you are struggling to find the perfect fabric for this project. I am happy to help.
In part 2 of this series, we will cut our fabric and start laying it all out to get a peek at our finished quilt. Thanks for following along👋🏻
XO Maureen
Quick links to all of the blog posts in the series:
In Part 1, we explored the exciting world of selecting fabrics for your baby quilt.
Part 2: We'll dive into the essential steps of cutting fabric to bring your cozy creation to life.
Part 4: We’ll assemble the quilt sandwich and get ready to hand stitch the layers together.
Part 5: We will hand quilt the layers together, then add make and add the binding.
Part 6: This is an optional step, adding lace to the binding.