
How to craft a modern vintage baby quilt part 2
EASY DIY BABY QUILT SERIES
Free Beginner Sewing Patchwork Pattern With Easy to Follow Tutorials
Perfect for new quilters and a quick make for the more experienced.
Cutting Fabric for Your Baby Quilt
Part #2 in the series
Welcome back to our baby quilt-making journey!
In Part 1, we explored the exciting world of selecting fabrics for your quilt.
Now, in Part 2, we'll dive into the essential steps of cutting fabric to bring your cozy creation to life.

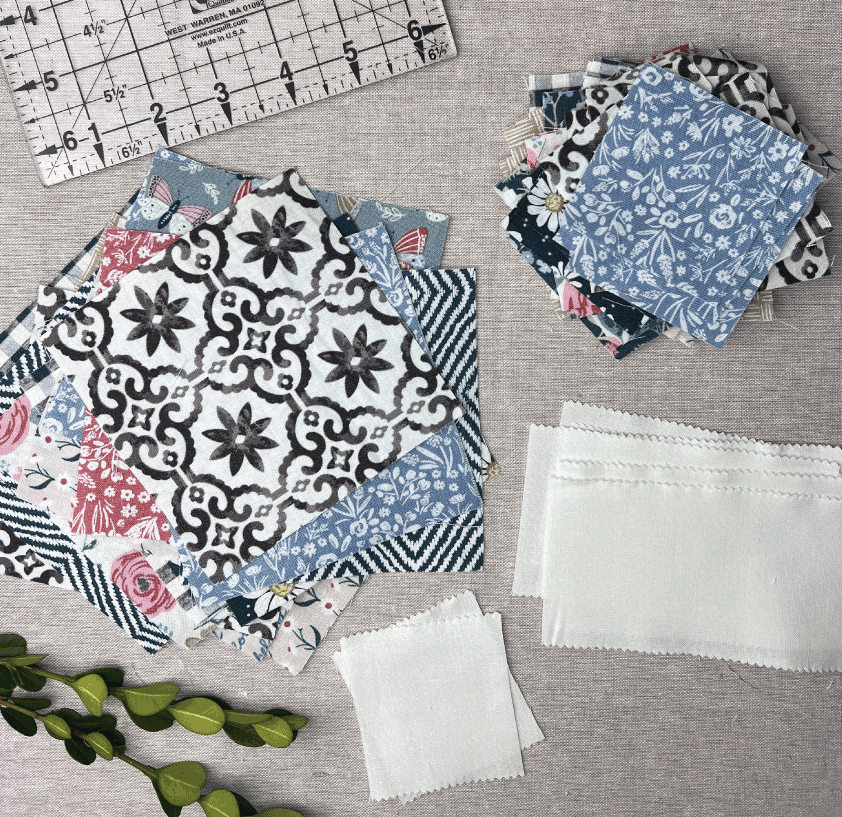
Step 1: Gather Your Materials
Before we embark on our cutting adventure, let's ensure we have all the necessary tools:
Fabric: Choose quality fabrics in colors and patterns that complement your baby quilt design.
Cutting Mat: A self-healing cutting mat provides a smooth surface for cutting and protects your work surface.
Rotary Cutter: This handy tool allows for precise, straight cuts. Make sure the blade is sharp for optimal results.
Quilting Ruler: A 24” acrylic ruler with clear markings helps measure and cut fabric accurately. Non-slip dots can be added to the back. Smaller size rulers are handy for the smaller cuts.
Fabric Scissors: While a rotary cutter is excellent for straight lines, fabric scissors are also a great choice
Want to make sure you never miss a post or fabric giveaway? Then click button below to subscribe to my newsletter and never miss a thing!
Step 2: Preparing Your Fabric
Some quilters prefer to wash and press their fabrics before starting a project to prevent shrinkage later. I never do and have never had a problem. You can press the fabric with an iron to remove wrinkles if necessary.
Some quilters prefer to starch their fabric before cutting. I keep forgetting to do this, but when I do, my cuts are more accurate. (You can make your own starch, I learned how here.)
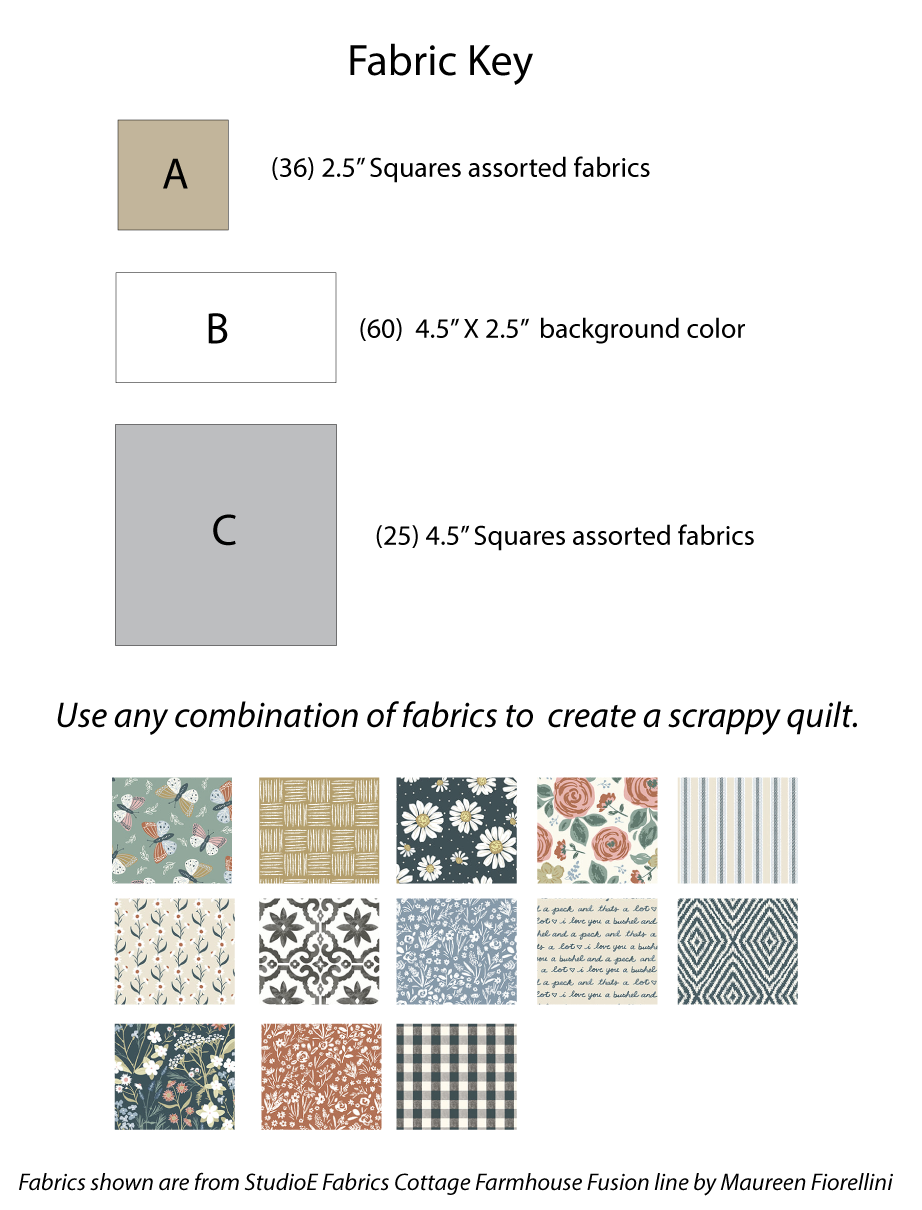
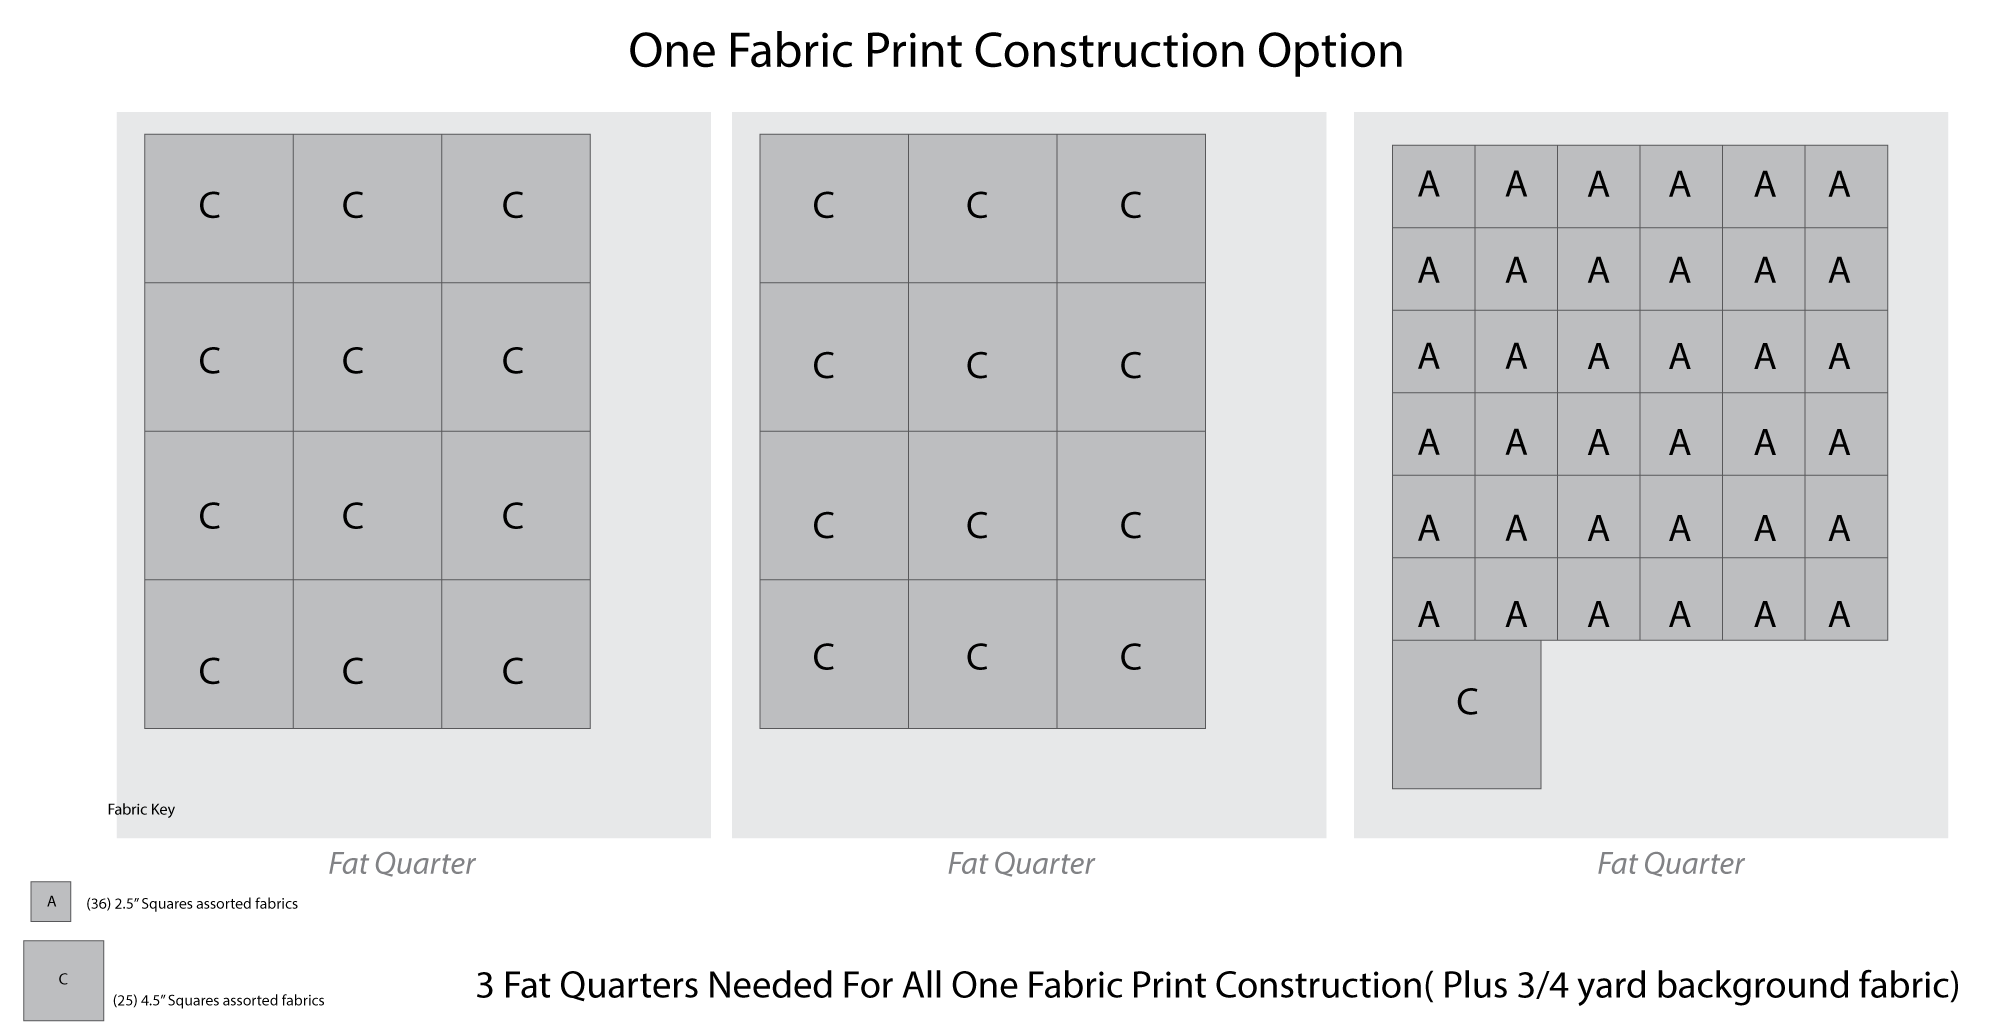
Study the Fabric Key above to see what sizes you will be cutting. Keep this nearby during the cutting process to avoid mistakes.
So, grab your favorite fabric, dust off those cutting tools of choice, and let's get cutting.
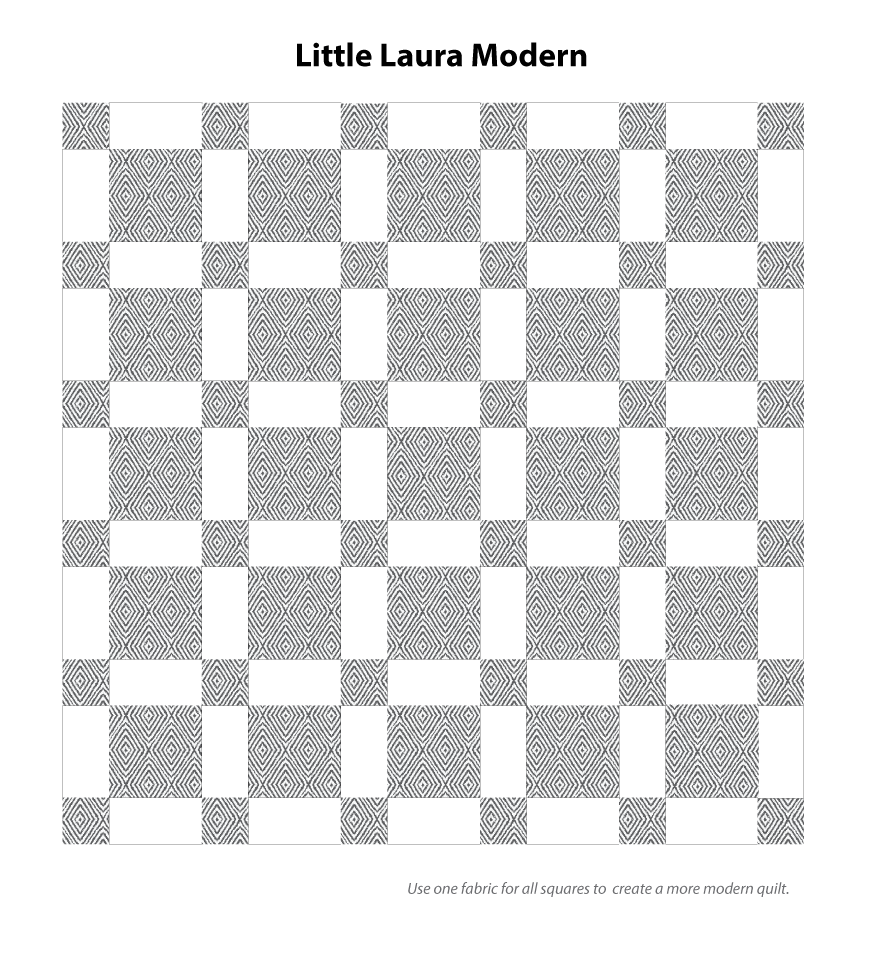
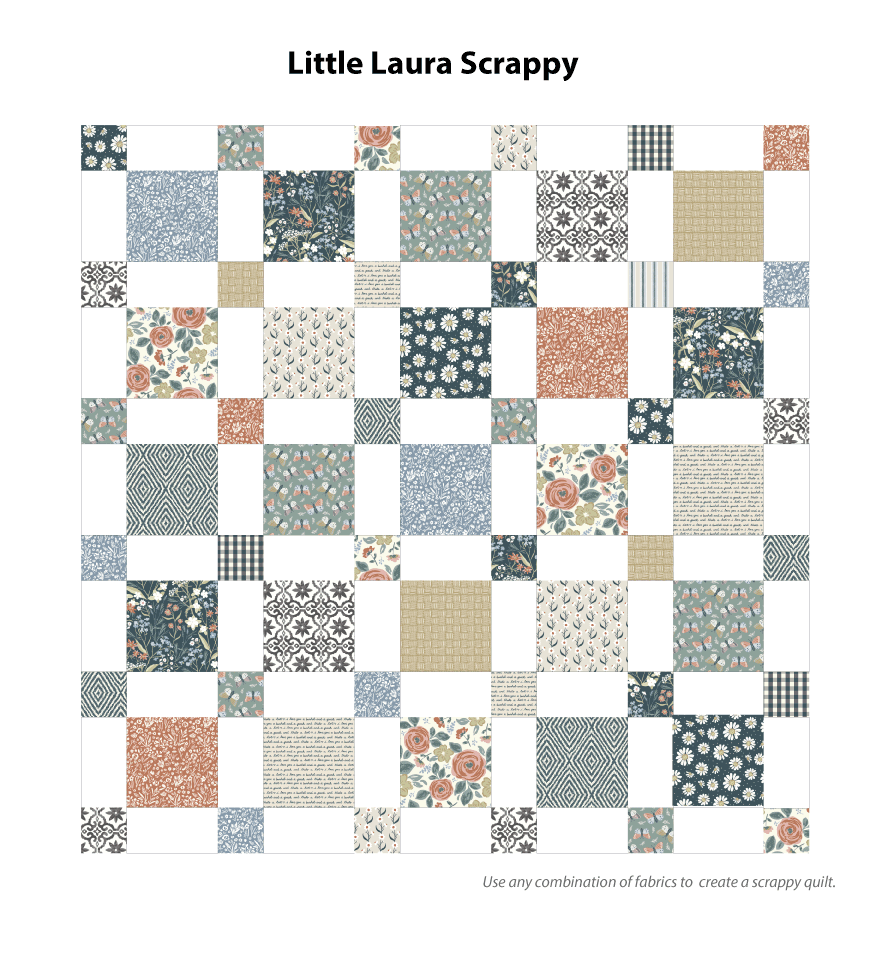
Quilt Options
I’m showing you the 2 quilt options I came up with. You can use this a guide for your quilt, or come up with something totally different.
Step 3: Cutting Strips and Squares
Now, let's move on to the actual cutting process:
Begin by squaring off one edge of your fabric, then flip your fabric over and use this straight line to start measuring your cuts. Align the fabric edges with the selvage to create straight, even lines for cutting. If you have never done that you can watch Suzy Quilts in this video.
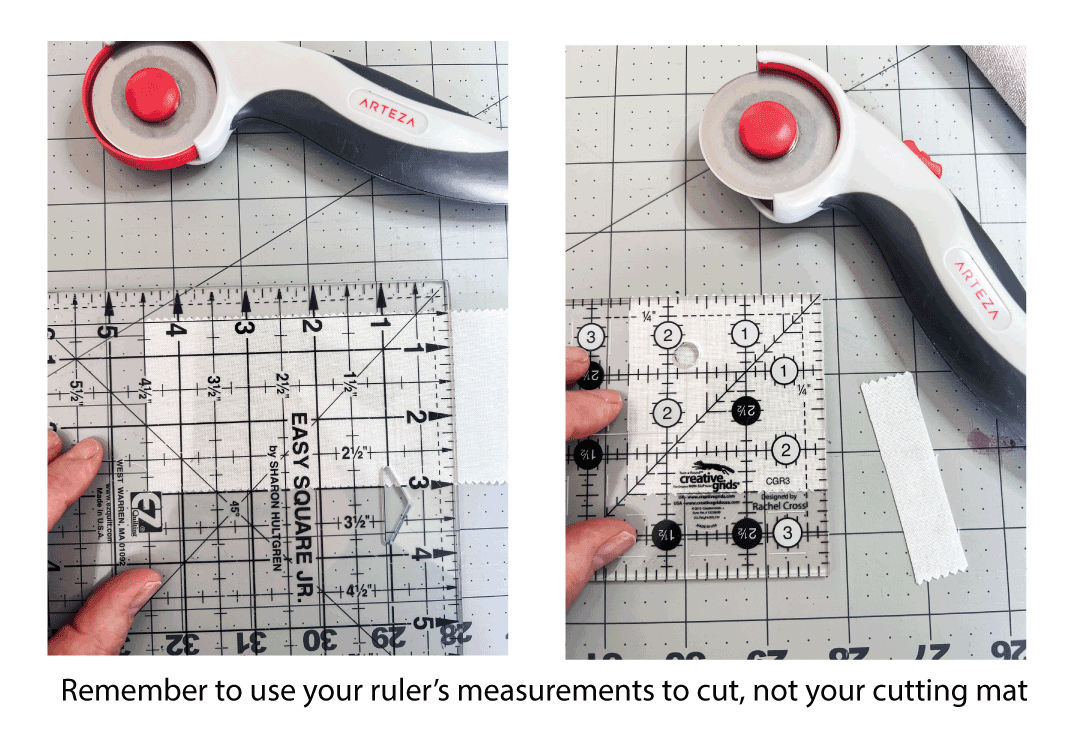
Measure twice cut once, my father always said that, he was a woodworker. That holds true for quilting as well. Using your quilting ruler, measure the desired dimensions on the fabric. If using a scissors, you will need to mark the fabric so you have a cutting guide to follow. I use a pencil. Use the measurements on your quilt ruler, not your cutting mat for accuracy. When making several cuts all the same size, I like to put a piece of tape on my ruler as a guide for easy reference.
If using a rotary cutter: Hold the ruler firmly in place and guide the rotary cutter along the edge for clean, straight cuts. Always cut away from you. Take your time and be precise. Make sure your blade is sharp and be careful. Always close your rotary cutter when done.
I like to make wof (width of fabric) strips in the desired size. Then use those strips to make the smaller cuts.
When cutting the squares: Use the quilting ruler to measure and mark, then cut along the lines to create perfect squares. Remember to use your quilting ruler for measuring, not your cutting mat.
Make sure your environment is uncluttered. I like to put on a podcast while I work on this part of the process. If you find yourself getting tense, take a break.
This diagram is to show you how many squares you will get from a fat quarter:
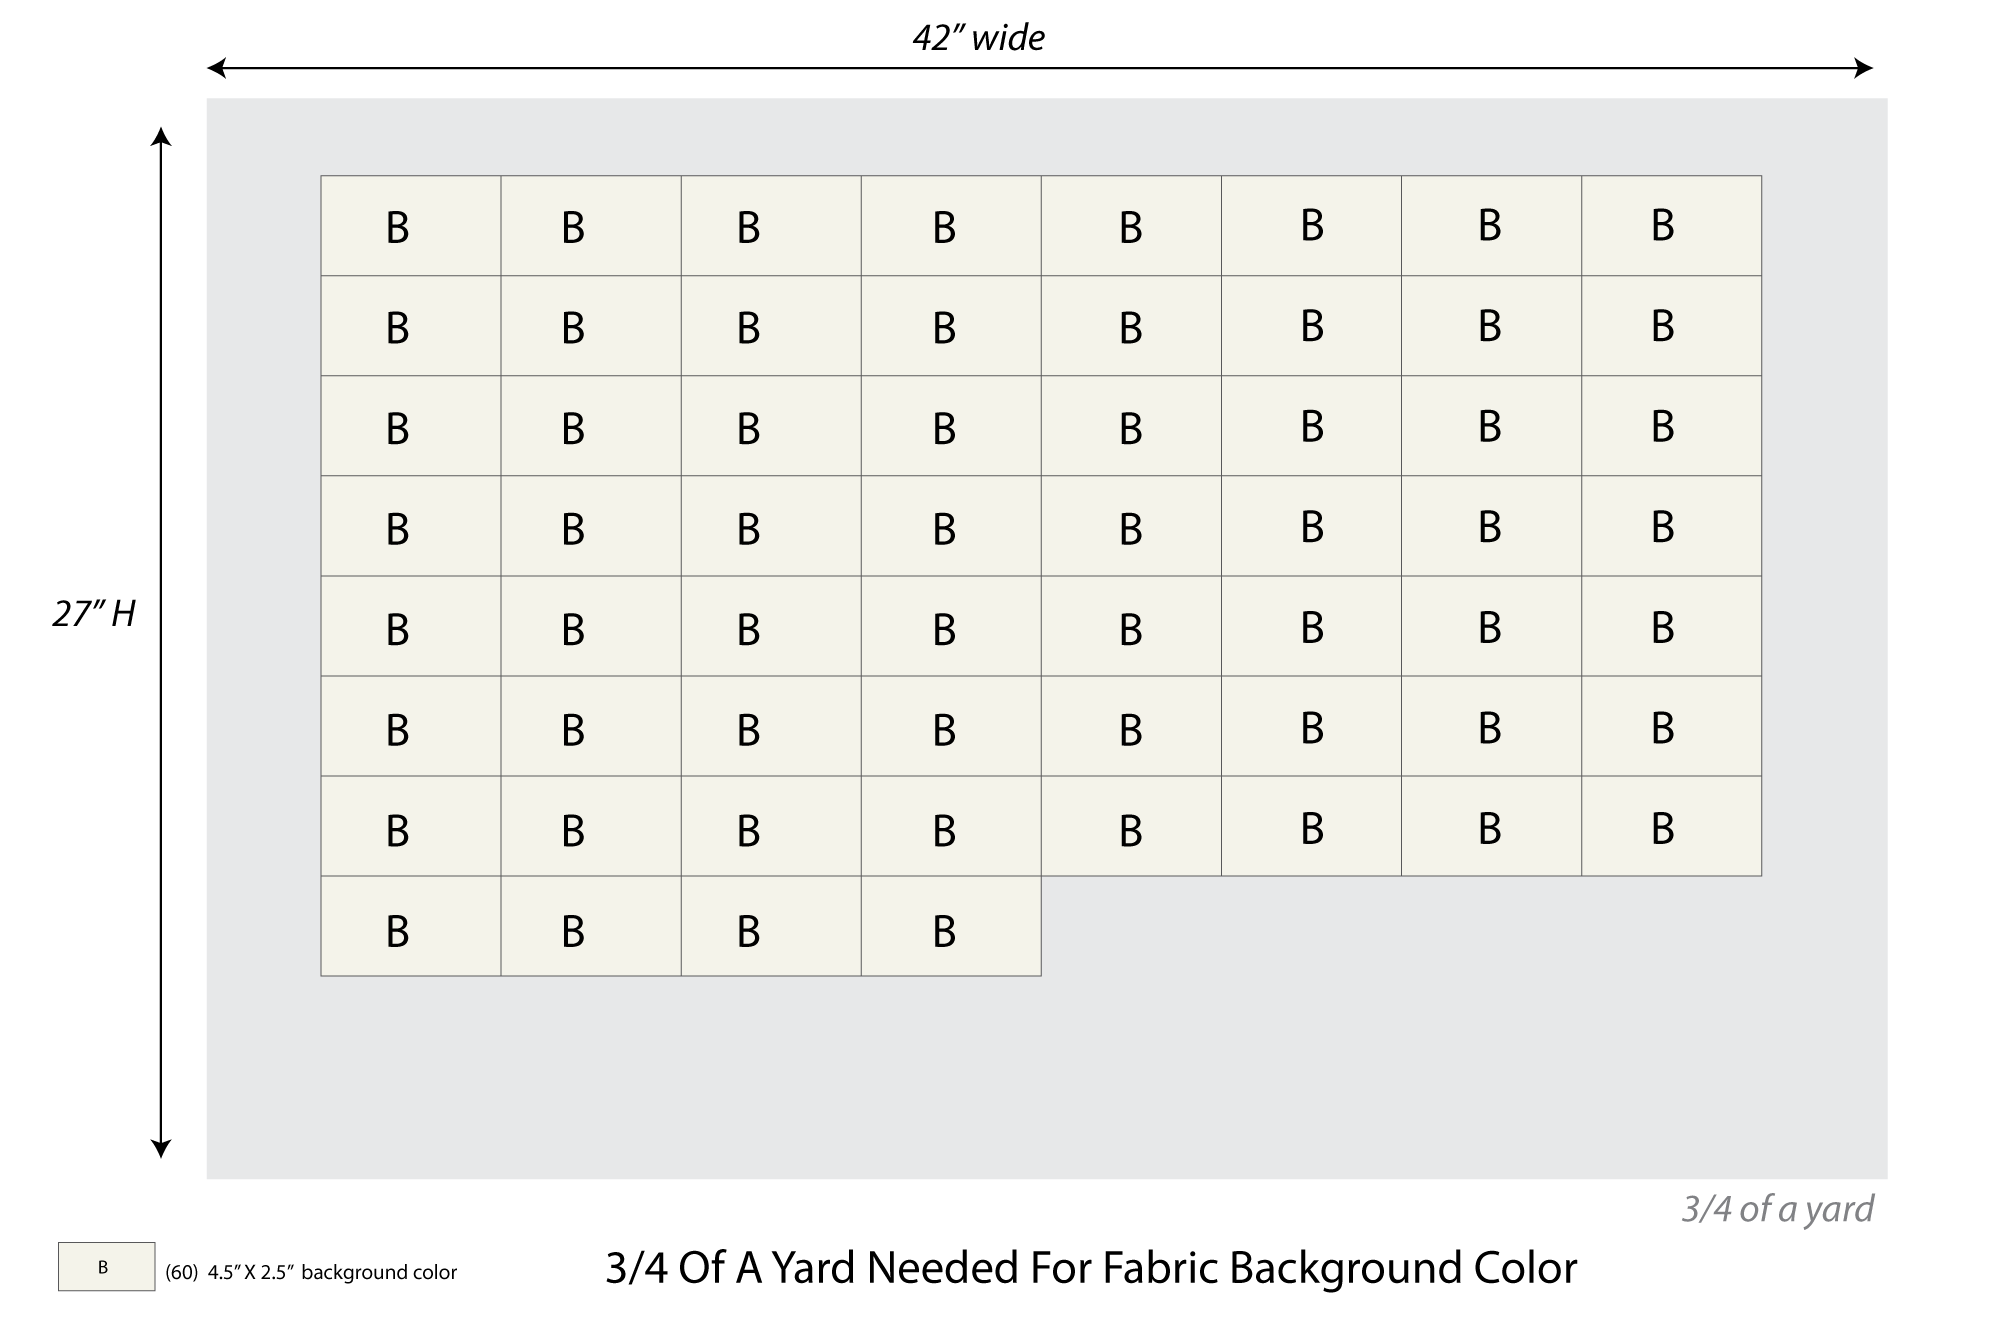
This diagram is to show you how many background rectangles you will get from 3/4 of a yard:
Step 4: Precision is Key
Whether cutting strips, squares, or more intricate shapes, precision is vital for a professional-looking quilt. Double-check measurements, and if needed, use pins or clips to secure fabric layers before cutting.
Cutting takes practice, it took me several quilts to get the hang of the rotary cutter, it still scares me a little but it definitely speeds up the process.
Step 5: Storing and Organizing
As you cut your fabric pieces, organize them according to size and color. This will make the piecing process smoother and more enjoyable.
I use post it notes to label my pieces to keep me organized.
Conclusion:
Congratulations! You've successfully navigated the second step in creating your baby quilt. Cutting fabric is a crucial phase that sets the foundation for the visual appeal and overall quality of your quilt.
In Part 3, we'll explore laying out all of the fabric cuts on a quilt wall and embark on the art of sewing together these fabric pieces, bringing us one step closer to a cherished, handmade masterpiece for your little one.
Stay tuned for more quilting adventures!
XO Maureen
P.S. Please comment below and tell me which version you prefer, Little Laura Modern or Scrappy👋🏻
And please share your makes, I would love to see them!
Quick links to all of the blog posts in the series:
In Part 1, we explored the exciting world of selecting fabrics for your baby quilt.
Part 2: We'll dive into the essential steps of cutting fabric to bring your cozy creation to life.
Part 4: We’ll assemble the quilt sandwich and get ready to hand stitch the layers together.
Part 5: We will hand quilt the layers together, then add make and add the binding.
Part 6: We added optiopnal lace to the binding.
Part 7: Bonus queen size fabric requirements for the more adventurous.