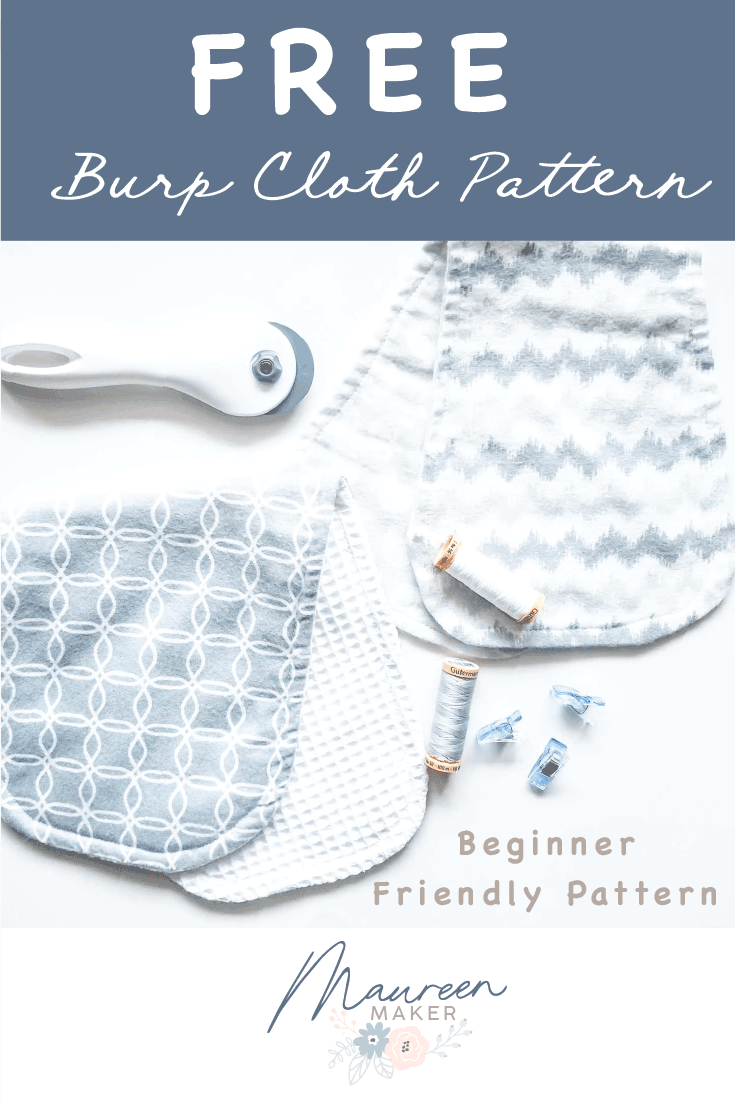
easy diy Burp Cloth tutorial-Free printable pattern
EASY, BEGINNER-FRIENDLY, BURP CLOTH SEWING PATTERN
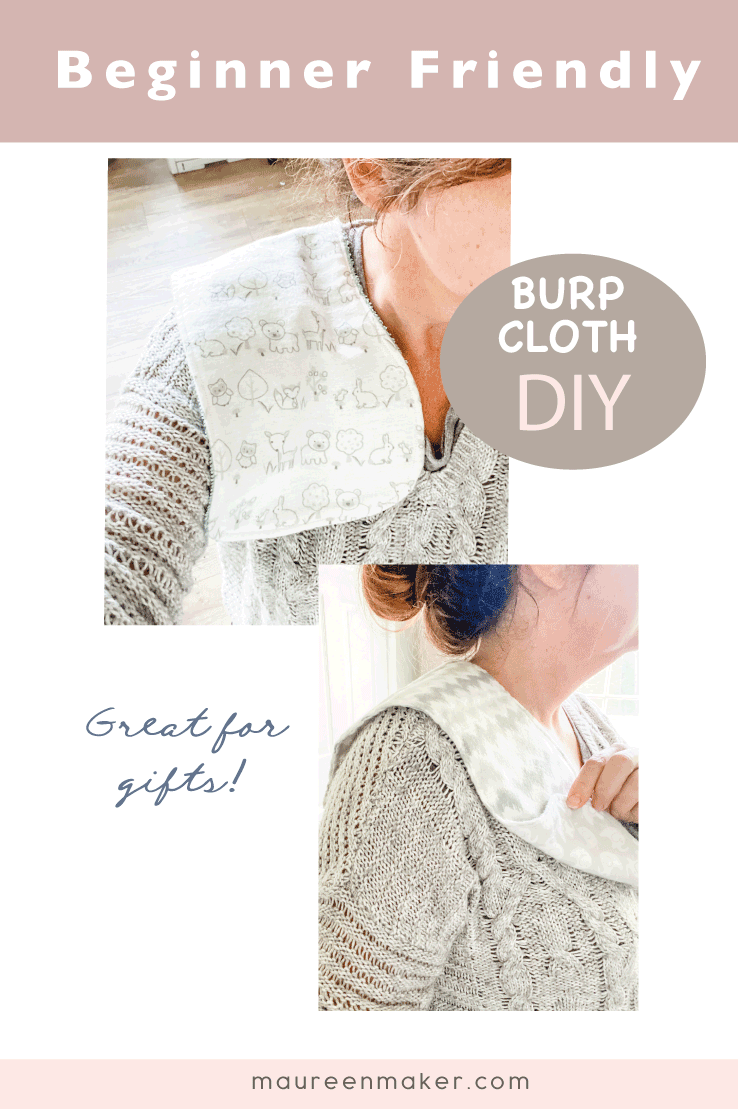
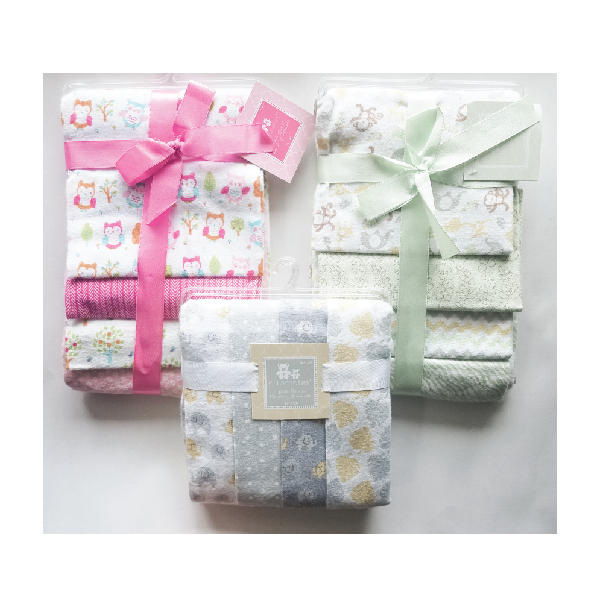
Make a batch of these practical, easy, DIY burp cloths today, to have on hand for gift giving.
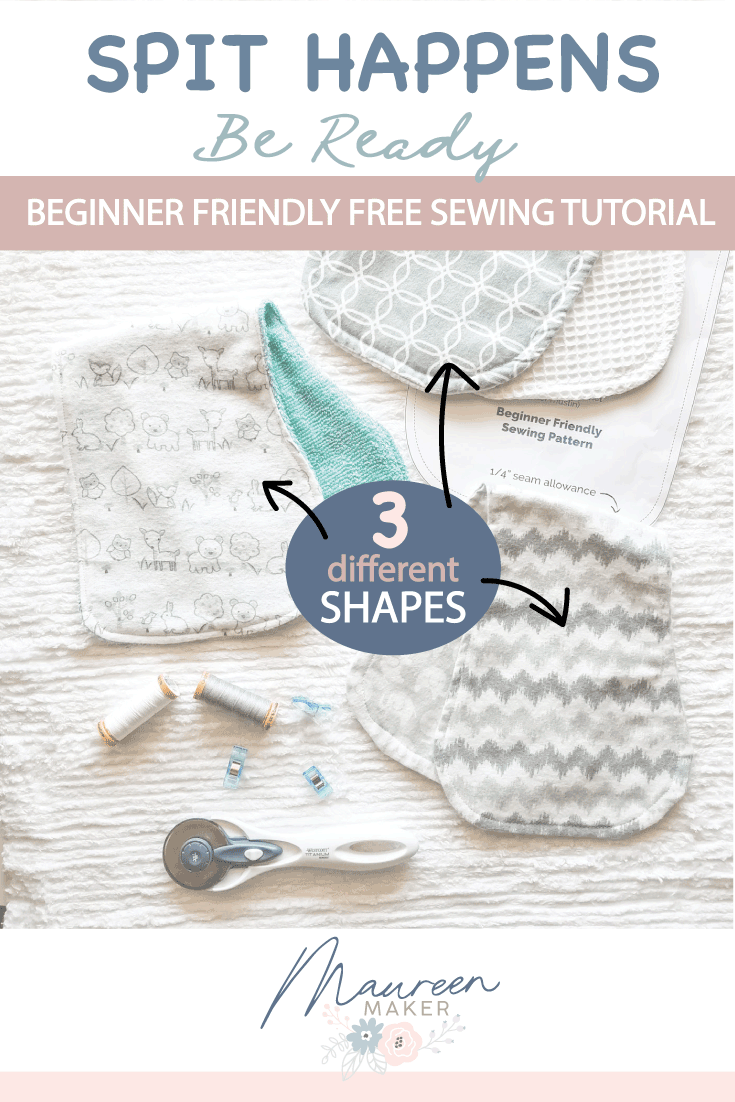
Three different shapes are included in the free pattern download.
Try them all and see which one you prefer!

Perfect Easy Beginner Sewing Project
Never sewn before? No problem. This is a perfect project for a beginner.
Learn to sew with this super easy tutorial!
Download the pattern here for three different styles of my diy burp cloth.
I am confident you can make this.
Detailed instructions are included on the pattern.
New to sewing?
Watch this short, helpful youtube video to get to know your sewing machine before you start.
You can also read your machine manual, but who has time for that:)
PRO TIP:
I have found, from experience, that sewing problems almost always arise from the machine not being threaded properly.
Please take a few minutes to learn how to thread your machine properly and it will save you time later from ripping out mistakes.
Very frustrating!!!
Don’t have a baby to make these for?
Why not make some and donate them to your local daycare center.
You can also do a quick Google search and you will get a long
list of places who are in need of baby items.

What fabric to use?
This burp cloth project uses 100% cotton flannel fabric for the front of the burp cloth and a very absorbent waffle weave fabric for the reverse.
But you can make the back flannel or terrycloth as well.
Any absorbent fabric will work.
For extra absorbency, I sometimes add a 3rd layer.
You can even repurpose a towel for the back.
I design surface patterns for baby products, so I used flannel receiving blankets I designed to make these (since I had them on hand and they are soooo soft!).
Like this one (Affiliate link)
The receiving blanket sets usually come in sets of three or four 28” x 28” receiving blankets, the perfect size to make this project.
What I love about using receiving blanket sets, is that the prints work beautifully together (if the designer did his/her job right ;).
You can find affordable sets of receiving blankets to use for this project wherever you purchase baby products (Walmart, Target, BuyBuy Baby, Amazon, etc)
How much Fabric do I need?
Well that depends on how many burp cloths you want to make.
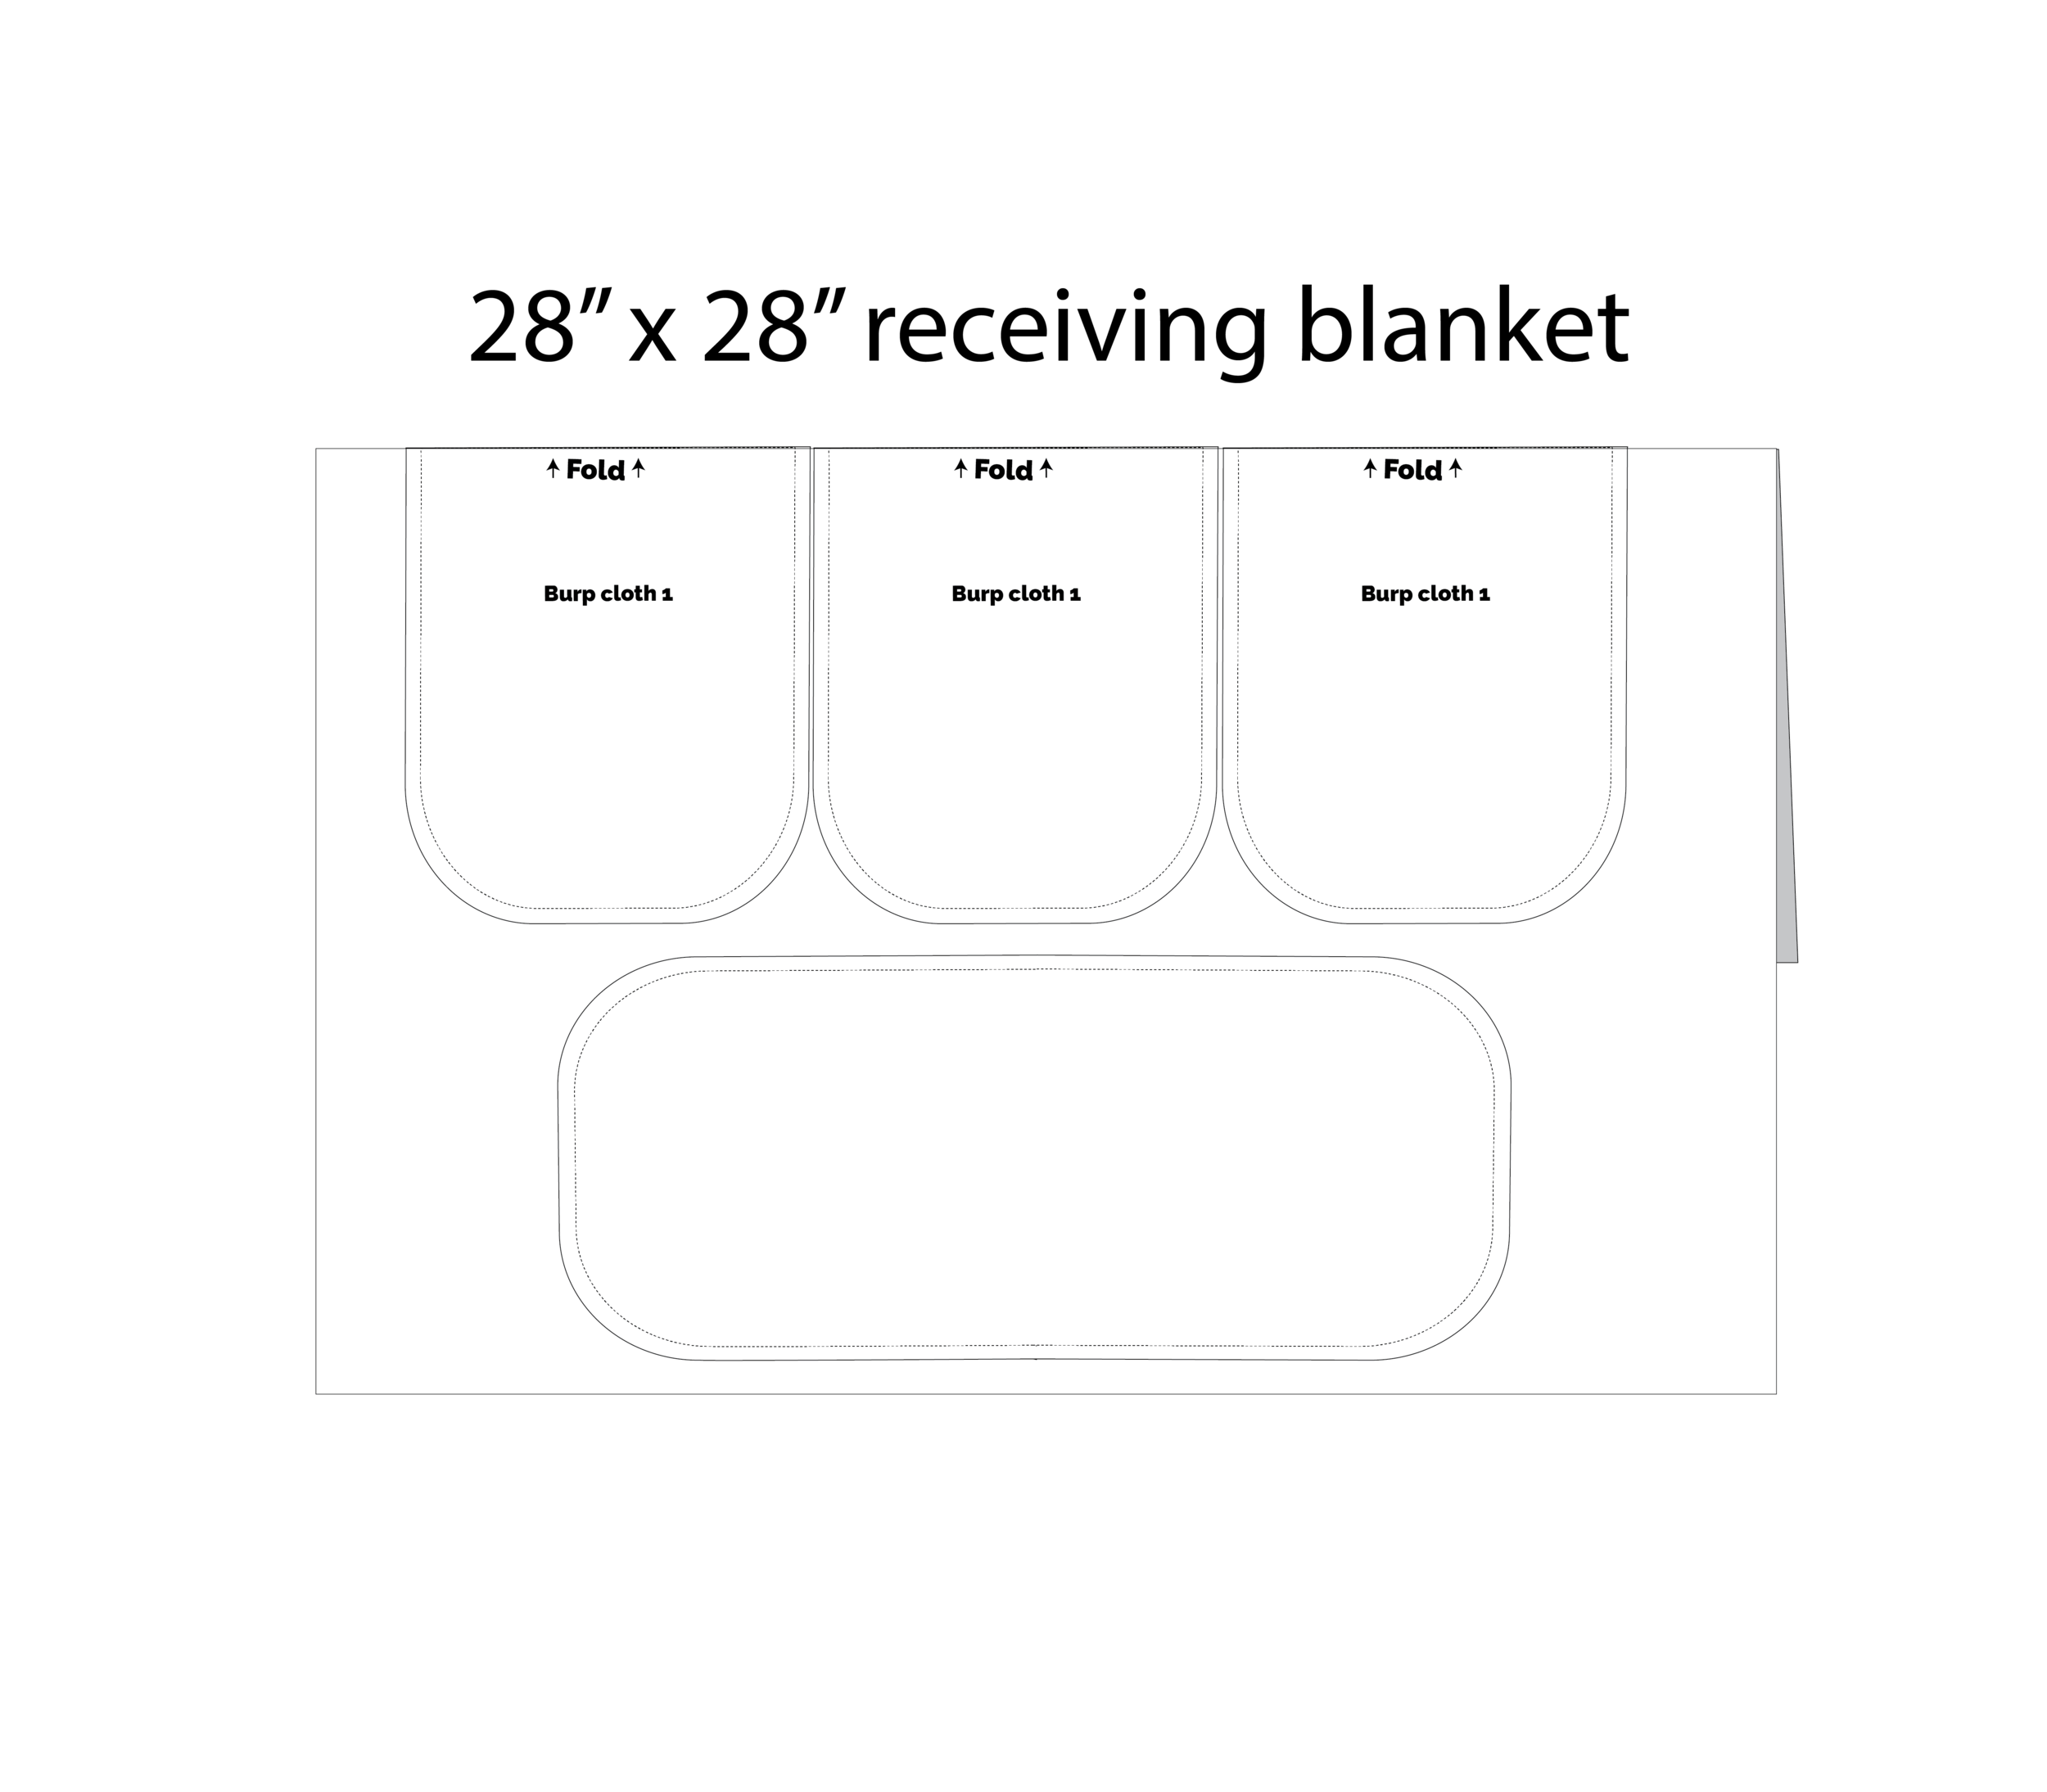
If you decide to go the receiving blanket route, see diagram below.
I was able to fit 4 burp cloth pattern pieces onto a standard 28” x 28” burp cloth.
So that means you can make 2 burp cloths out of one receiving blanket, the front and back will be the same fabric.
For the 4th piece, trace the pattern onto the fabric using a water soluble marker or a pencil.
Flip the pattern piece to complete the shape, since this piece of fabric is not doubled.
You want to maximize your fabric usage to avoid waste:)
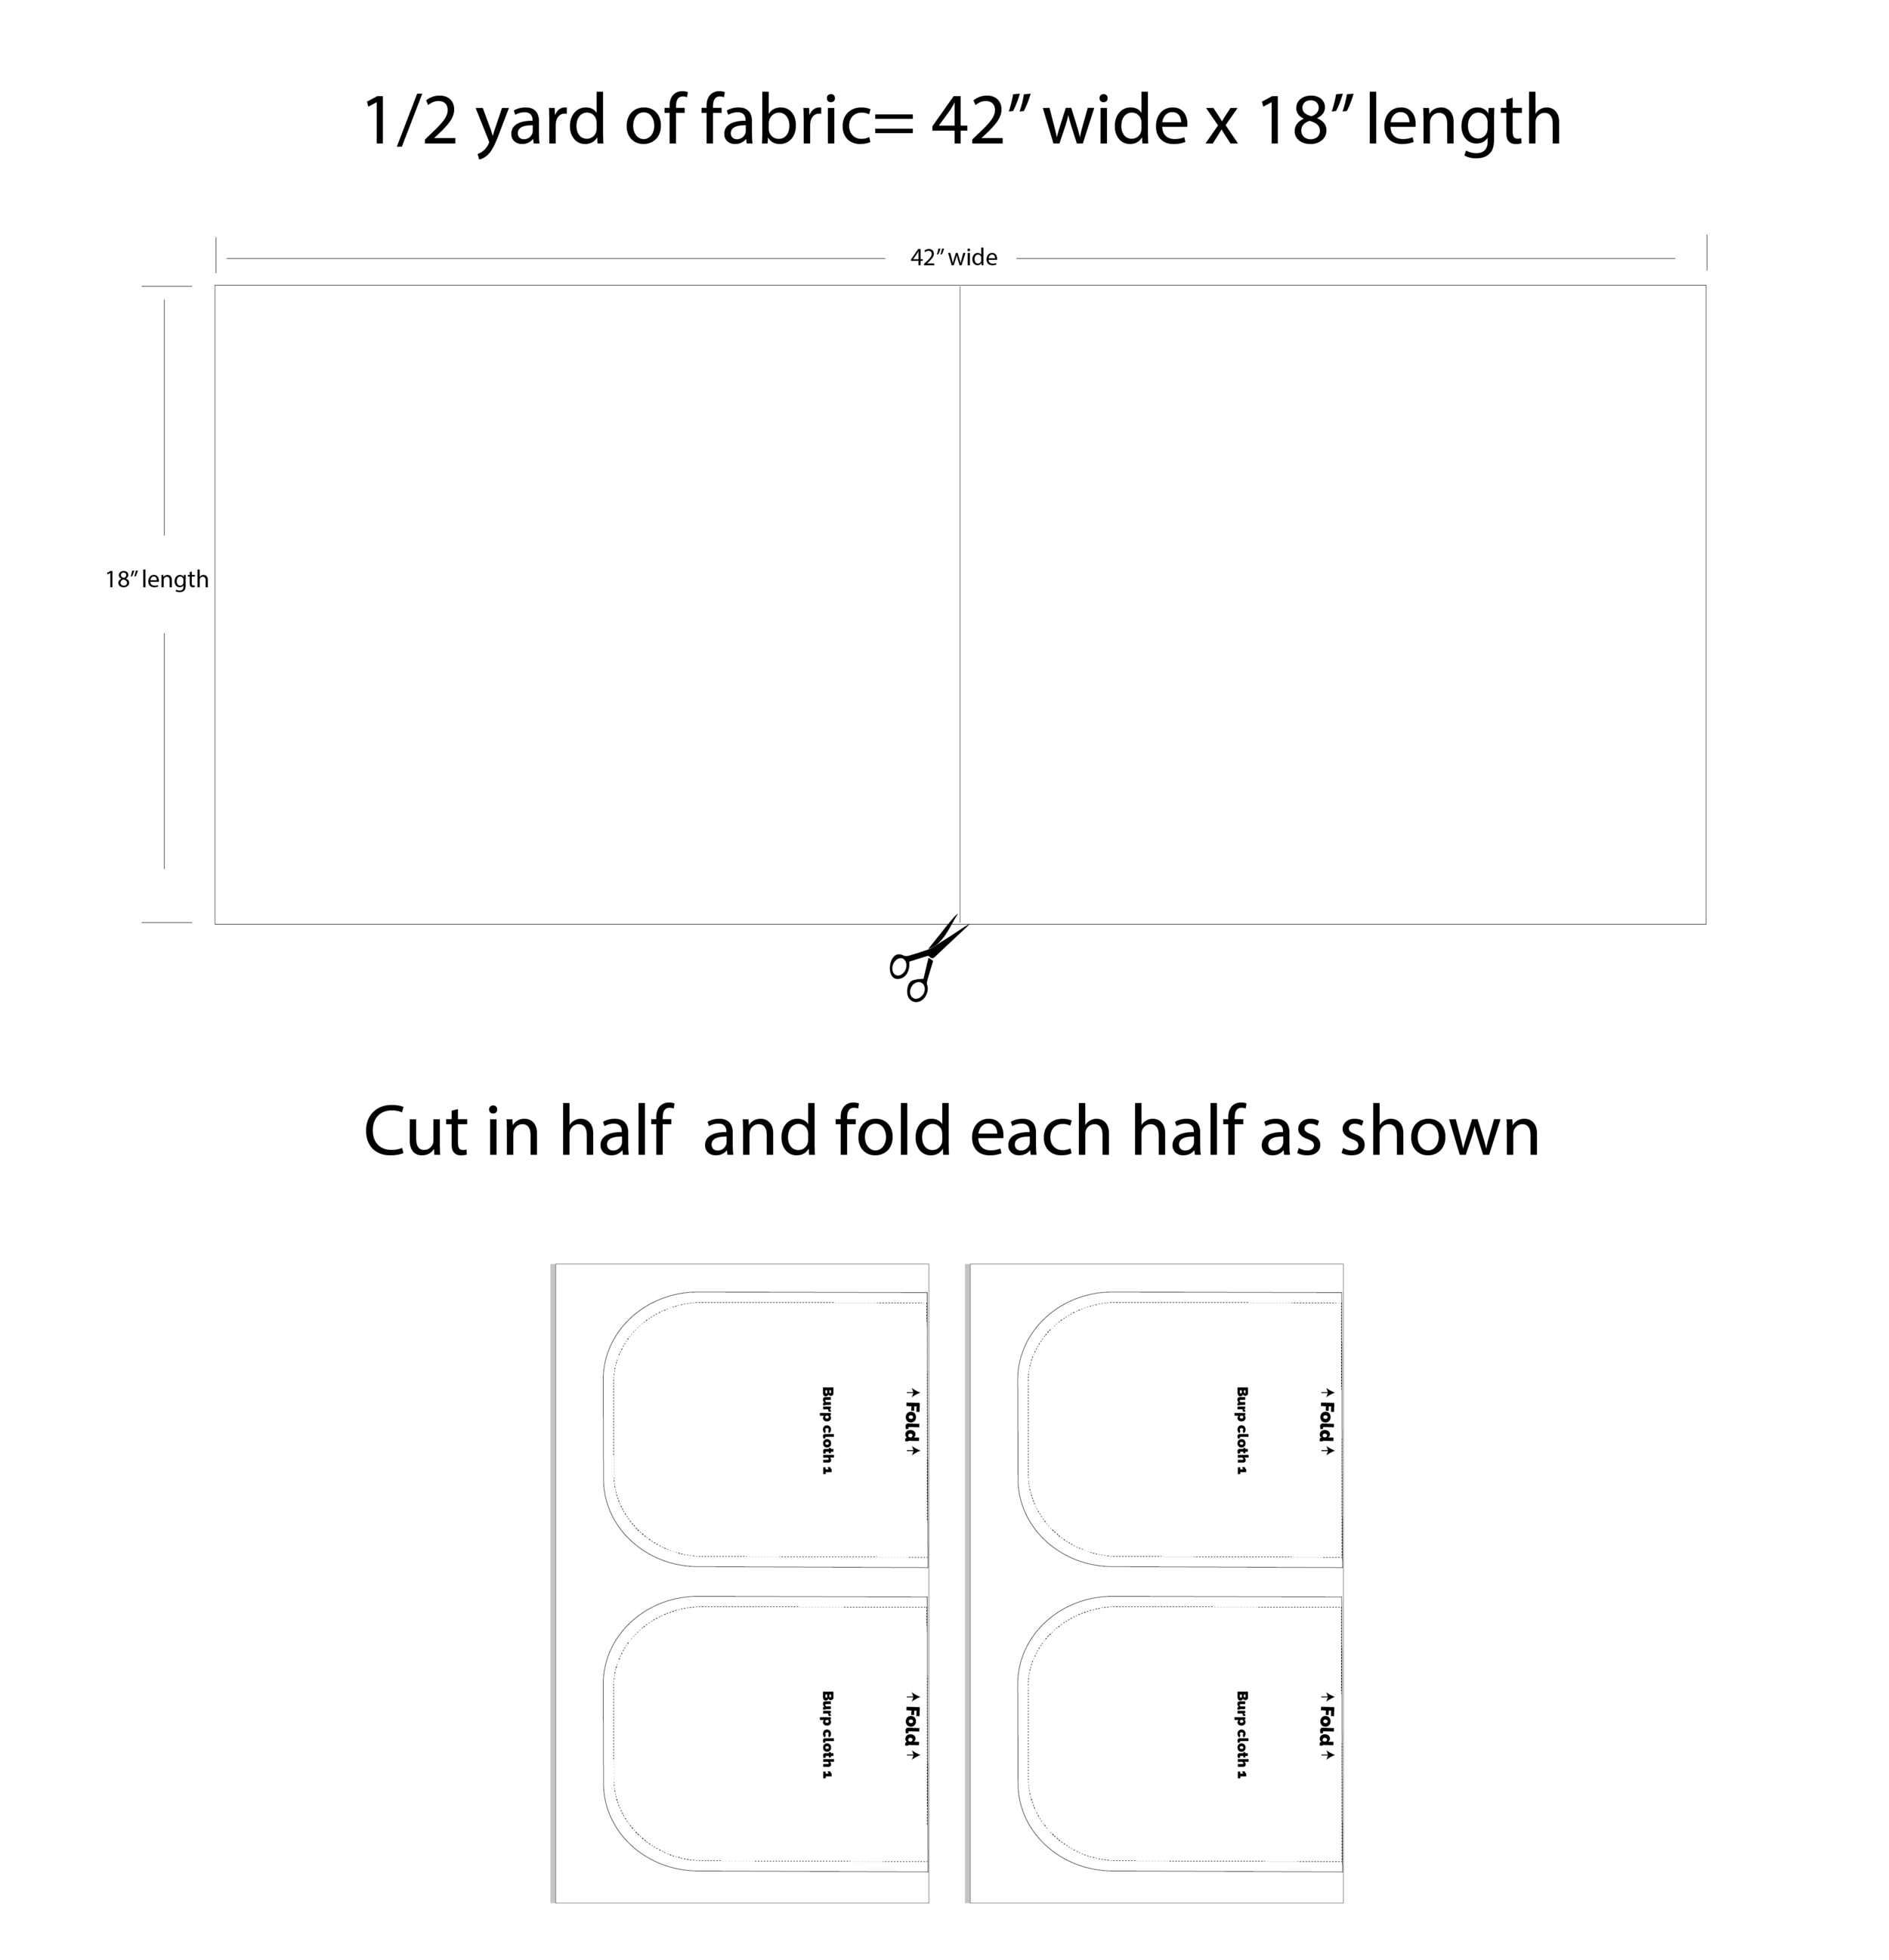
How many yards of fabric will you need?
Most infant flannel fabric is sold in widths of 42”.
I based my estimates on this.
If you look at the diagram below,
I was able to fit 4 burp cloth pattern pieces on 1/2 yard of fabric.
That will make 2 burp cloths (or 4 if you use a different fabric for the back).
I like to use a different fabric for the back, but do whatever you prefer.
LET’S MAKE THIS !
Detailed instructions are included in the pattern download.
You will receive a password to my download vault when you sign up, where I keep all of my freebies.
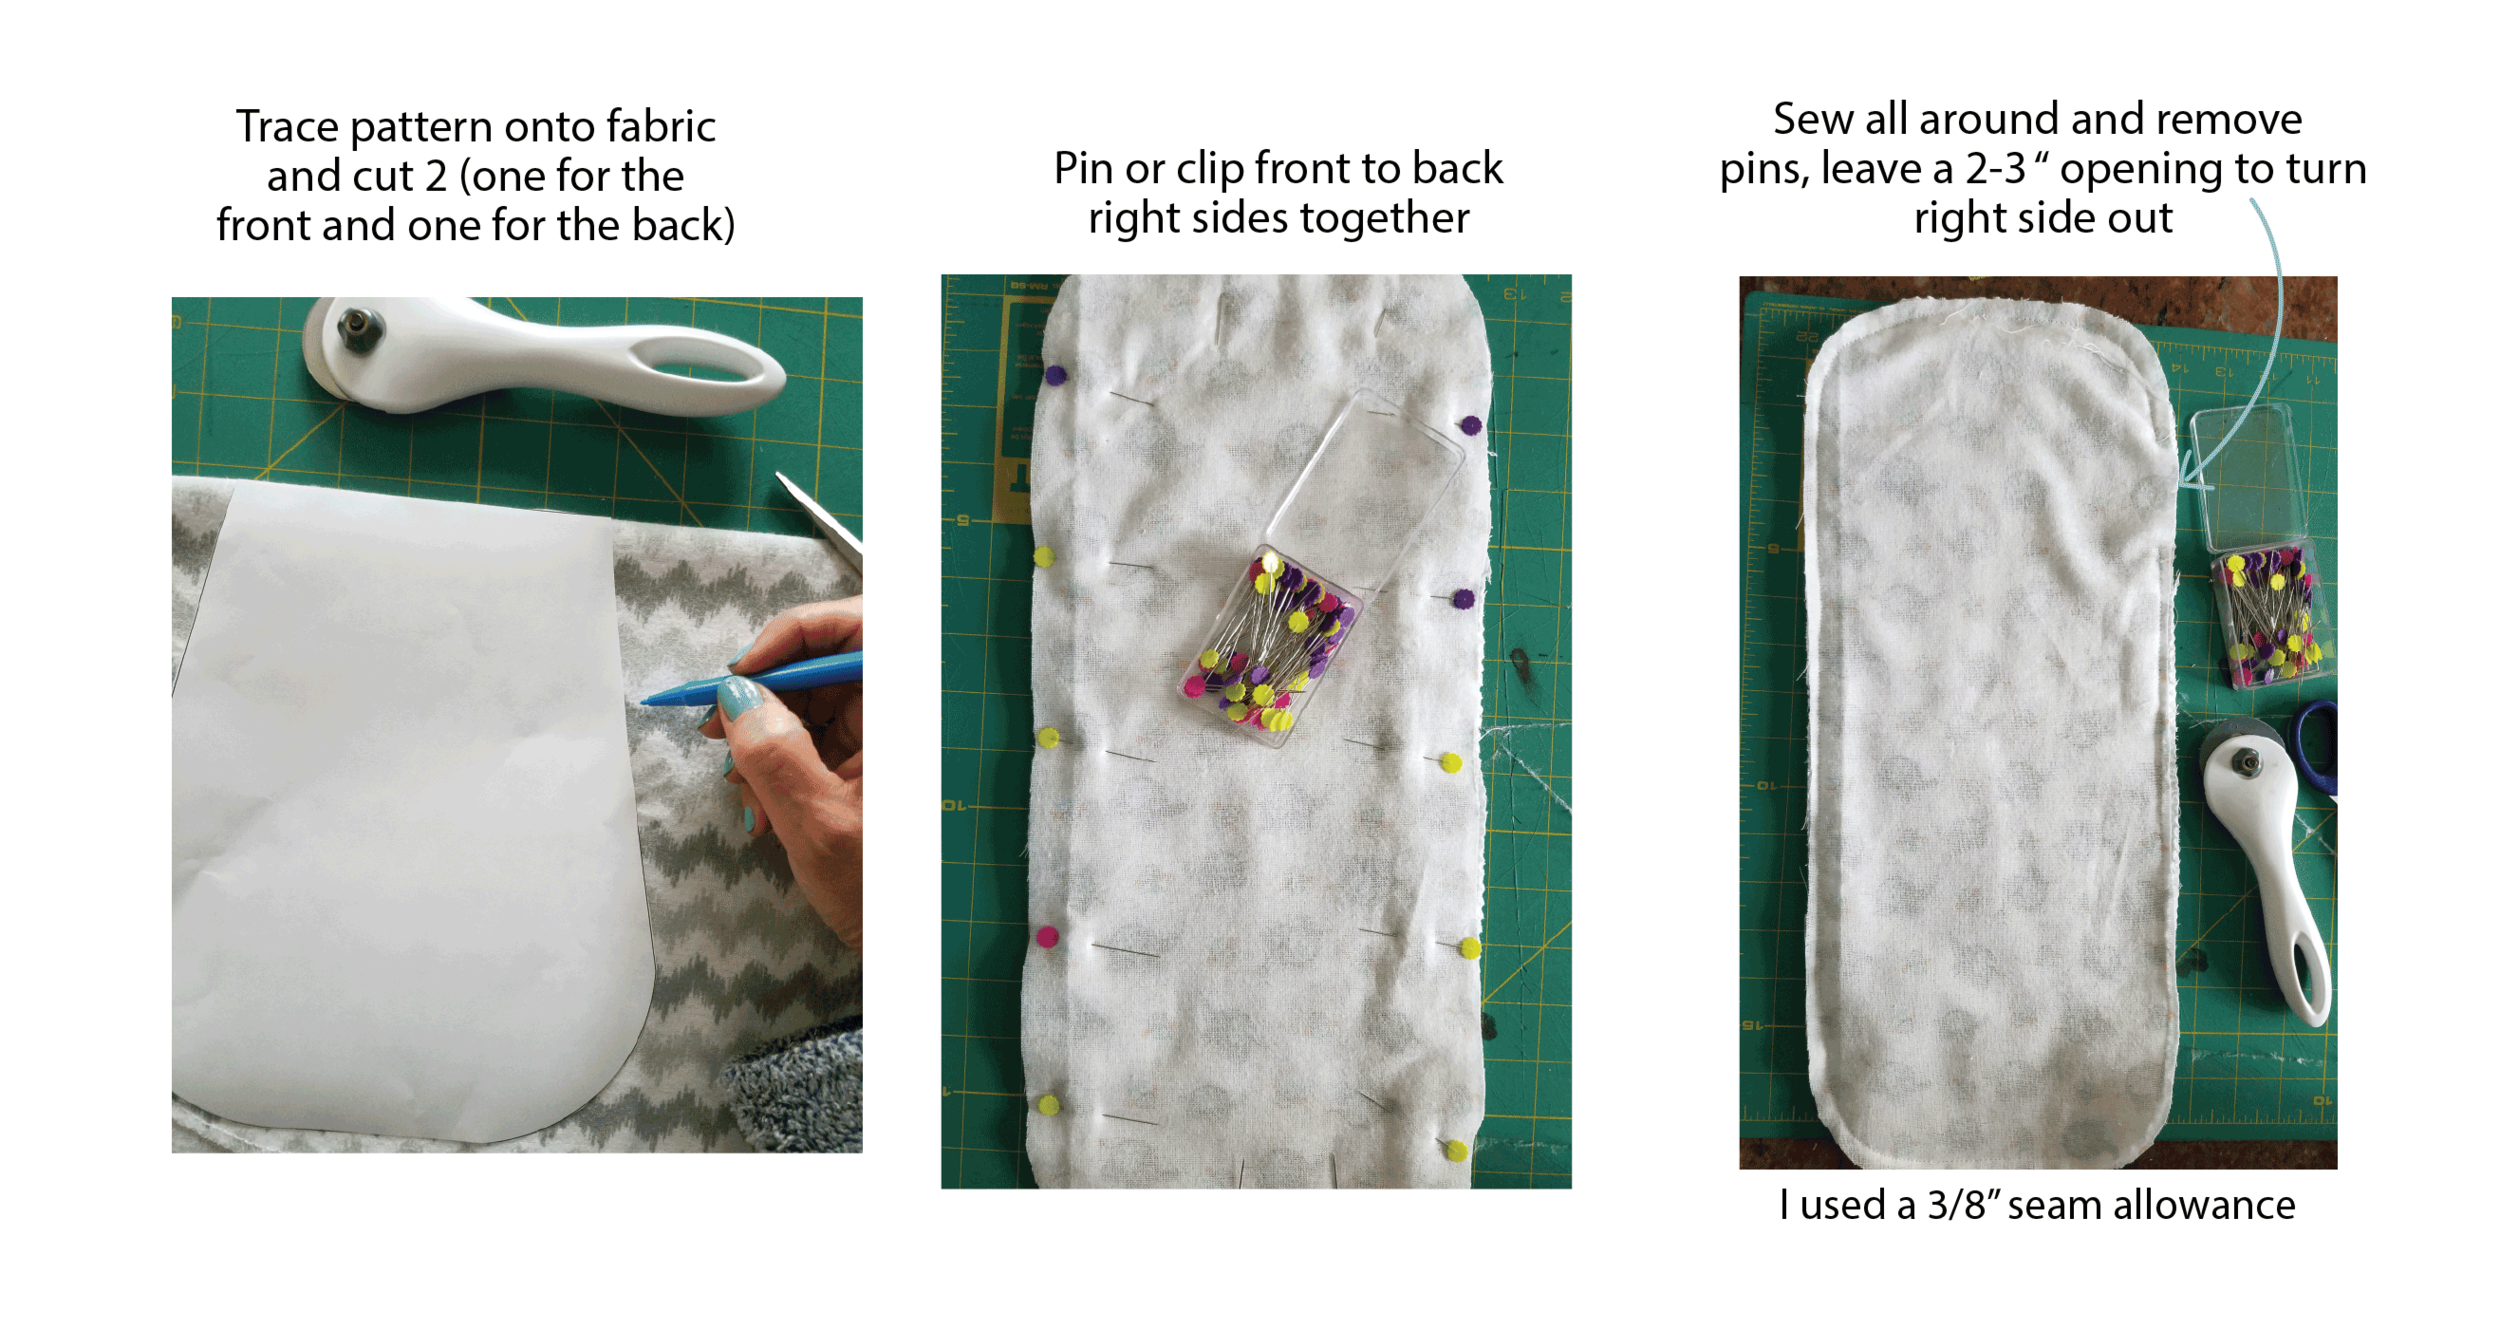
1. Print and cut out chosen burp cloth pattern.
2. Fold fabric and pin pattern to fabric lining up on fold as shown.
3. Cut 2 (one for the front and one for the back, you may cut 3 if you want extra absorbency)
4. Place right sides together and pin or clip together.
5. Sew all around leaving a 2-3 “ opening to turn right-side out.
Remove pins as you go and make sure not to sew over pins or you make break your machine needle.
6. Cut out notches in rounded corners to reduce the bulk when you turn this right side out.
7. Turn right side out, press and top stitch all round using 1/4” seam allowance, making sure to close the open seam.
That’s it! You did it!!!!
I knew you could! Easy, right?
Here are a few photos so you can see the process:
Watch how fast this comes together:
I hope you enjoyed this tutorial!
Let me know how it turned out.
Tag me on Instagram @maureenmaker
I can’t wait to see yours!
If you liked this tutorial, you might also like my dog bandana tutorial.
Or this dog bandana tutorial uses less fabric but has added snaps for easy on and off.
It’s super cute and very easy to make !
My zero waste reusable bowl cover tutorial is also easy to make and great to give as a gift.
You will feel so good helping someone to reduce their reliance on single use plastic.
I also have some sweet coloring pages you can download and print for free here.
They will keep the kids busy while you sew:)
Happy Making