
Faux Real Orange Peel Quilt Pattern
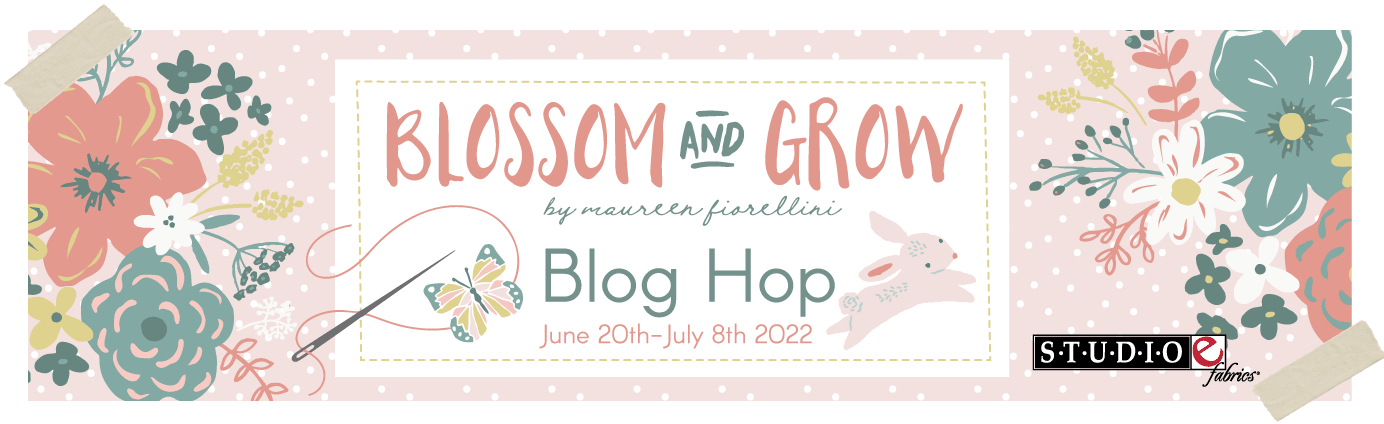
BLOSSOM AND GROW Sewing BLOG HOP
Hello everyone and welcome to day 1 of the Blossom and Grow Blog Hop!!
I’m Maureen and I am your host for the hop.
Over the next 2 weeks, talented makers have volunteered to bring you inspiring sewing projects using my first licensed fabric collection; Blossom and Grow with Studio E Fabrics.
I can’t wait to share them with you.
Along the way there will be giveaways from generous sponsors, so make sure you pop in every day to see what we are up to.
The full schedule of projects can be found here. Each maker’s link to their project will become active on the date listed. Bookmark the schedule and come back each day to be inspired.
I’m so glad you decided to join me! Let’s get started…
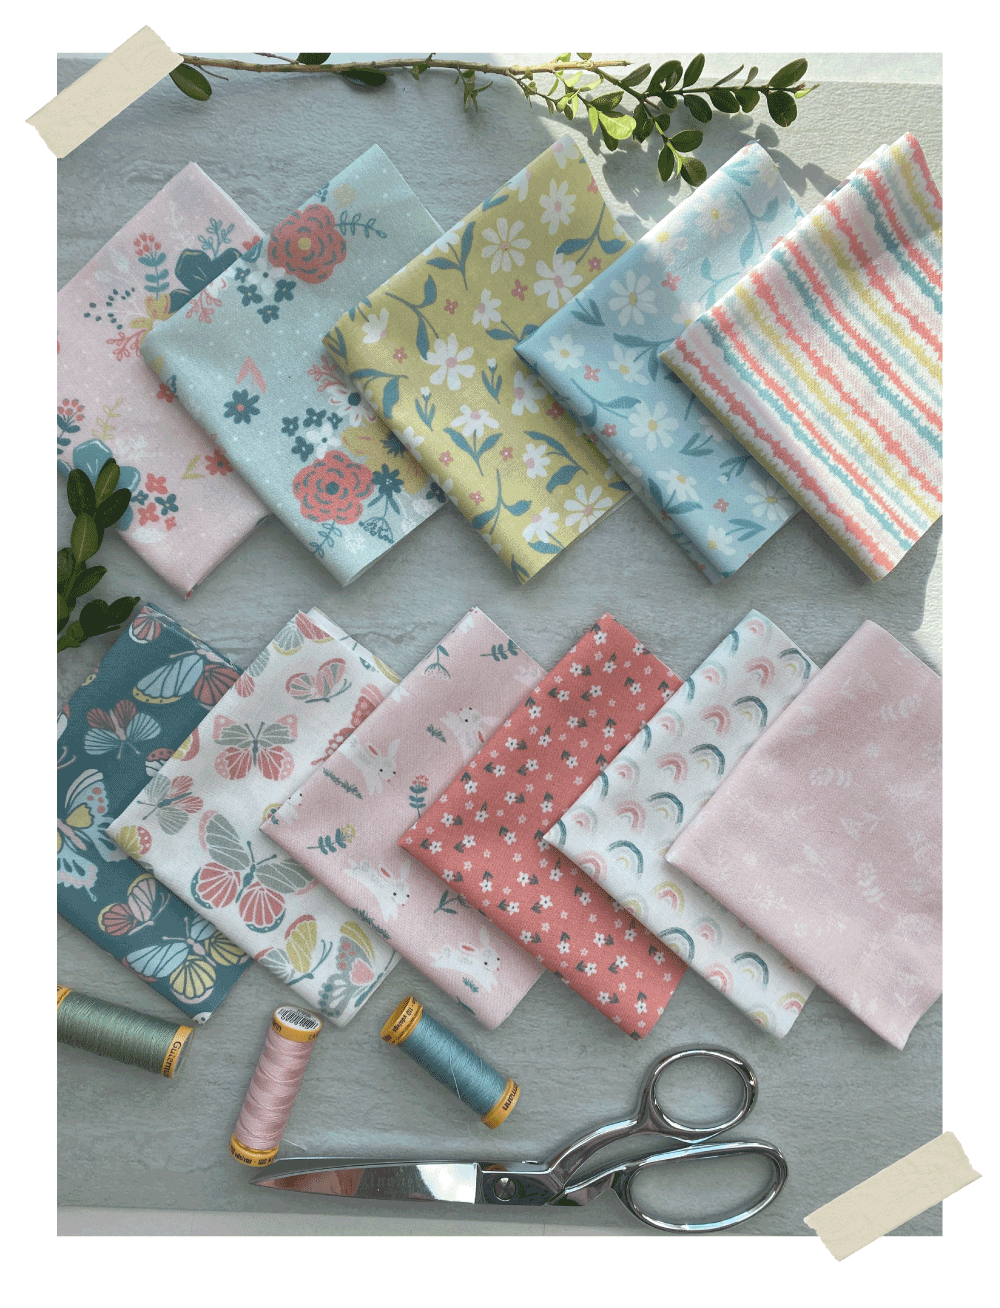
THE COLLECTION
THE INSPIRATION
Blossom and Grow was inspired by the little things we take for granted, a butterfly that visits our garden for a short while, a rainbow after a sunshower, flowers that bloom for only a few days, and children who grow up too fast.
This collection is filled with positive messages, sweet bunnies and florals in soft, calming colors.
Perfect for the young, and young at heart.
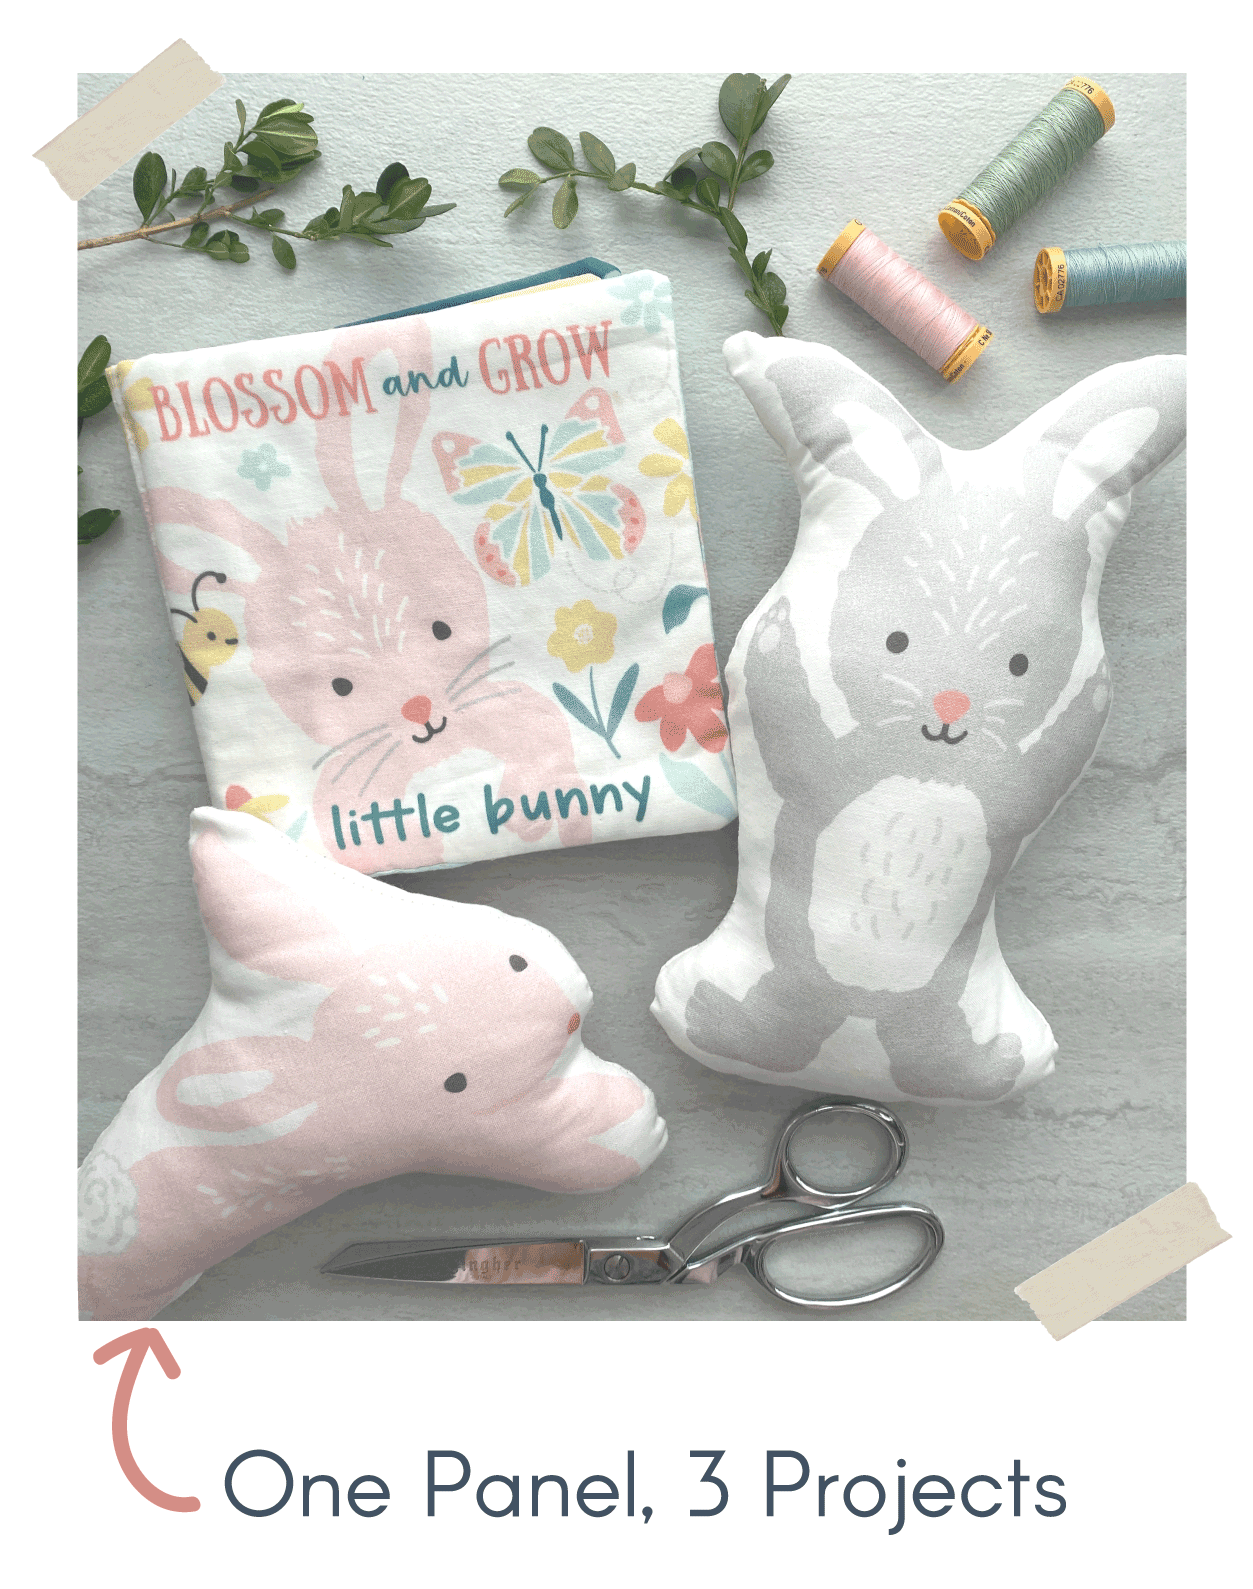
There is a fabric book panel that includes 2 soft bunny toys, such a nice gift to give.
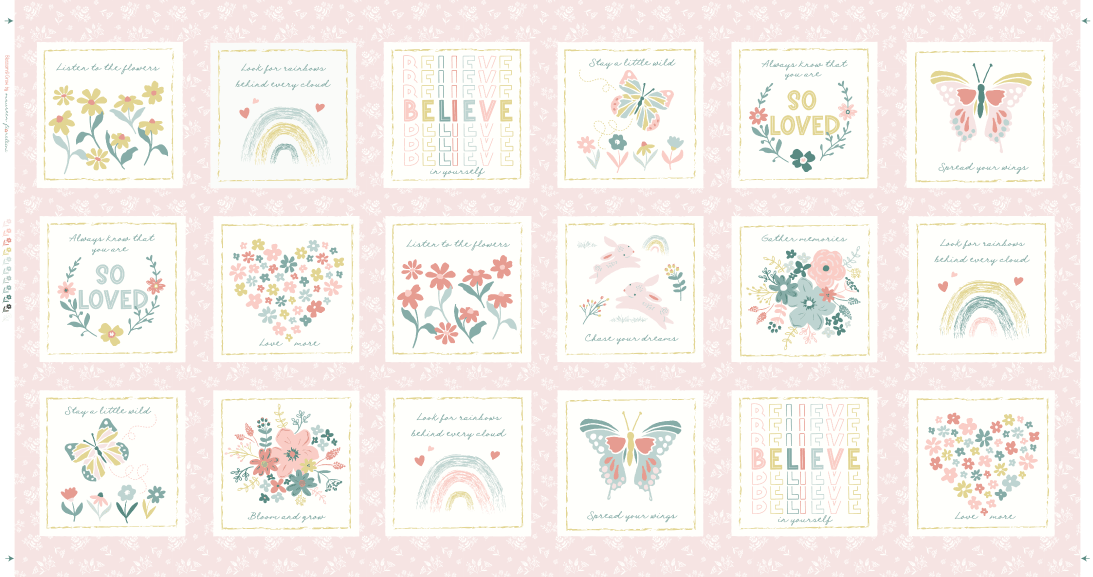
POSITIVE SENTIMENTS PANEL
I just love positive messages, so the Sentiments panel is one of my favorites in this group.
THE ORANGE PEEL YARDAGE
I designed this one out of a desire to provide a little help for beginner quilters, like me.
I actually made my first quilt using this as the front of my quilt, as you can see in the photo. Doesn’t it look pieced? Fooled you!
Such a great project to dip your toes into the world of quilting.
Today’s project is this quilt, I call it “ Faux Real Orange Peel” .
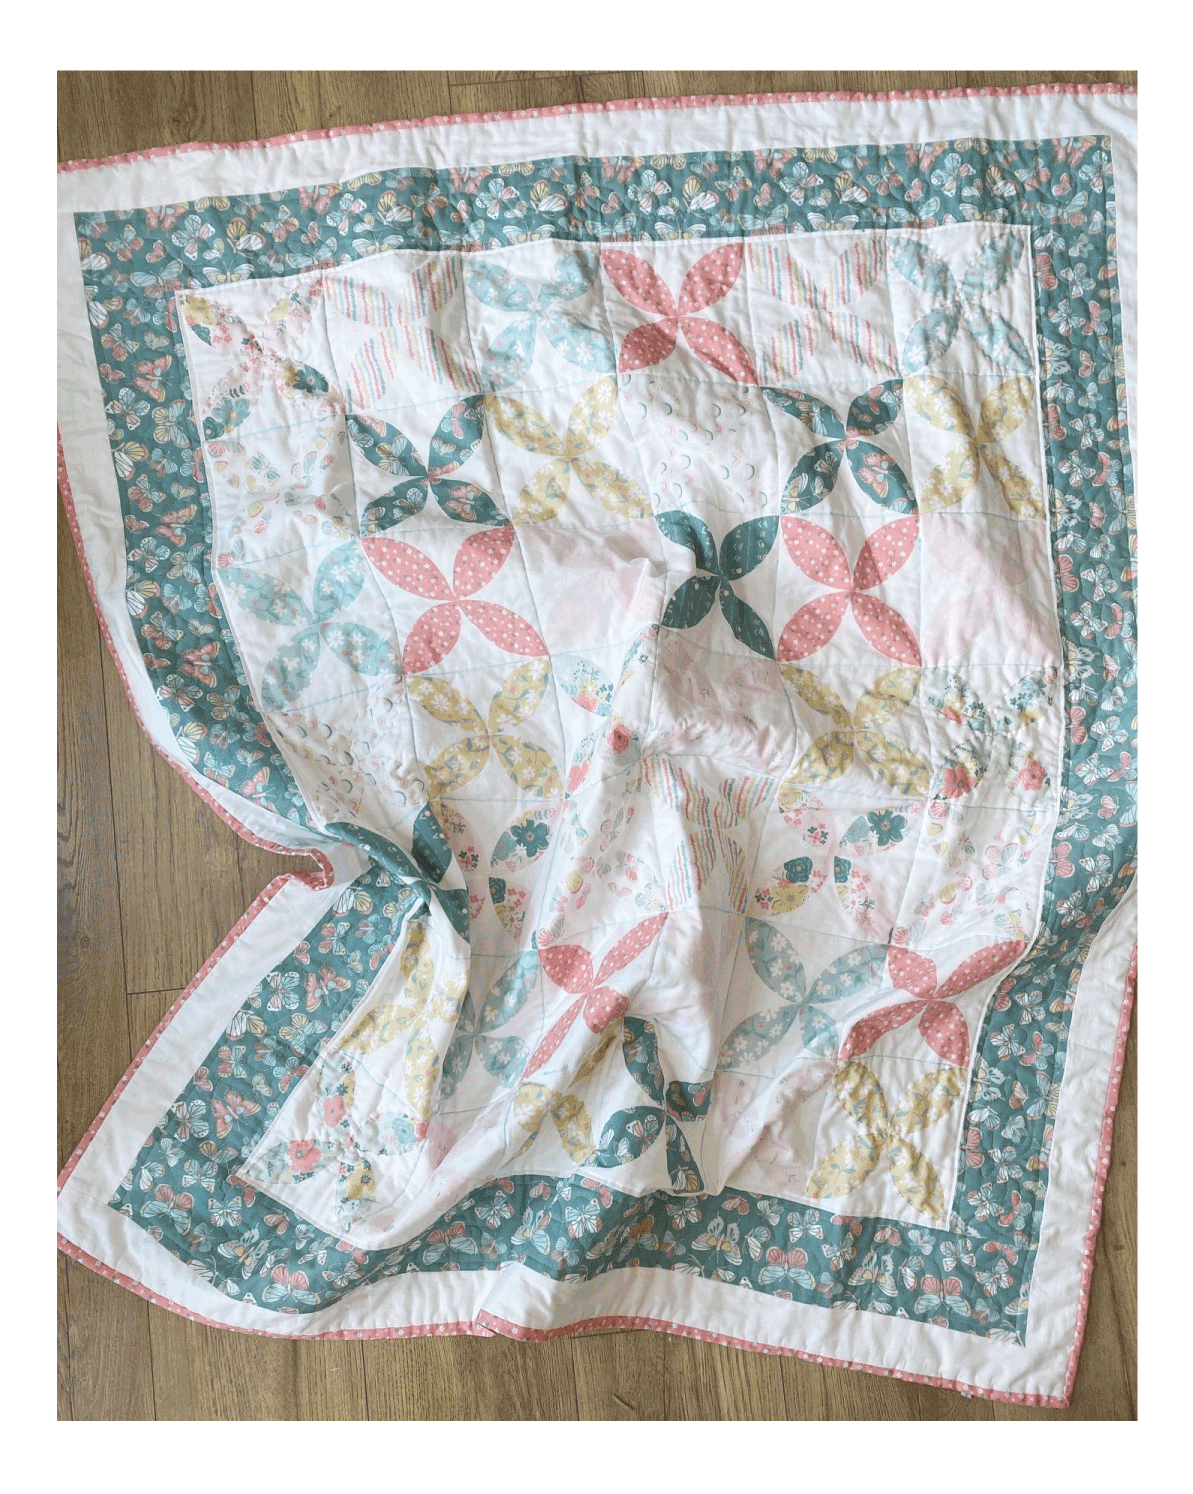
FAUX REAL ORANGE PEEL QUILT
The great thing about this pattern, is that you can easily adjust the measurements and make it any size you like.
I was going for a lap size blanket, I felt this size is pretty useful. Plus it wouldn’t take too long to make.
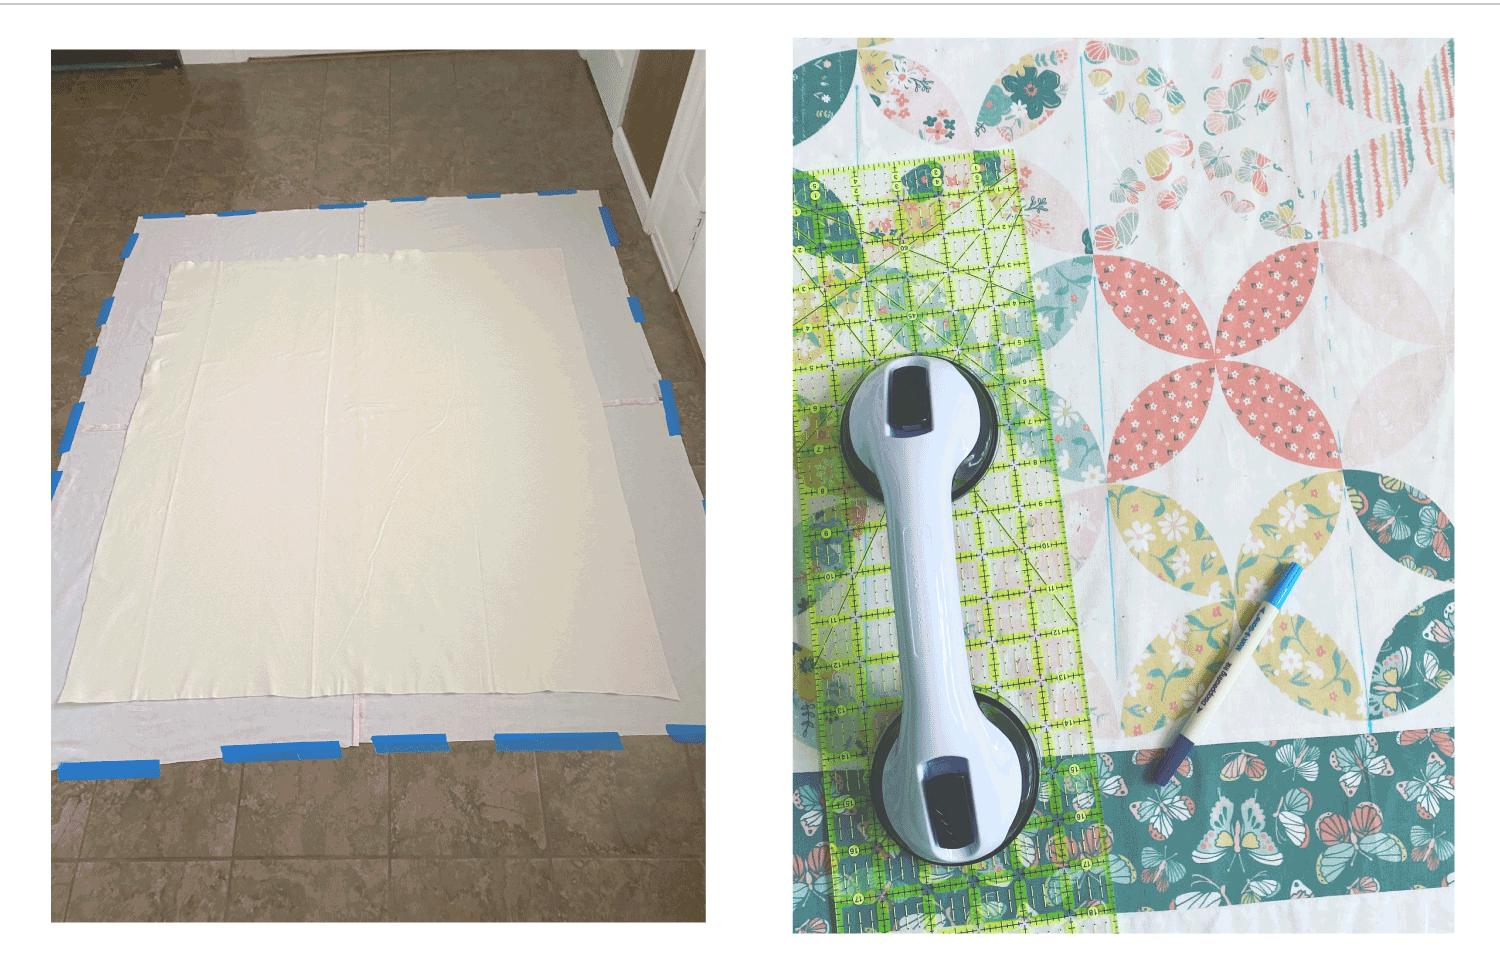
Just make sure when you cut out your Orange peel fabric for the center panel, you allow for the 1/4” seam allowance beyond the orange peel printed pieces.
This way you achieve the “faux” pieced look. (see the diagram below)
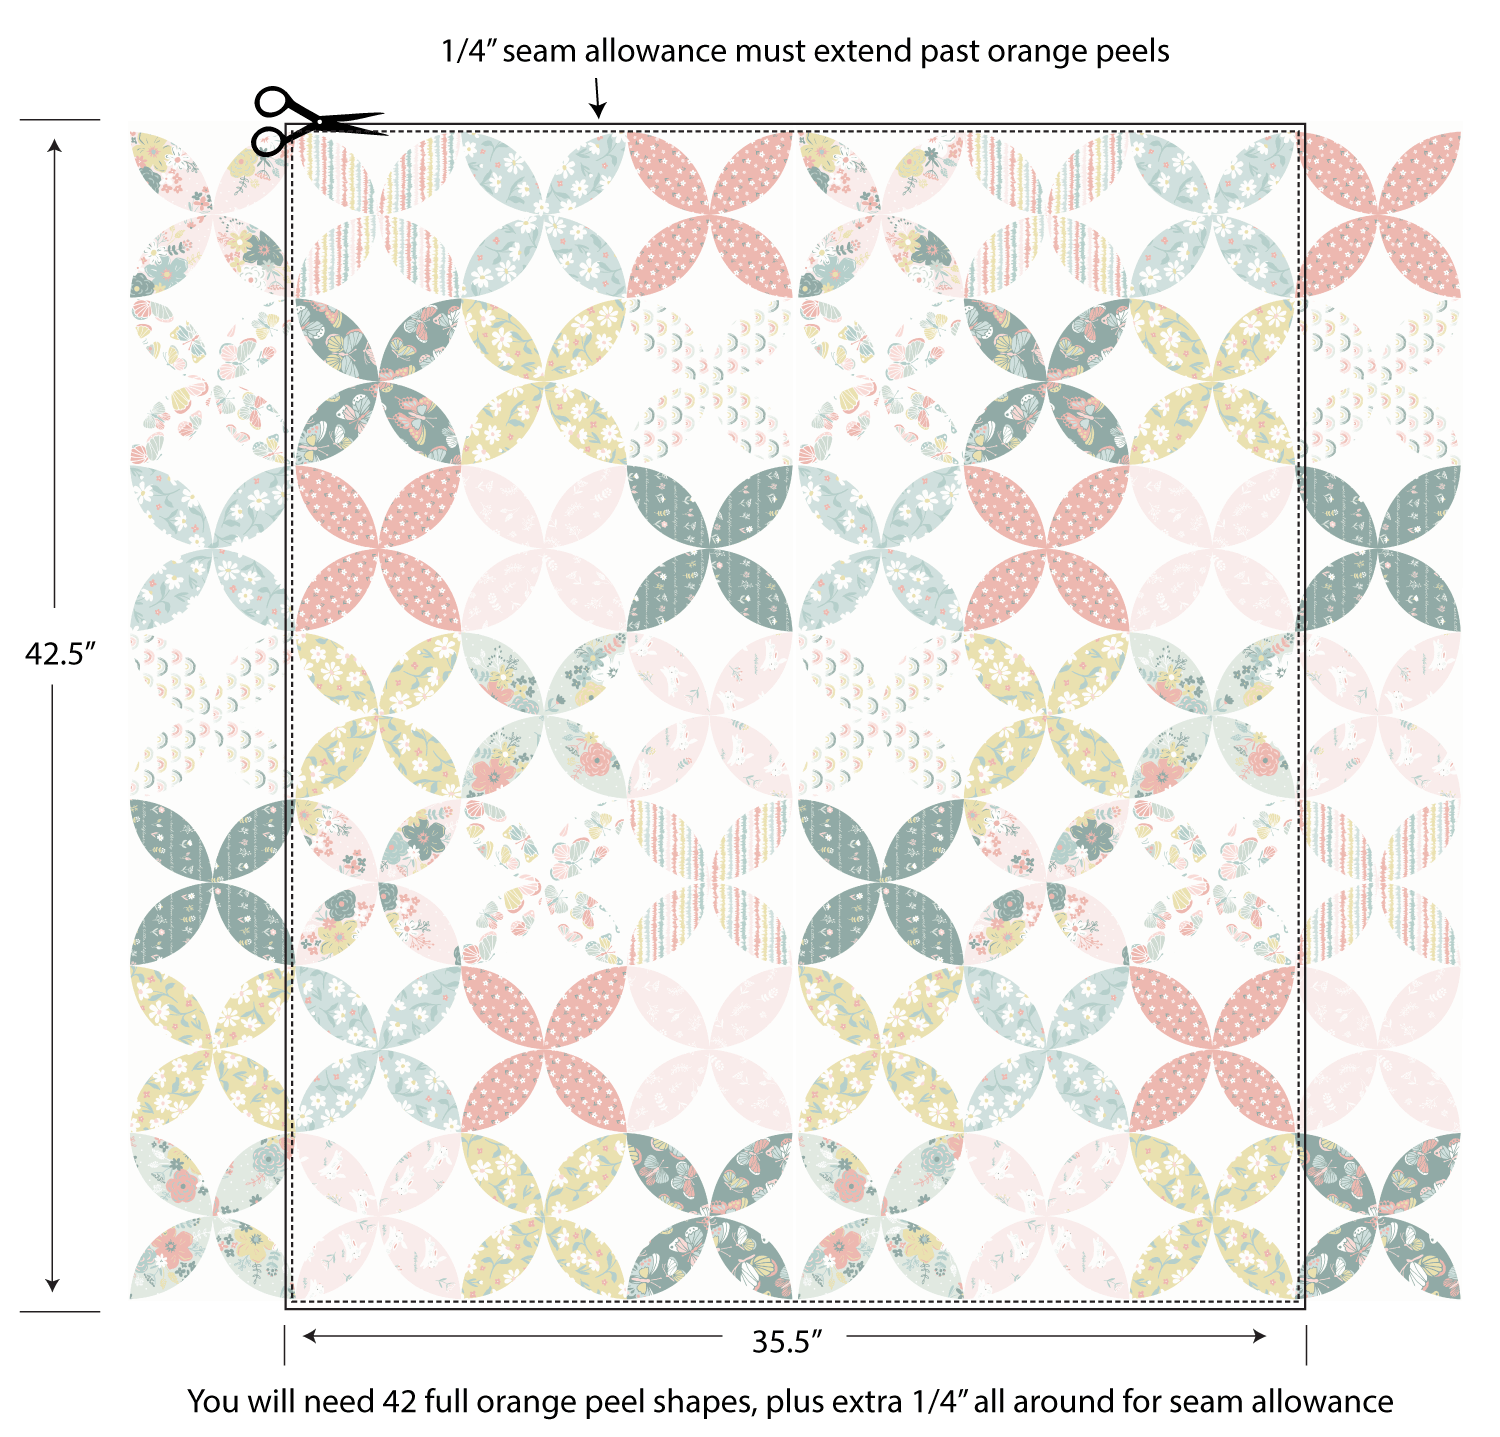
I was able to make one yard of the Orange Peel yardage work for this. But you must count the number of full Orange Peel shapes before cutting your fabric to make sure you have 42 orange peel shapes, plus 1/4” seam allowance all around.
Please note, you may need slightly more than a yard.
FABRIC NEEDED:
6098-21 Multi | Blossom & Grow Orange Peel fabric 42.5” Wide x 35.5” height, to include 42 full Orange Peel shapes, plus 1/4” seam allowance all around.
I was able to make one yard of the Orange Peel yardage work for this. But you must count the number of full Orange Peel shapes before cutting your fabric to make sure you have 42 orange peel shapes, plus 1/4” seam allowance all around.
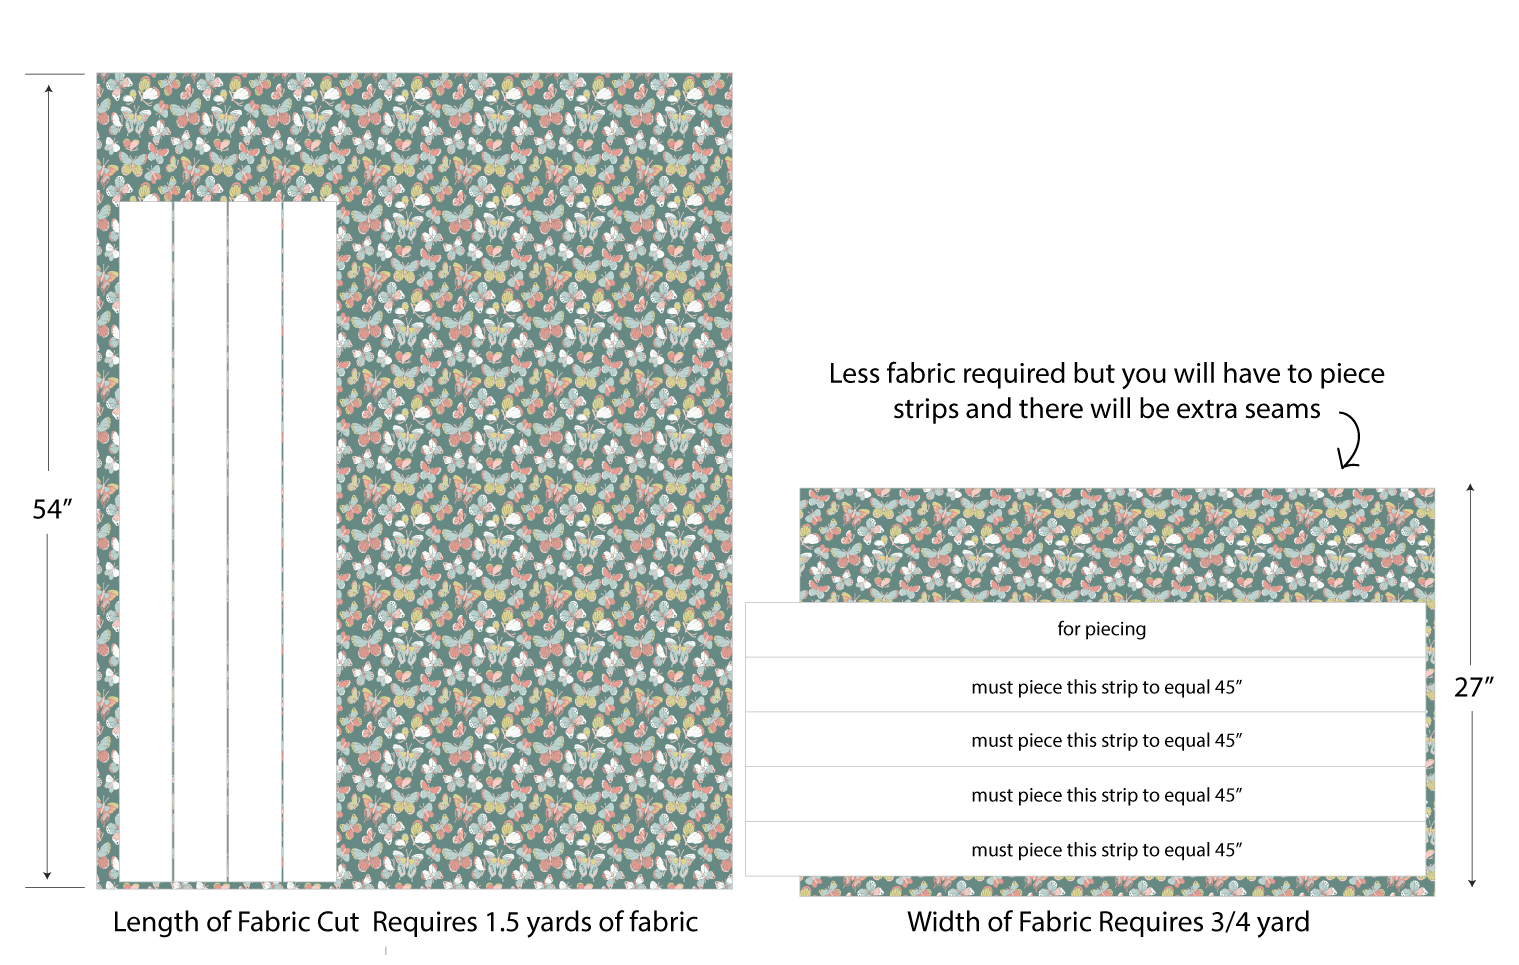
6095-77 Teal | Blossom & Grow | Butterfly Toss for the 3.5” sashing strips. (4) strips each measuring 3.5”x 45”.
You will need 1.5 yards if you are cutting LOF (Length of Fabric) strips.
You will need .75 yards if you are cutting WOF (Width of Fabric).
White sashing strips. (2) strips 2.5” x 50”, and (2) strips 2.5” x 48”.
You will need 1.5 yards if you are cutting LOF (Length of Fabric) strips.
You will need .75 yards if you are cutting WOF (Width of Fabric).
1/2 yard of 6100-22 Pink | Blossom & Grow | Tiny Floral Toss for binding
53” x 60” backing for quilt. I used (2) 1.5 yard cuts of the bunny fabric 6096-22 Pink || Blossom & Grow.
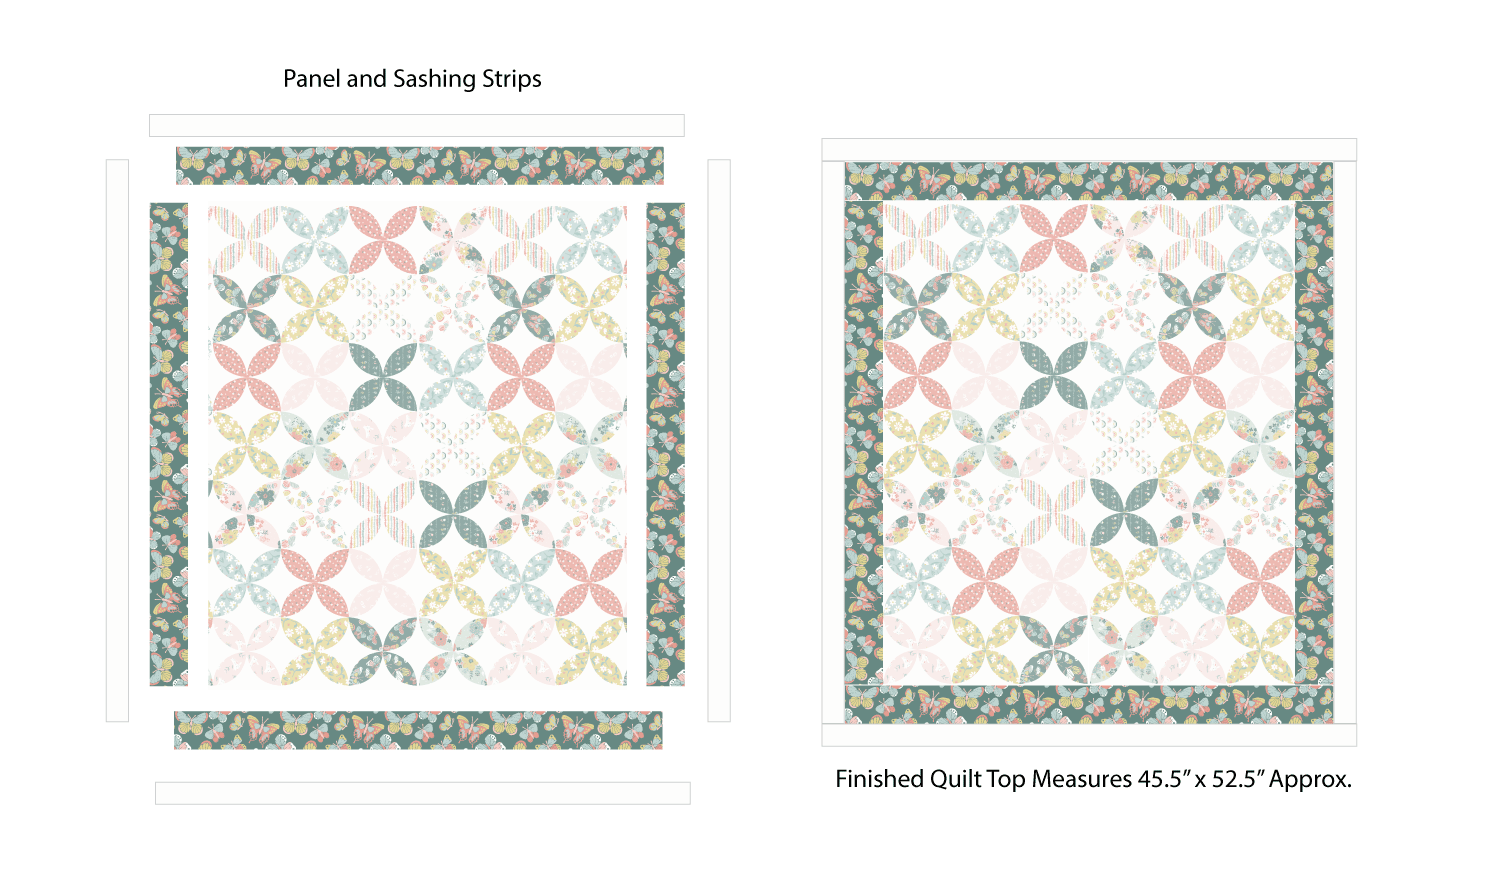
ATTACHING SASHING STRIPS
Attach the teal butterfly side strips first, trim strips flush with the Orange Peel Panel, then attach the top and bottom strips and trim.
Repeat this process to attach the white sashing strips.
Press all seams to the dark side. (I love saying that😜)
The finished quilt top is approximately 45.5” x 52.5”.
Quilt and bind as desired.
TIP FOR CUTTING SASHING STRIPS
You can use less fabric and cut your strips from WOF (width of fabric), but you will have to piece the strips and you will have extra seams.
I cut my butterfly strips from 1.5 yards LOF (length of fabric) because I wanted less seams. This method requires more fabric as shown in the diagram below. Save the extra for another project.
For the white sashing I also cut LOF (length of Fabric), it required 1.5 yards of fabric with plenty left over for another project. White always is useful to have on hand.
PUTTING IT ALL TOGETHER
At this stage, I needed a little more direction, so I watched Melanie Hams “Your First Quilt” series. I miss Melanie so much 😢.
I highly recommend you watch it or take a beginner’s quilt class.
After completing this quilt, I enrolled in Brittany Lloyd’s Beginner’s Quilt Academy,
and I feel like I have progressed to confident beginner stage after taking her class.
I am a member of Amazon affiliate program and I earn a small percent of whatever
you purchase from Amazon through my links at no extra cost to you.
I only recommend products I actually use, pinky promise.
I hope you’re hungry, because now it’s time to MAKE A QUILT SANDWICH😜
If you do not have extra wide fabric for the back of your quilt, you will have to piece large pieces of fabric together, that is what I did.
I used the bunny fabric for the back (don’t stress over matching up the fabric repeat pattern. It will not be noticeable).
The tutorials I followed said to add 4” all around the quilt top for your quilt batting and backing. This is to allow for shifting when quilting.
I think 4” was too much, there was a lot of waste. I am saving it for another project though.
All things considered, (adding the extra 4” all around because that is what the experts say to do) you will need a piece of fabric that measures 53” x 60” to back your quilt.
Let’s figure out how to get there. Quilting cotton is 40-42 inches wide. If you purchase (2) 1.5 yard cuts of your backing fabric that is 42” wide, then, piece them together selvage to selvage, you will have one large piece of fabric that is approximately 83” x 54”, after piecing. Remember, you only need 53” x 60”.
This pieced back is now 23 inches more than you need for the height. At this point I understood why extra wide fabric is made for backing quilts.
You will want your seam centered in the middle of the back of the quilt, so there will be an 11.5” x 54” extra piece of fabric on both the top and bottom. Save it for another project.
THE PROCESS
Lay your pieced backing fabric face down on the floor. Use painters tape on all sides to secure and smooth out so there are no wrinkles. It should be taught but not stretched.
Place your batting on top. I used Quilter’s Dream 100% cotton light batting in the throw size 60”x60”
Lastly, place your pieced quilt top on top of batting right side facing up.
Mark your quilting lines before pinning. I used a water soluble marker and my longest ruler.
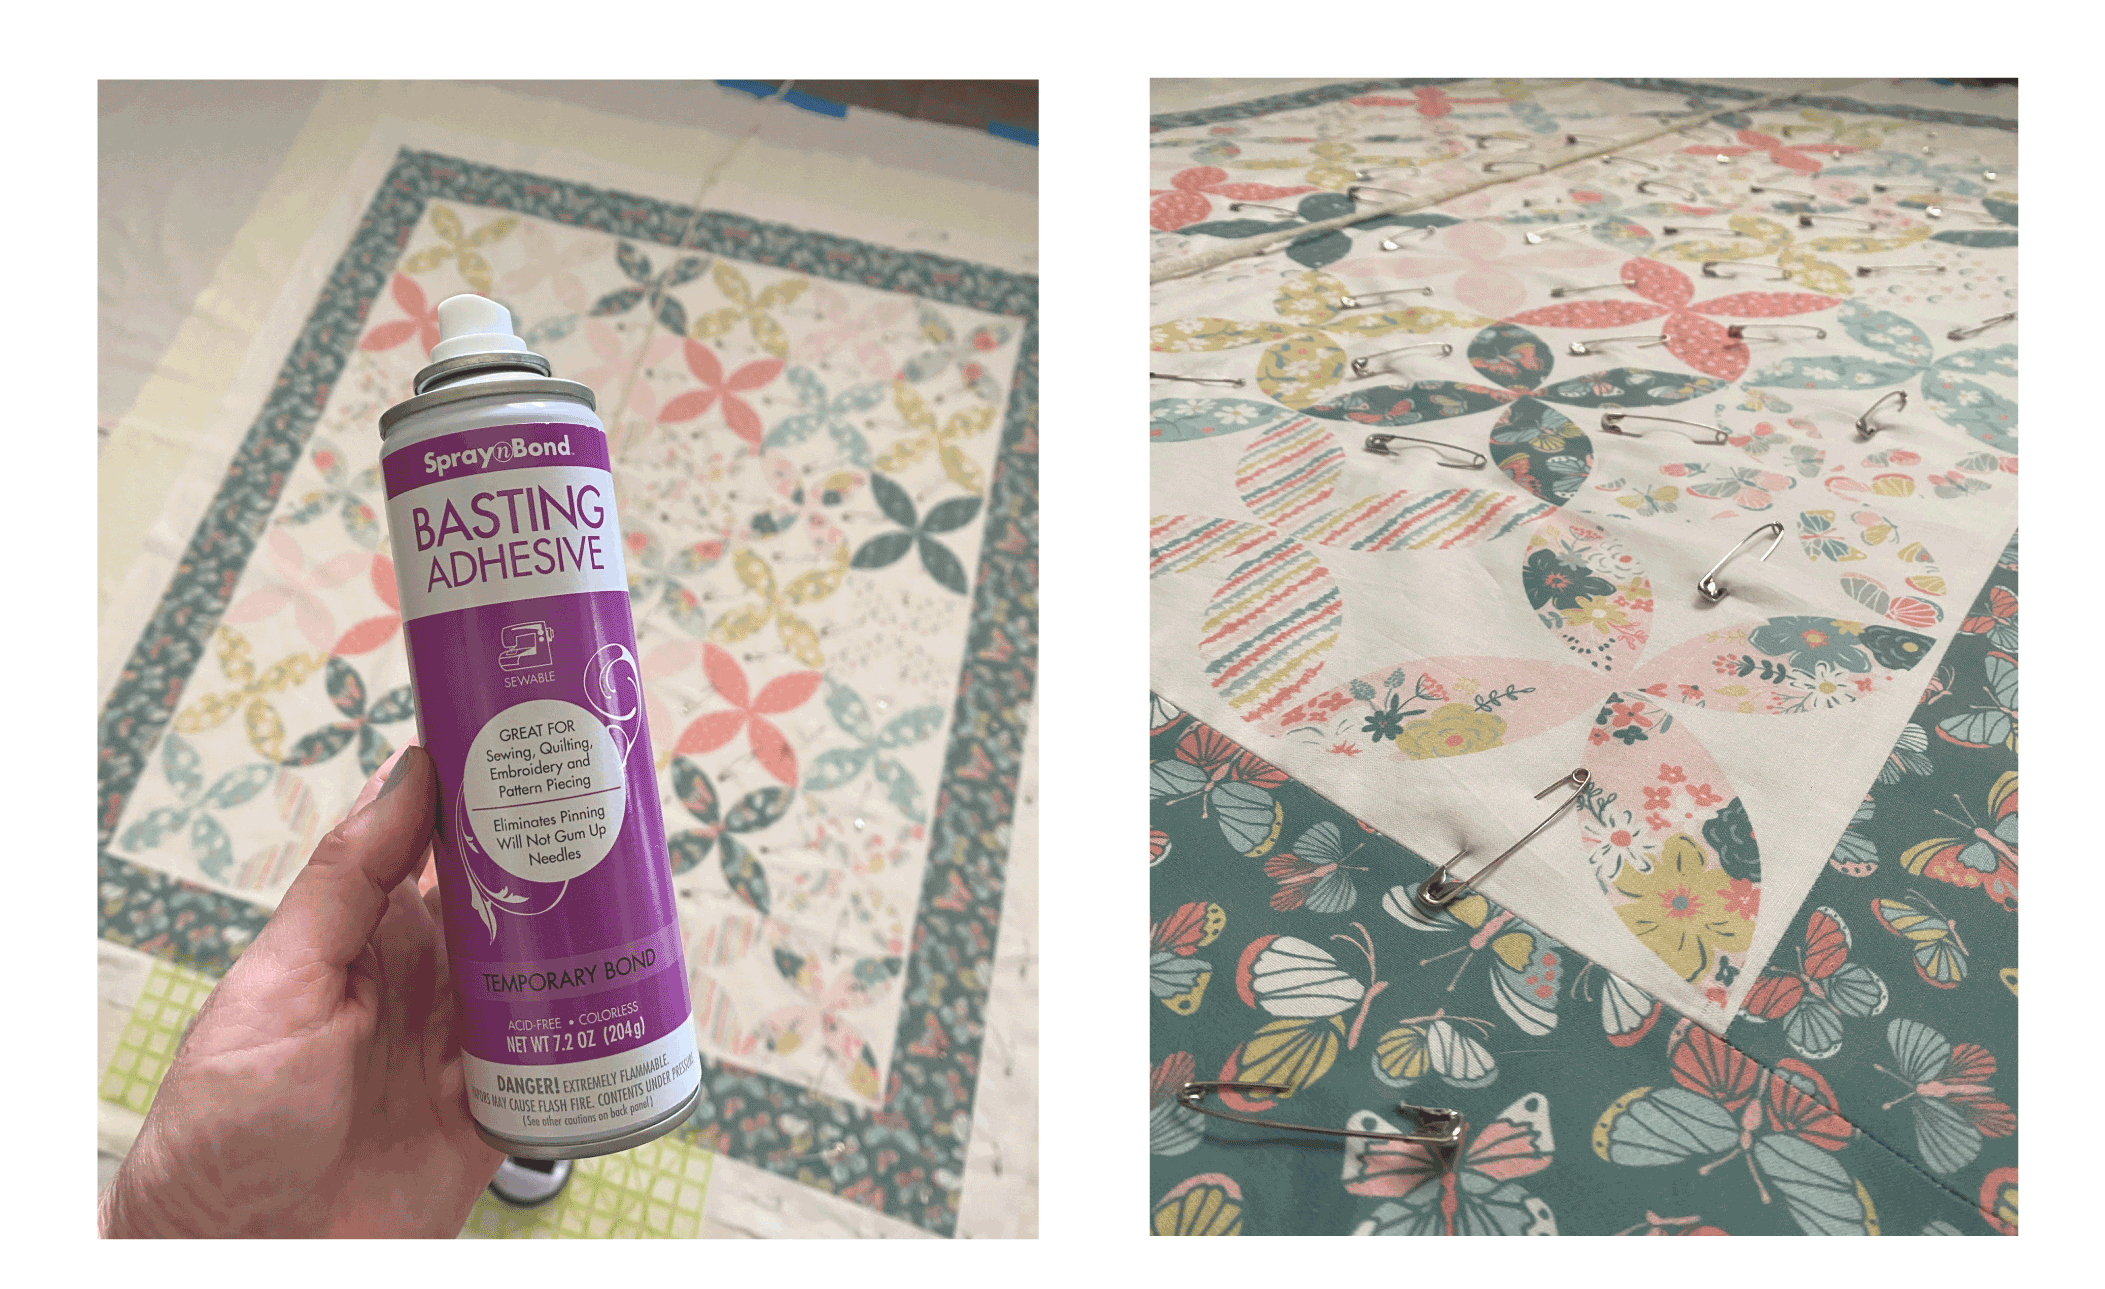
Pin or spray baste. My first try at pin basting was a failure, my pins left rust marks on my quilt, so I resorted to spray basting.
I have since purchased better pins and I prefer to pin baste now. It’s all about having the right supplies. Buy 2 packs, I ran out half way through basting my second quilt and had to wait for more.
Pin basting is time consuming, so put on a podcast or movie and make a cup of tea. Place pins every 4-5 inches through all layers. Work from the center out.
Remove the tape and get ready to quilt.
QUILTING
I followed 2 tutorials to learn how to machine quilt this project. I was so nervous to try this, but it was easier than I feared.
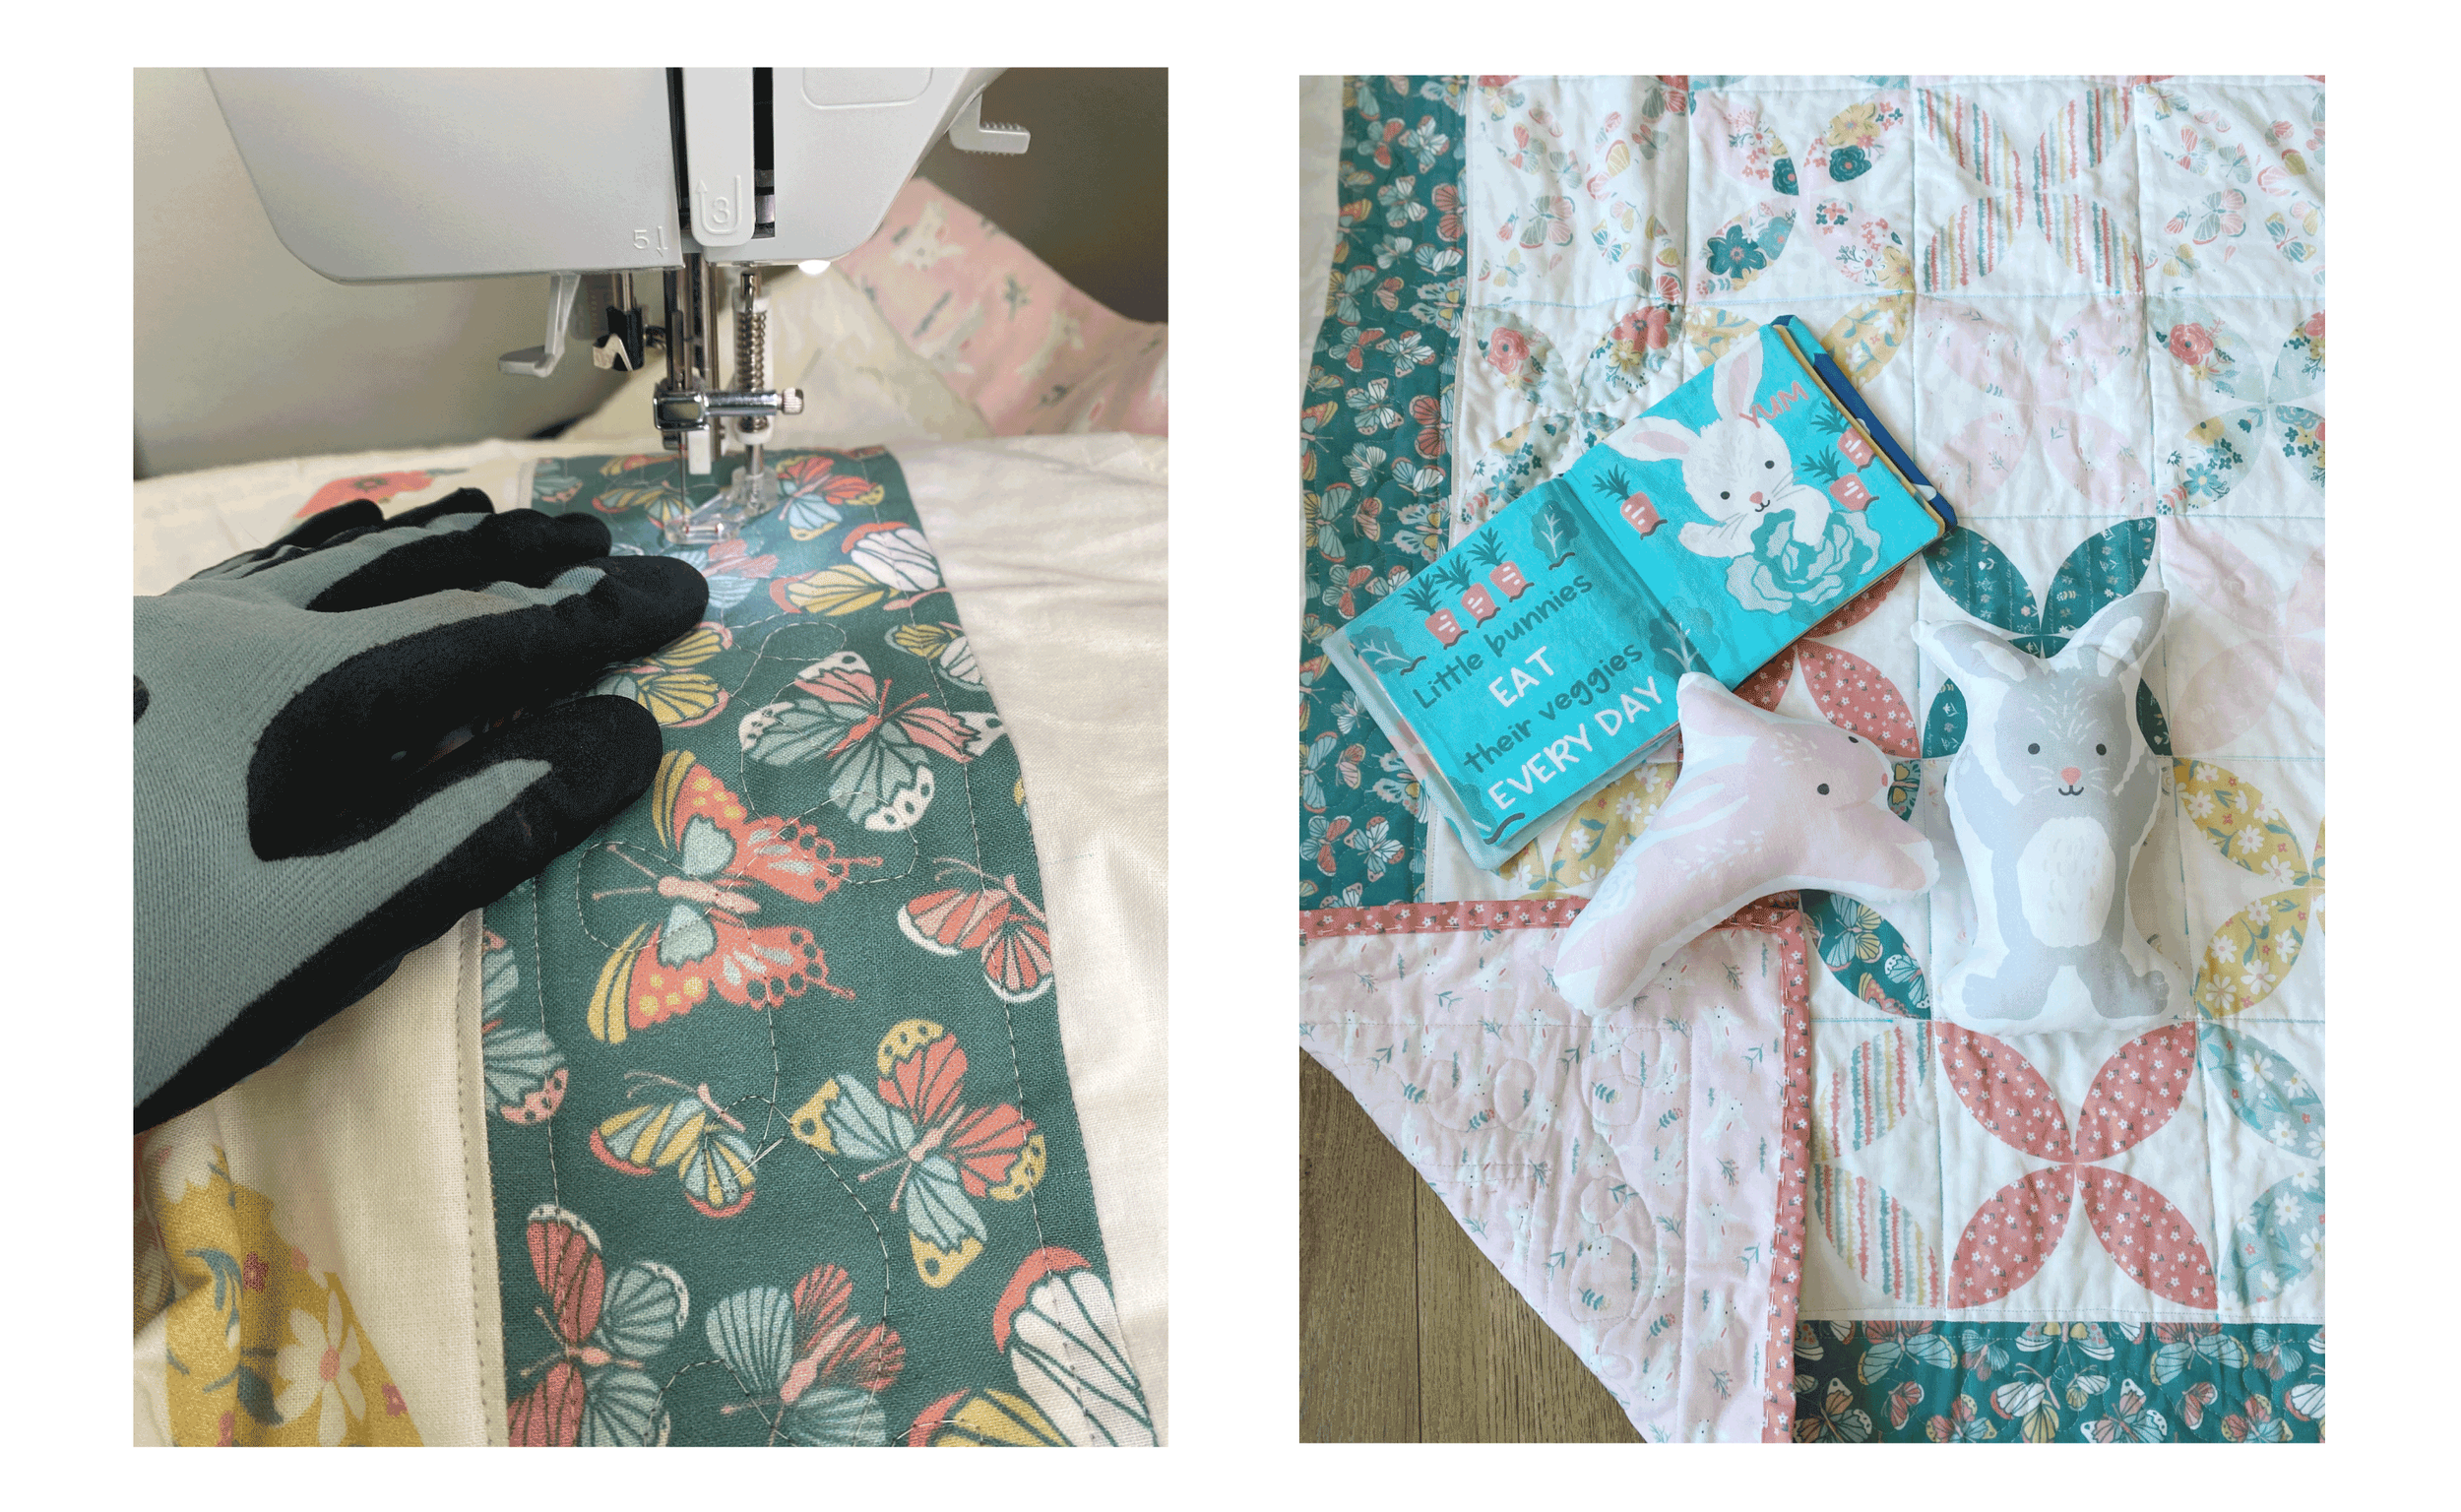
I used a walking foot for my sewing machine.
Notice in the photo, I did straight stitching to frame each Orange Peel “block”. I followed this tutorial from Melanie Ham.
For the butterfly sashing, I tried my hand at free motion quilting. I used this tutorial to learn how to do it.
Work gloves came in handy, they gave me more control as I guided the quilt.
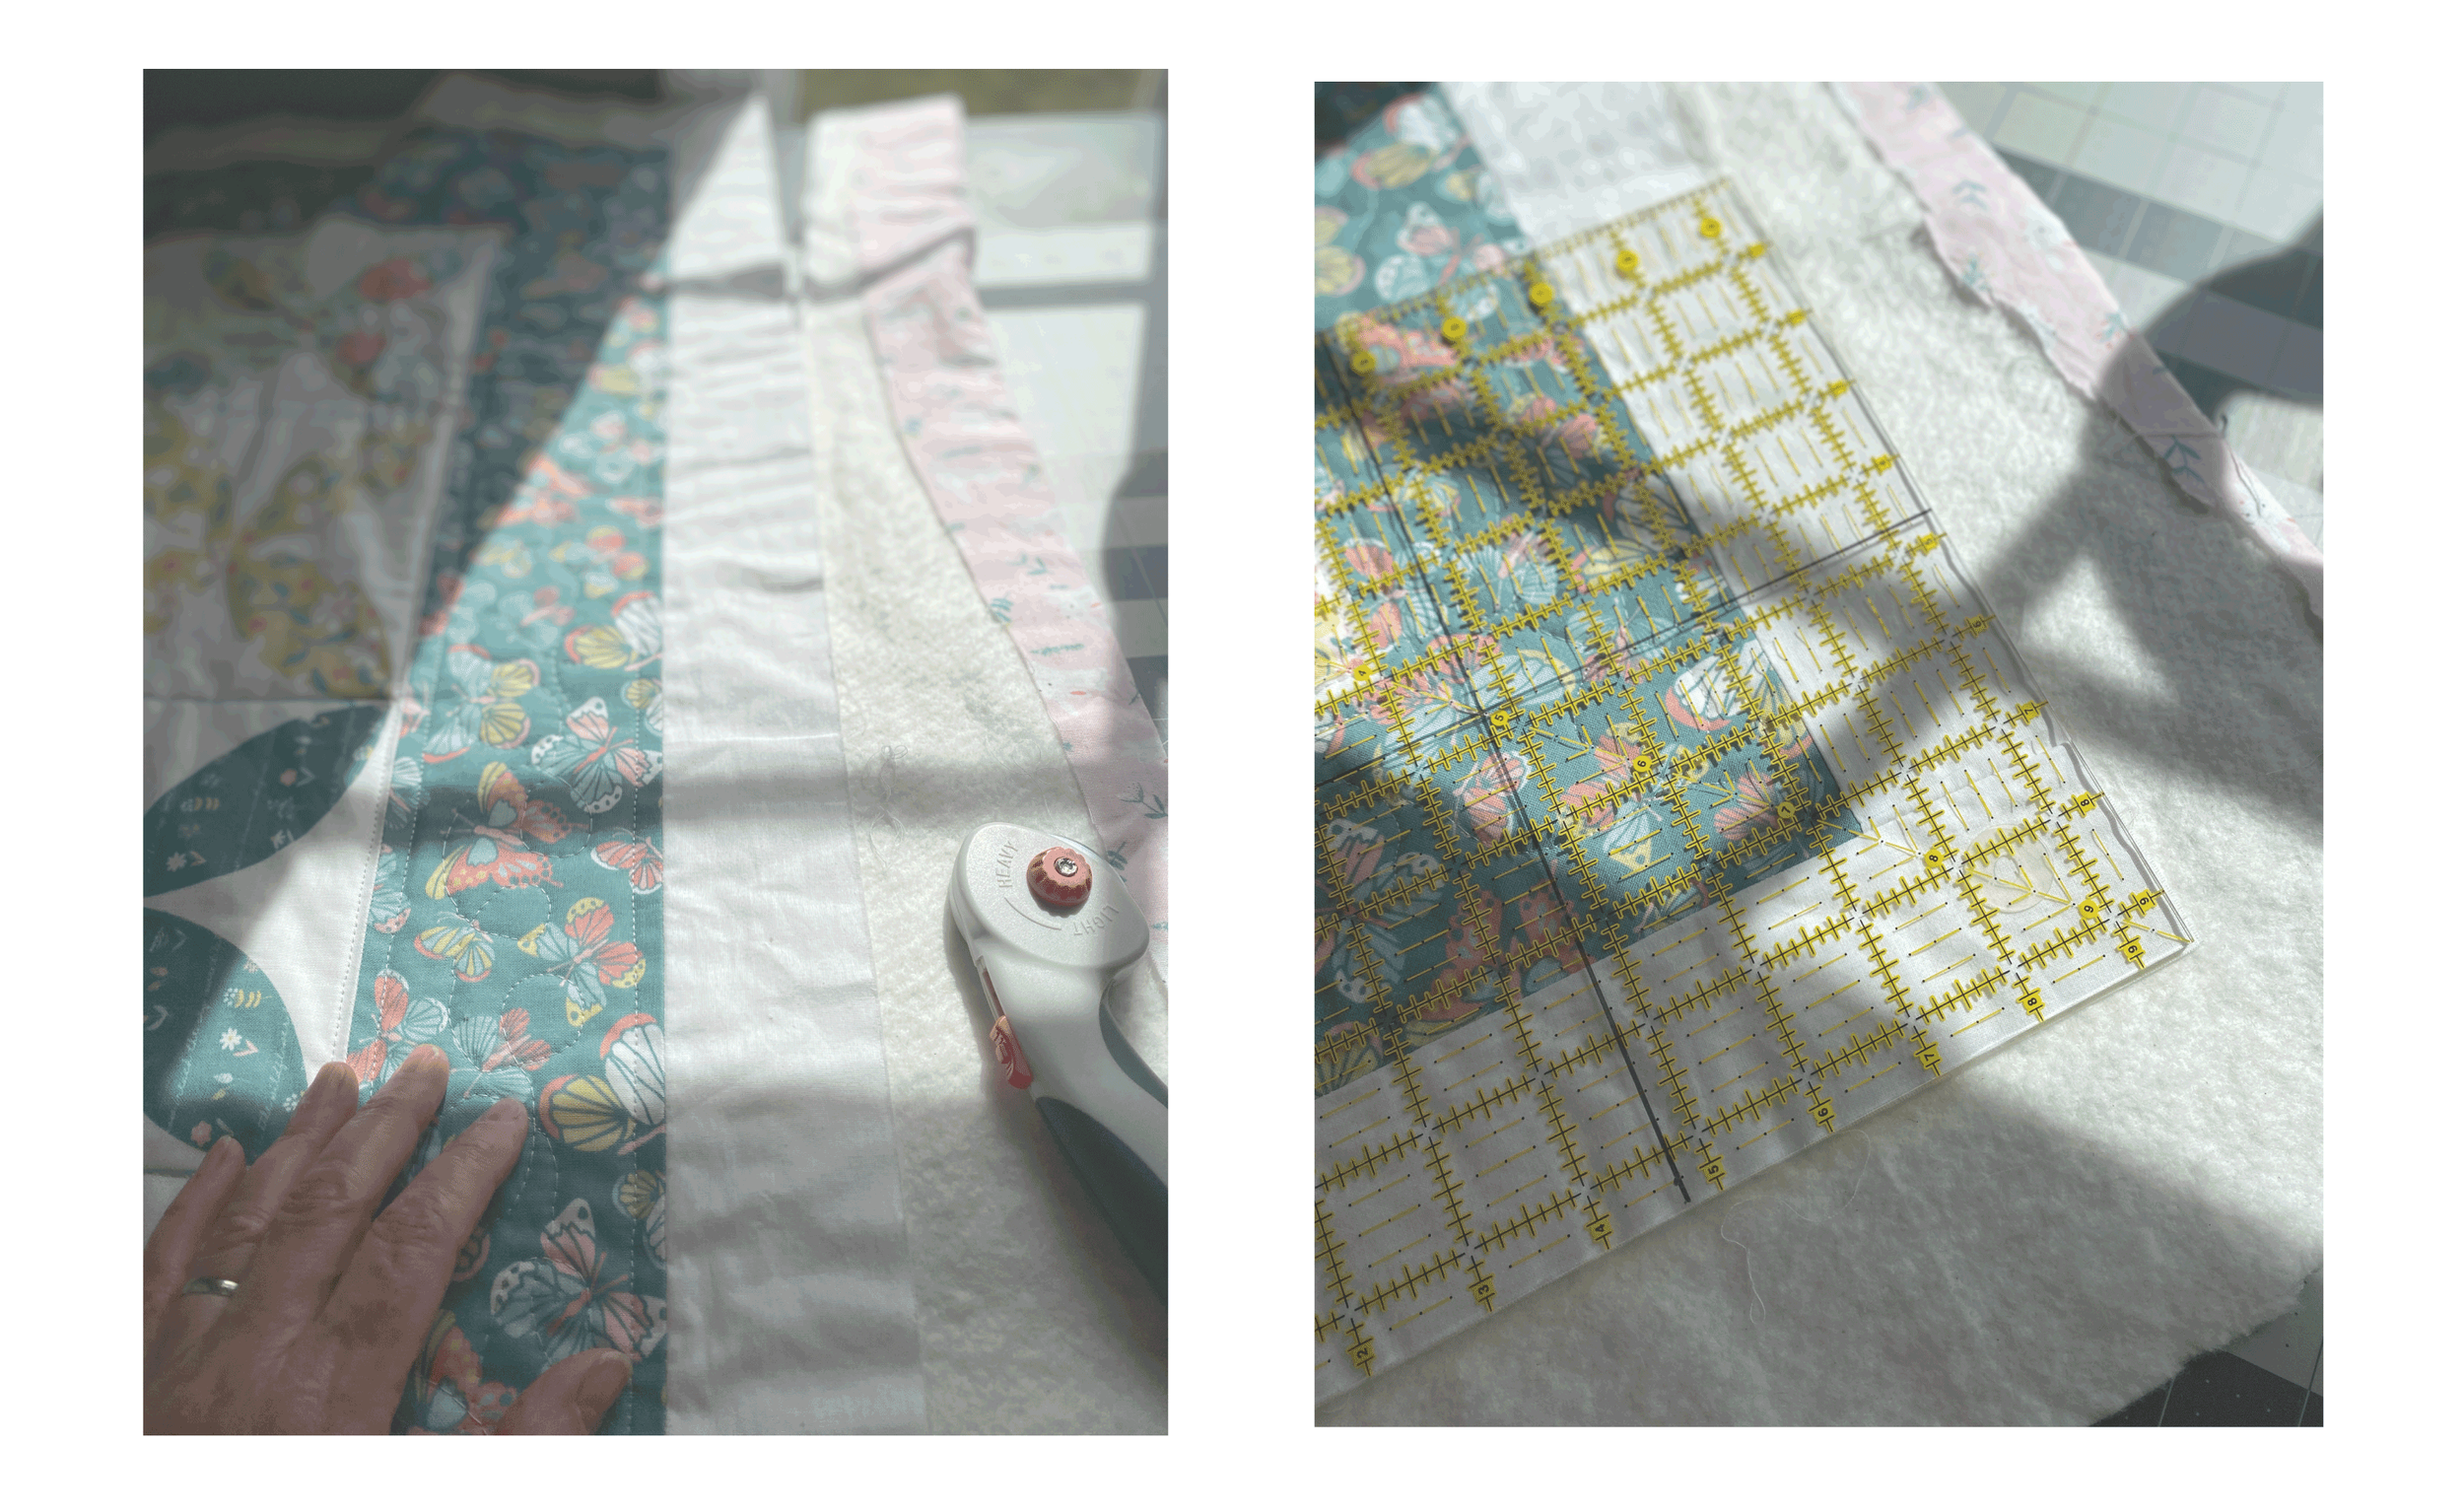
TRIM UP AND SQUARE YOUR QUILT
I used my largest 6” x 24” ruler to square up my quilt top. I used the 90 degree corners on the ruler to trim all of the corners using a rotary cutter.
Please be careful, they are so sharp.
Trust your ruler, not your quilt or your cutting mat when you trim your quilt.
BINDING
I made my own binding using 1/2 yard of the 6100-22 Tiny Floral Toss.
To figure out how much fabric you need for binding, you have to do a little math, sorry.
Here is the formula:
Add up the measurements of the all sides of your finished quilt (aka perimeter).
Add 20 inches.
Mine was 214”. Now divide that by 40 (the width of quilting fabric is usually 40-42”) I got 5.35
Round that number up to a whole number= 6
This is the number of strips you need, cut on the width of fabric, to bind your quilt.
Multiply 6 times the width of your binding strips, I’m using 2.5” wide strips= That number is now 15.
Divide that number by 36 to calculate the yardage you will need= So, you will need .42 yards to bind this quilt using 2.5” strips cut on the width of fabric.
Answer= 1/2 yard fabric
If your head hurts from doing the math, use this super handy binding calculator instead, from Quilter’s Paradise. And don’t forget to thank them, they are very nice.
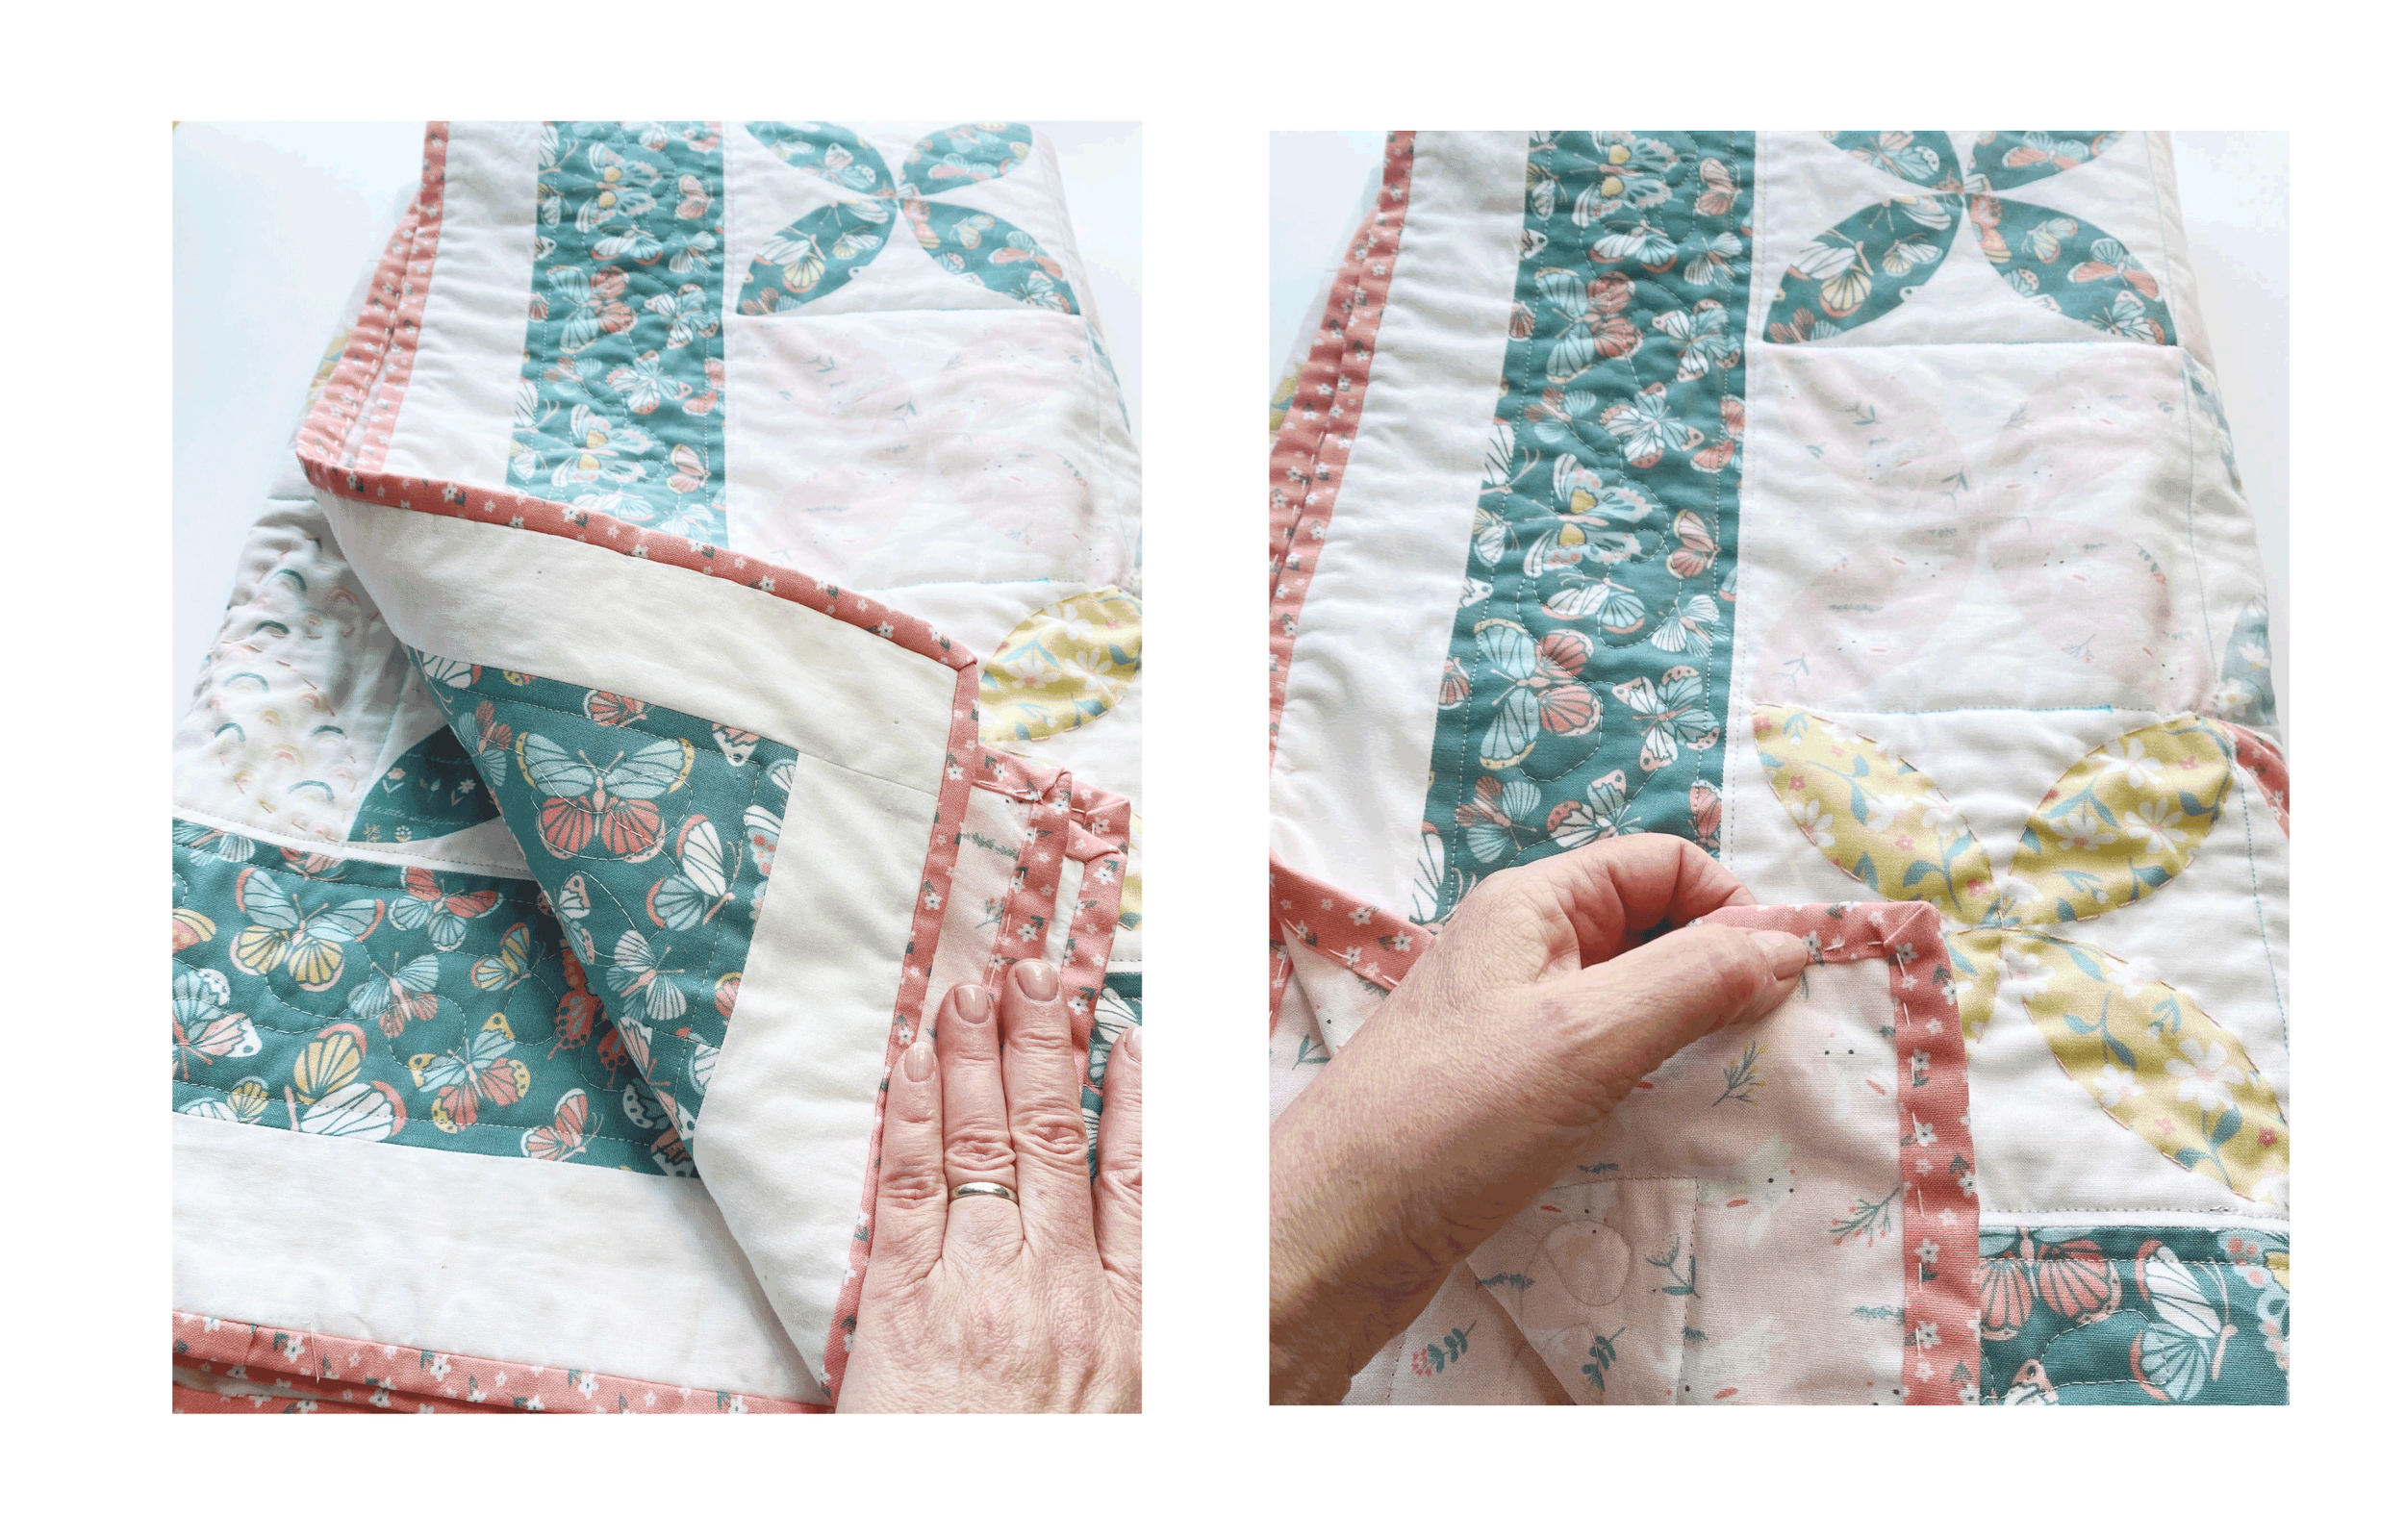
ATTACH BINDING TO QUILT
I think this is easier to watch a video than to explain. This is the one I followed.
I like to attach my binding to the back of the quilt by machine, then fold it over to the front and hand stitch using chunky stitches. On this quilt I did the reverse, machine stitched it to the front, then hand stitched the back. It is personal preference, you do you.
I learned how to do that from Brittany Lloyd, she explains how here.
EXTRA HAND STITCHING
I wanted to add to the “Faux” piecing look, and hand stitch each Orange Peel shape. It is a work in progress, I keep it in my living room and do a little every now and then.
I use DMC Pearl cotton, there are so many lovely colors to choose from. You can see in the photo one orange peel is hand stitched, when you wash it it crinkles up nicely. Again, this look is personal preference. Can you spot it? (Hint, it is near the fabric book)
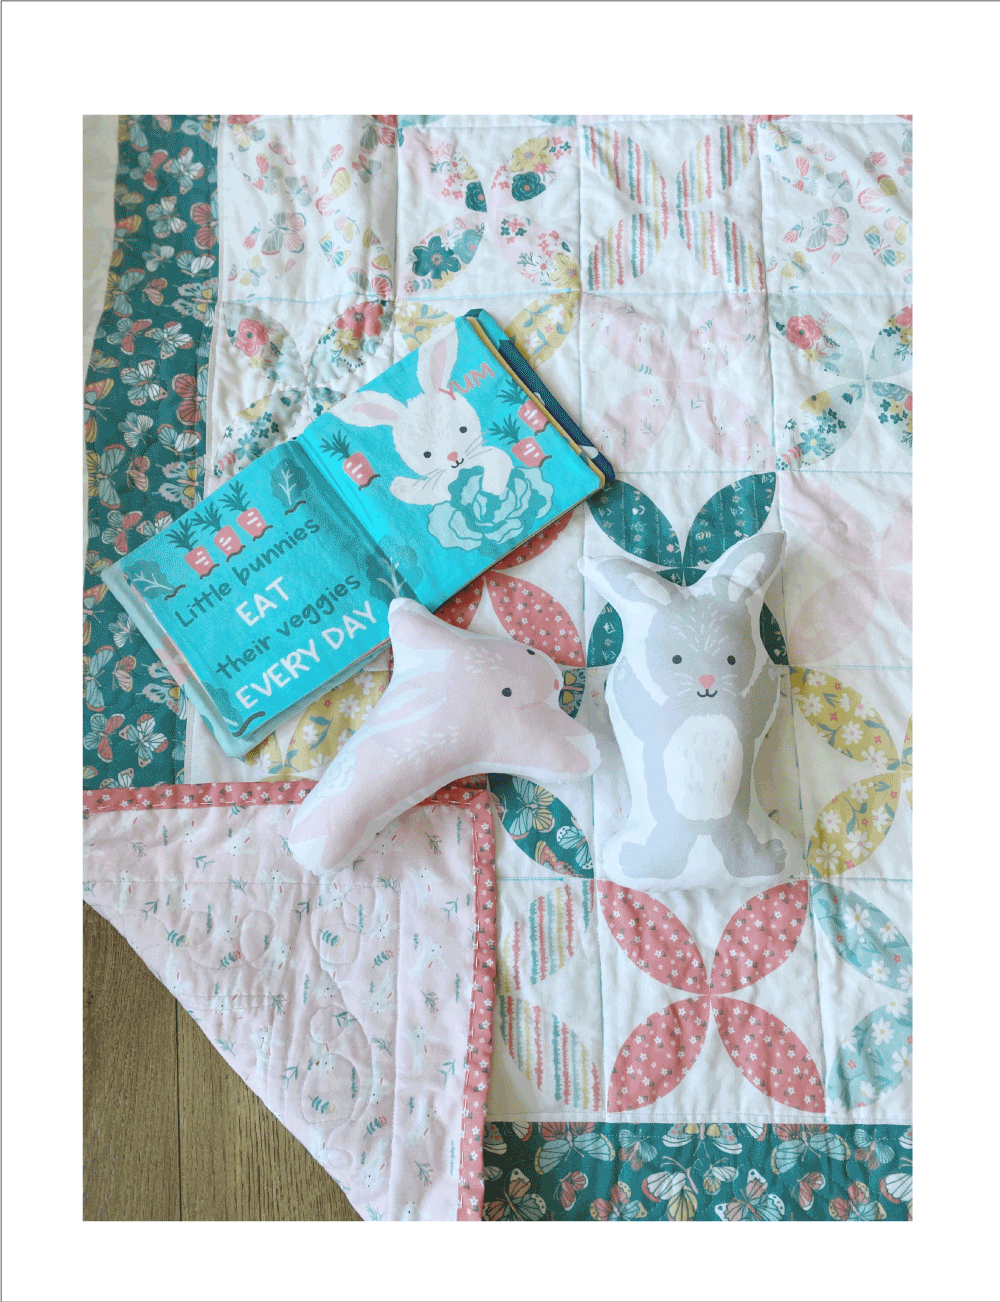
Thanks for sticking around until the end!
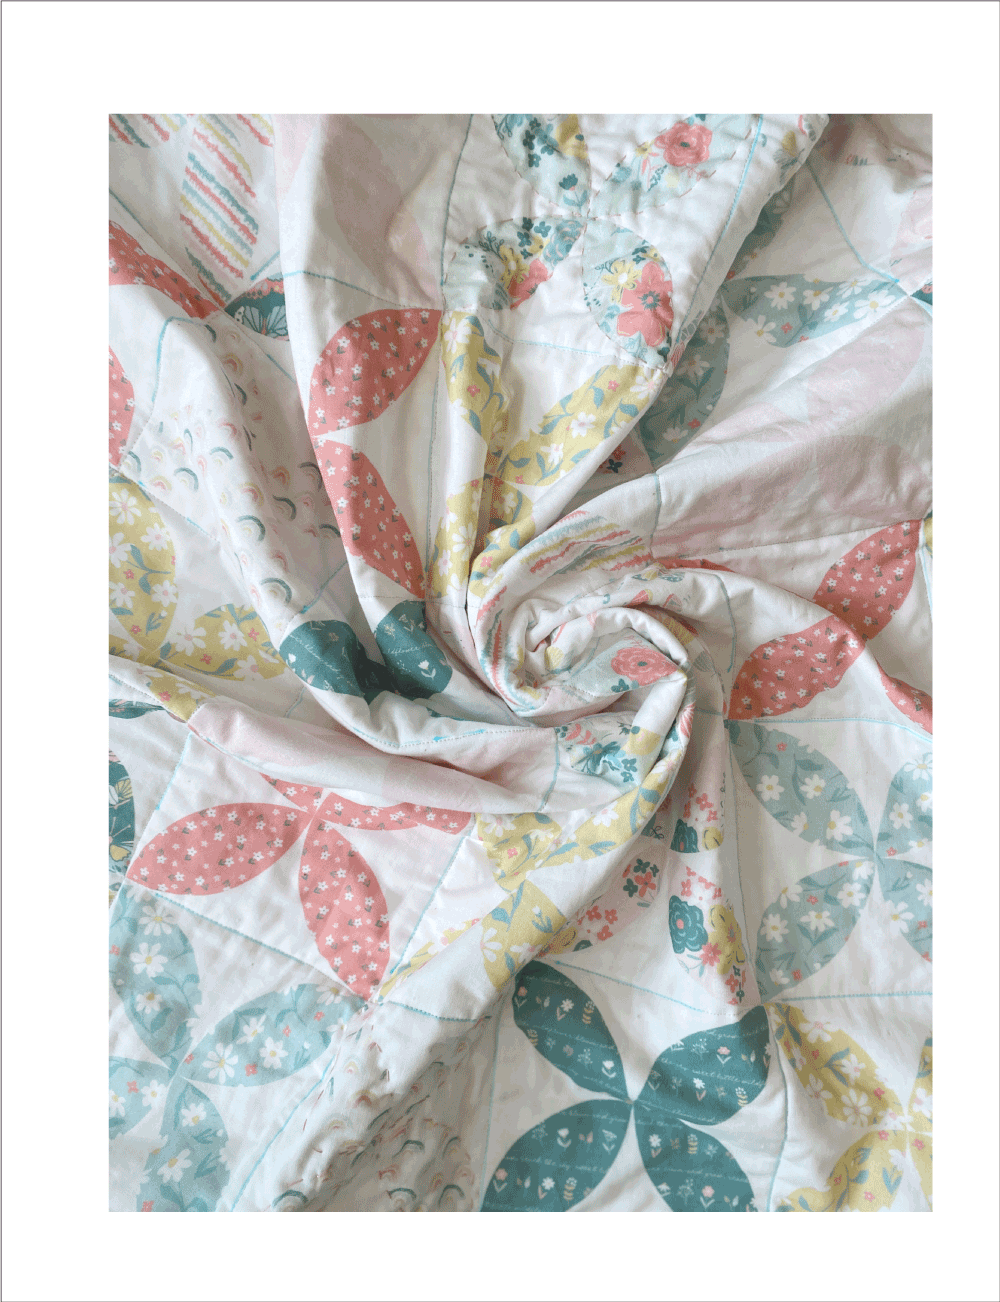
I took this quilt swirl photo below before I washed the quilt. The blue quilting guide lines made with the water soluble marker came out in the wash. (Whew, I was a little worried).
I hope you enjoyed this little tutorial and it inspired you to make something. You can repeat this process with any “cheater” quilt panel. There are so many lovely ones to choose from. Feel free to make your sashing strips thicker or thinner.
Make one for your “other” Baby
My thoughts:
I love how this turned out, and I learned so many different skills along the way. I have a better understanding of cutting efficiency, and maybe next time, I will take that into consideration so that there is not so much left over fabric. I don’t mind because I will use it for another project, but I understand that it adds to the cost of the project. A more efficient method could have been to use several different fabric squares to make a pieced sashing, so many possibilites.
I would love it if you would drop a comment below. Share any tips or resources you have found along the way that has helped your sewing.
Or just say hello!
Happy making!
Don’t forget to check back in tomorrow.
Lindsay Conner is sharing her Burrito Pillowcase tutorial. Doesn’t that sound fun? Perfect for Taco Tuesday. See you tomorrow.
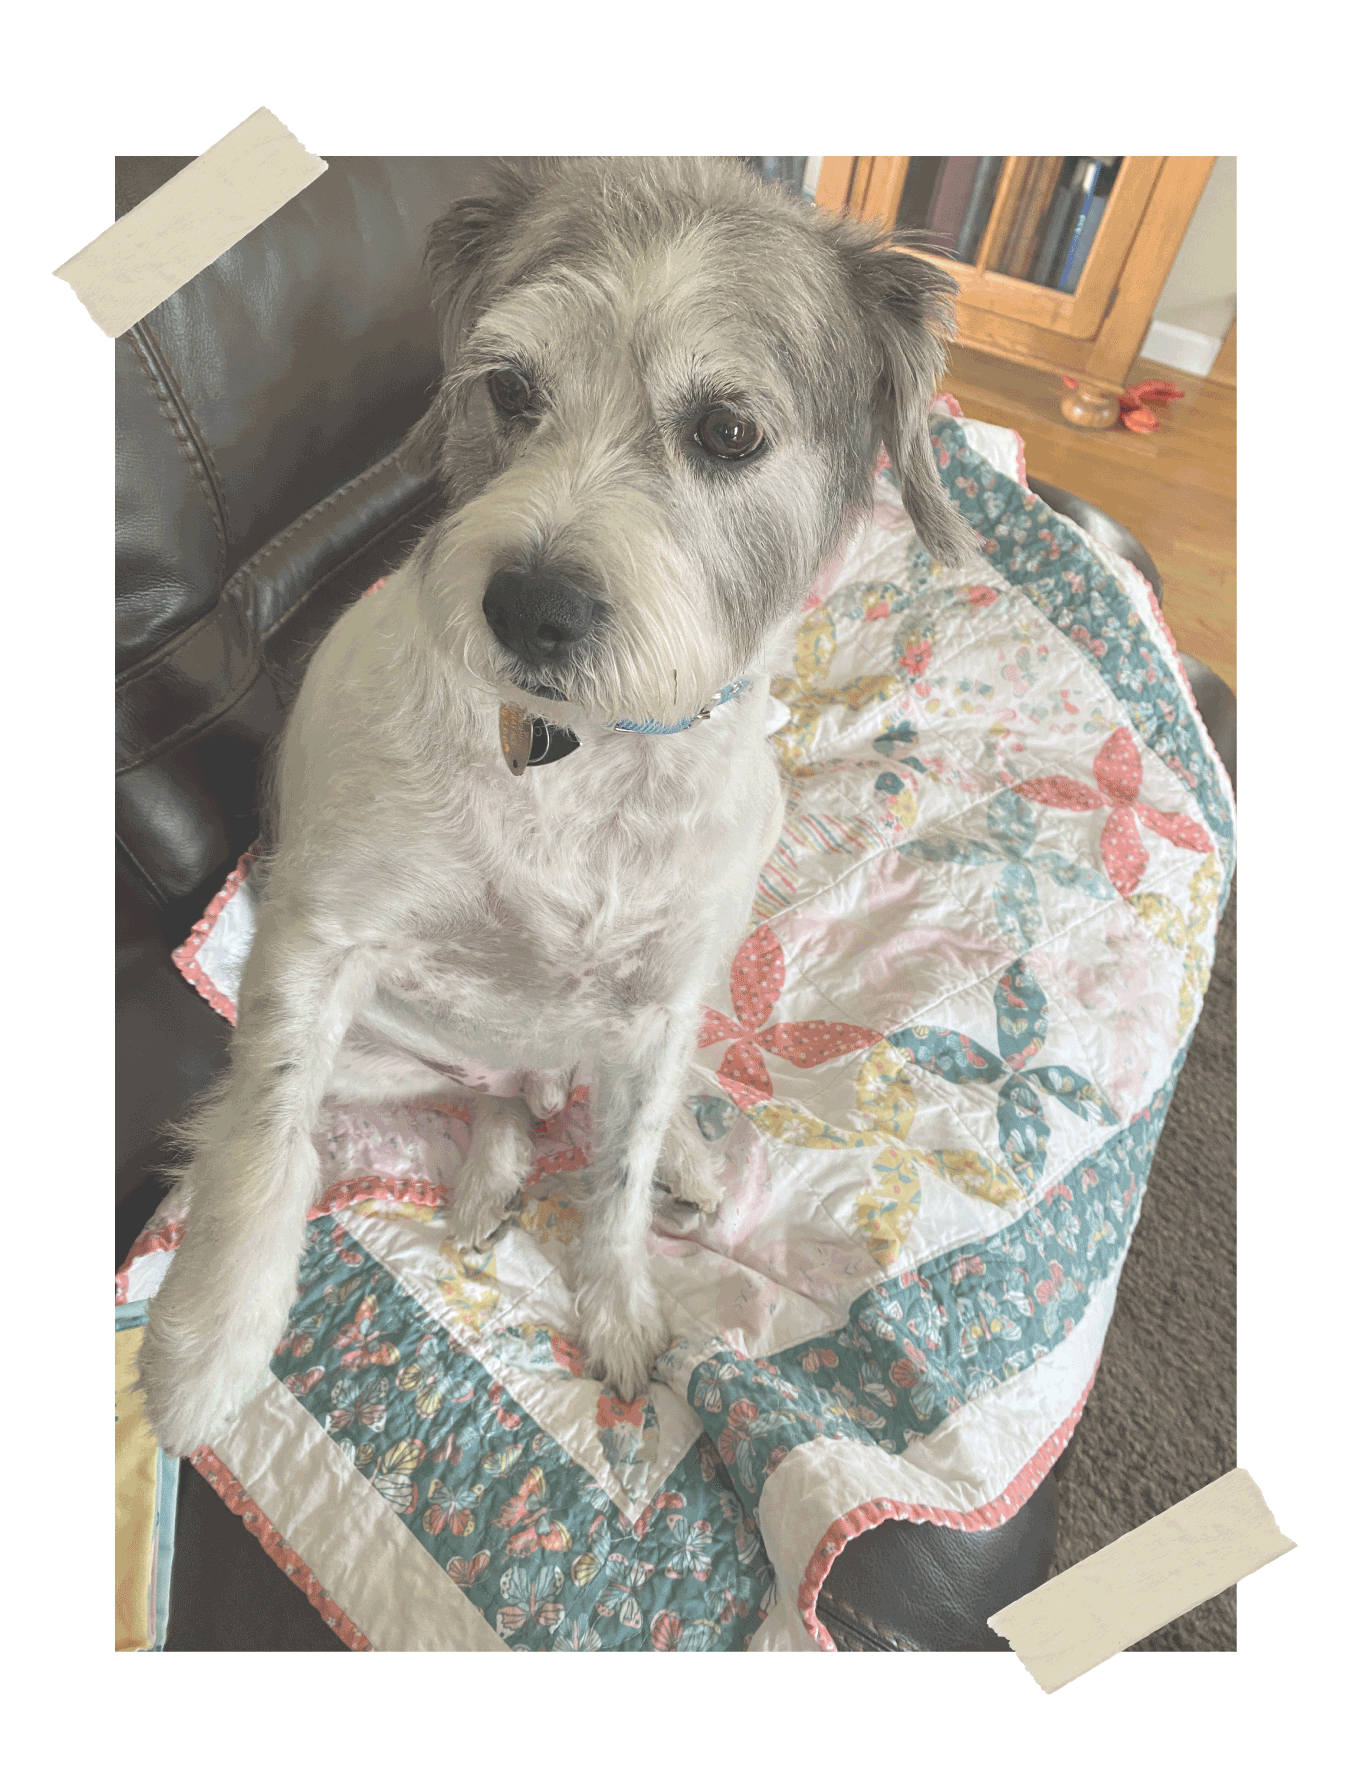
PS. If you liked this sewing tutorial, you may also like my easy reversible dog bandana tutorial, for the other baby in your life🥰
It is double-sided and no special tools required. It is my most popular post to date.
Or show about sewing up a batch of burp cloths to give with this quilt. No binding to attach, just straight sewing.